Welcome to the third article of the Microsoft Power Platform Series in the previous article we learned how to use Data connectors while building applications with Microsoft Power Apps - Check it out.
In today's article, we will be building a simple Canvas App, for you to be reading this you should be familiar already with what Canvas Apps are from my previous article. Feel free to go through the article in other to understand better what will be discussed here. Microsoft's Power Platform - Low Code Platform .
Let's start!
Setting up your Microsoft 365 Developer Account
A Microsoft 365 account pulls together all the traditional Office apps, such as MS Word, Excel, PowerPoint, etc., so having a Microsoft 365 Developer account will provide access to these apps.
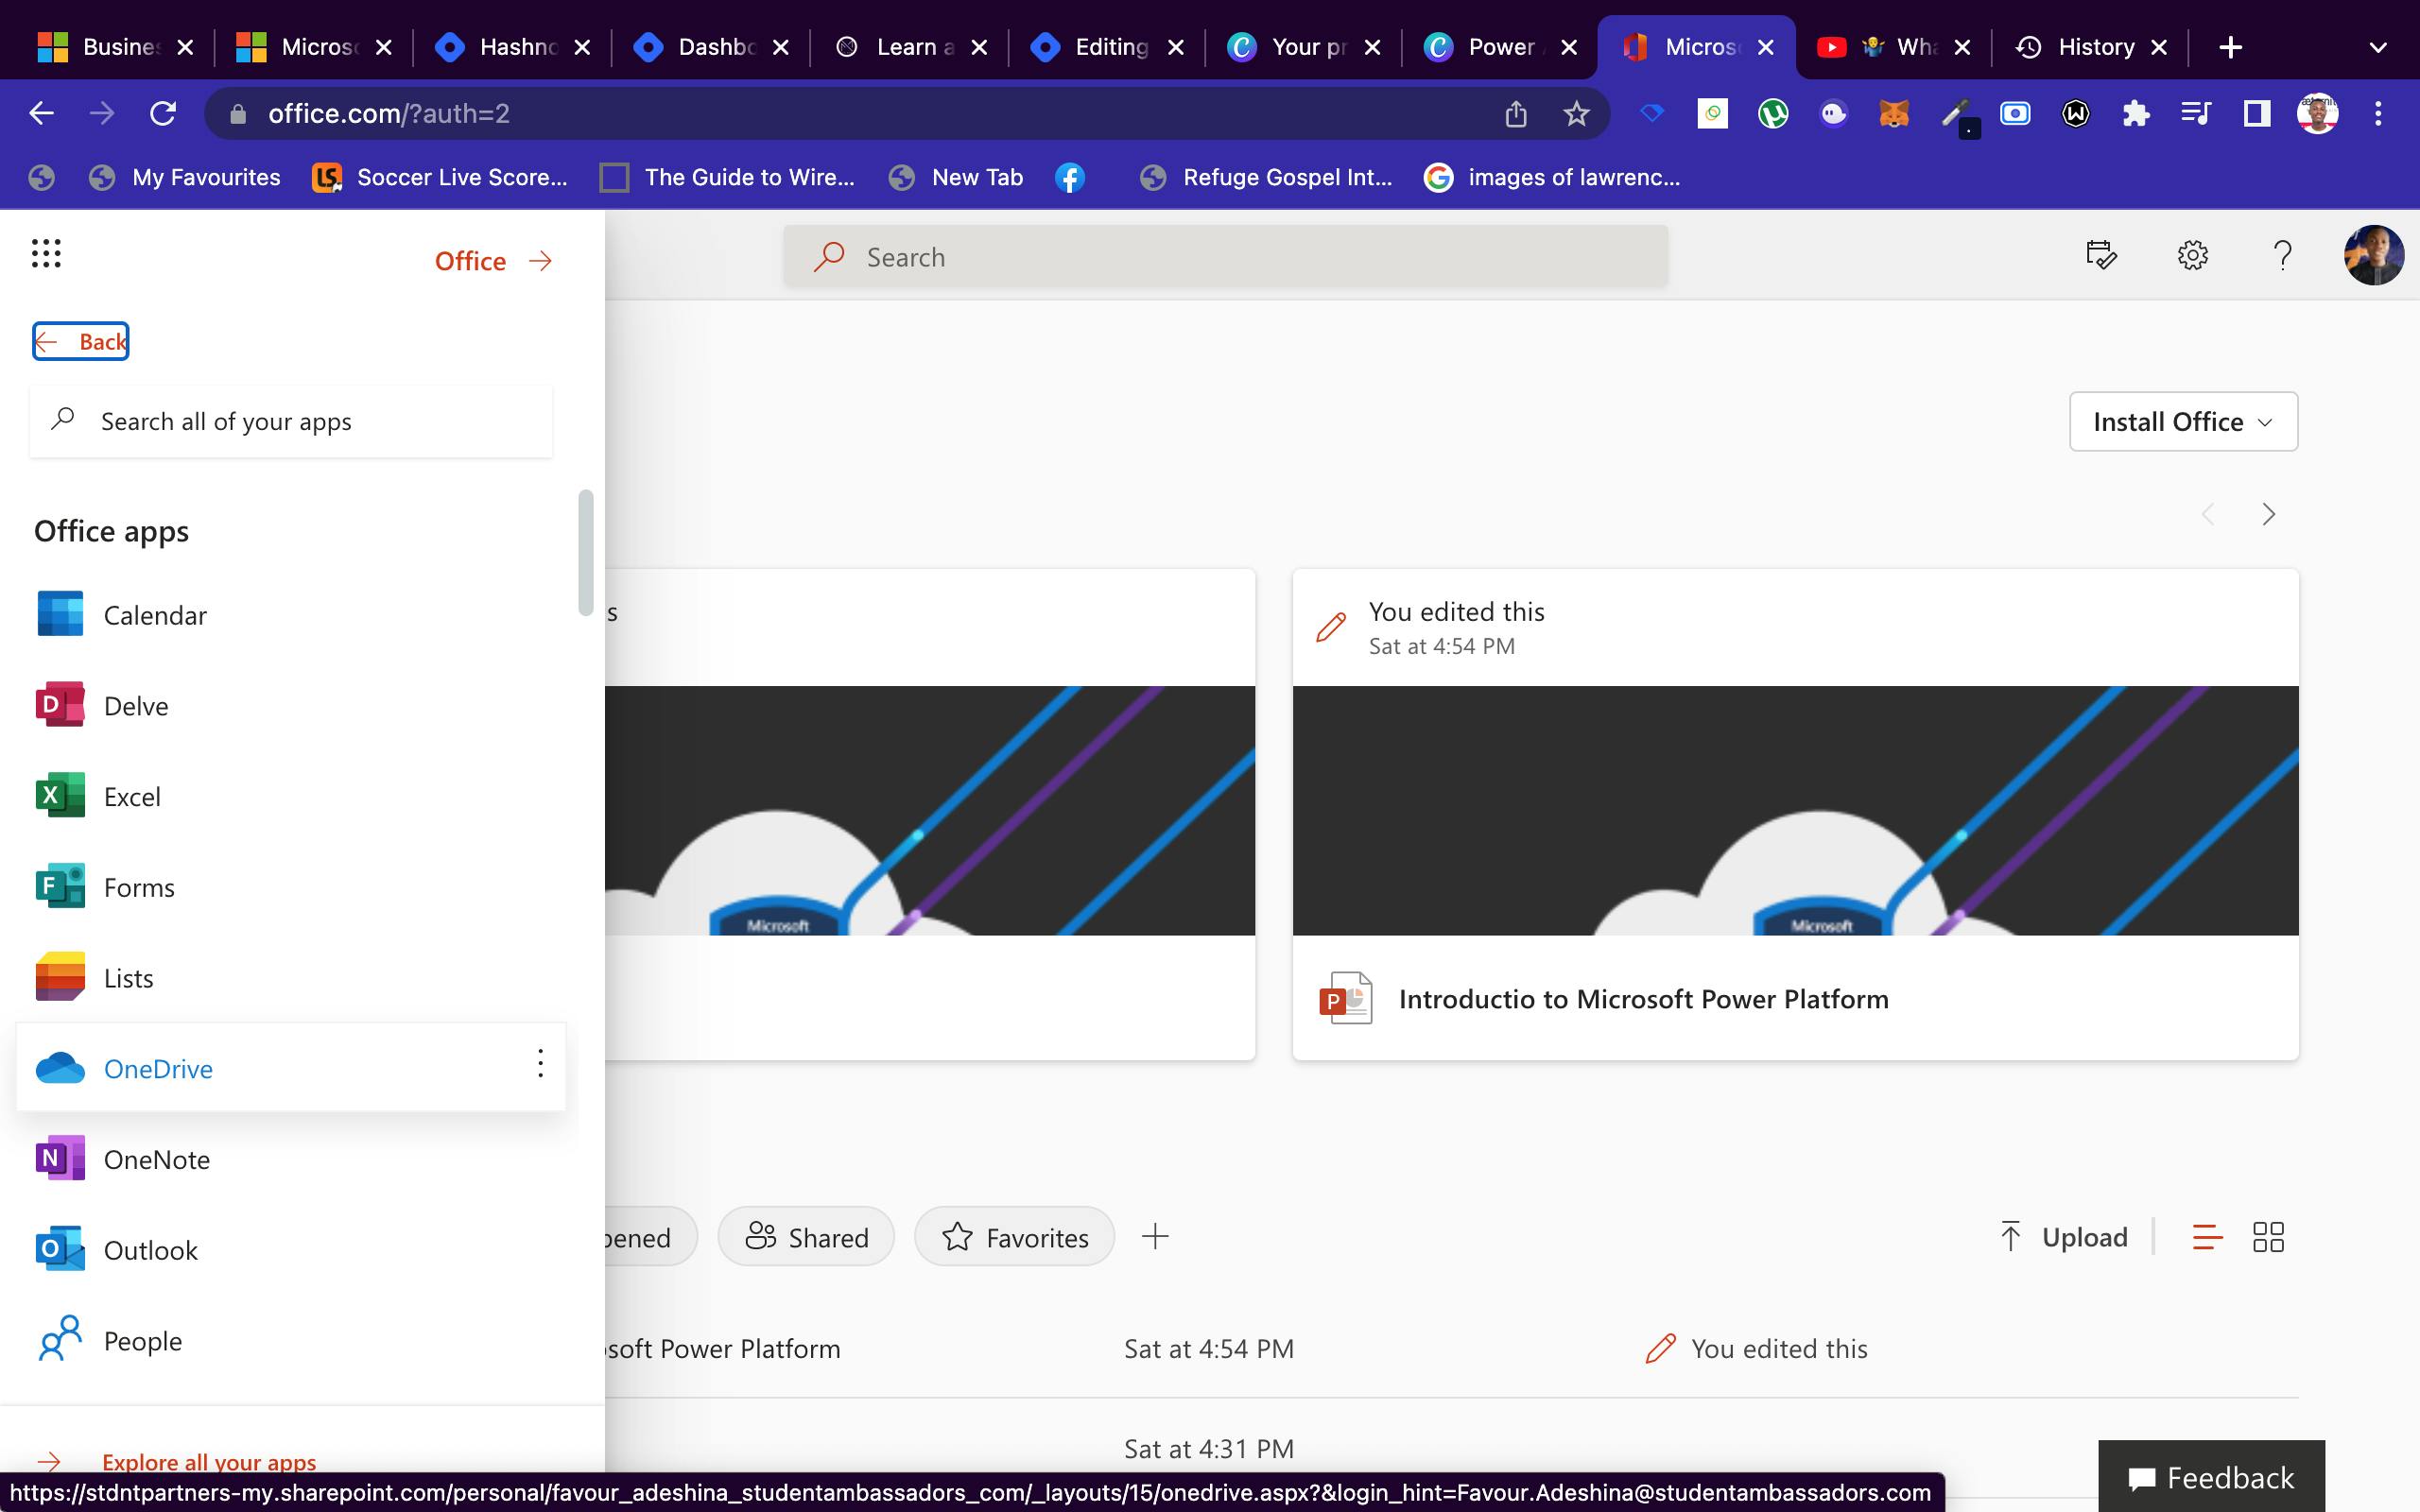
You should also know that your Microsoft's Power Platform products (Power Apps, Power Automate, Power BI, and Power Virtual Agents) are all included in Office Apps, so in order to have access to these apps for building you need to have a Microsoft 365 Account.
Following these steps, we are going to join the Microsoft 365 Developer Program:
Visit this link Microsoft 365 Developer Center
Click on Join now
Enter your Microsoft account registered email address and then complete the authentication process
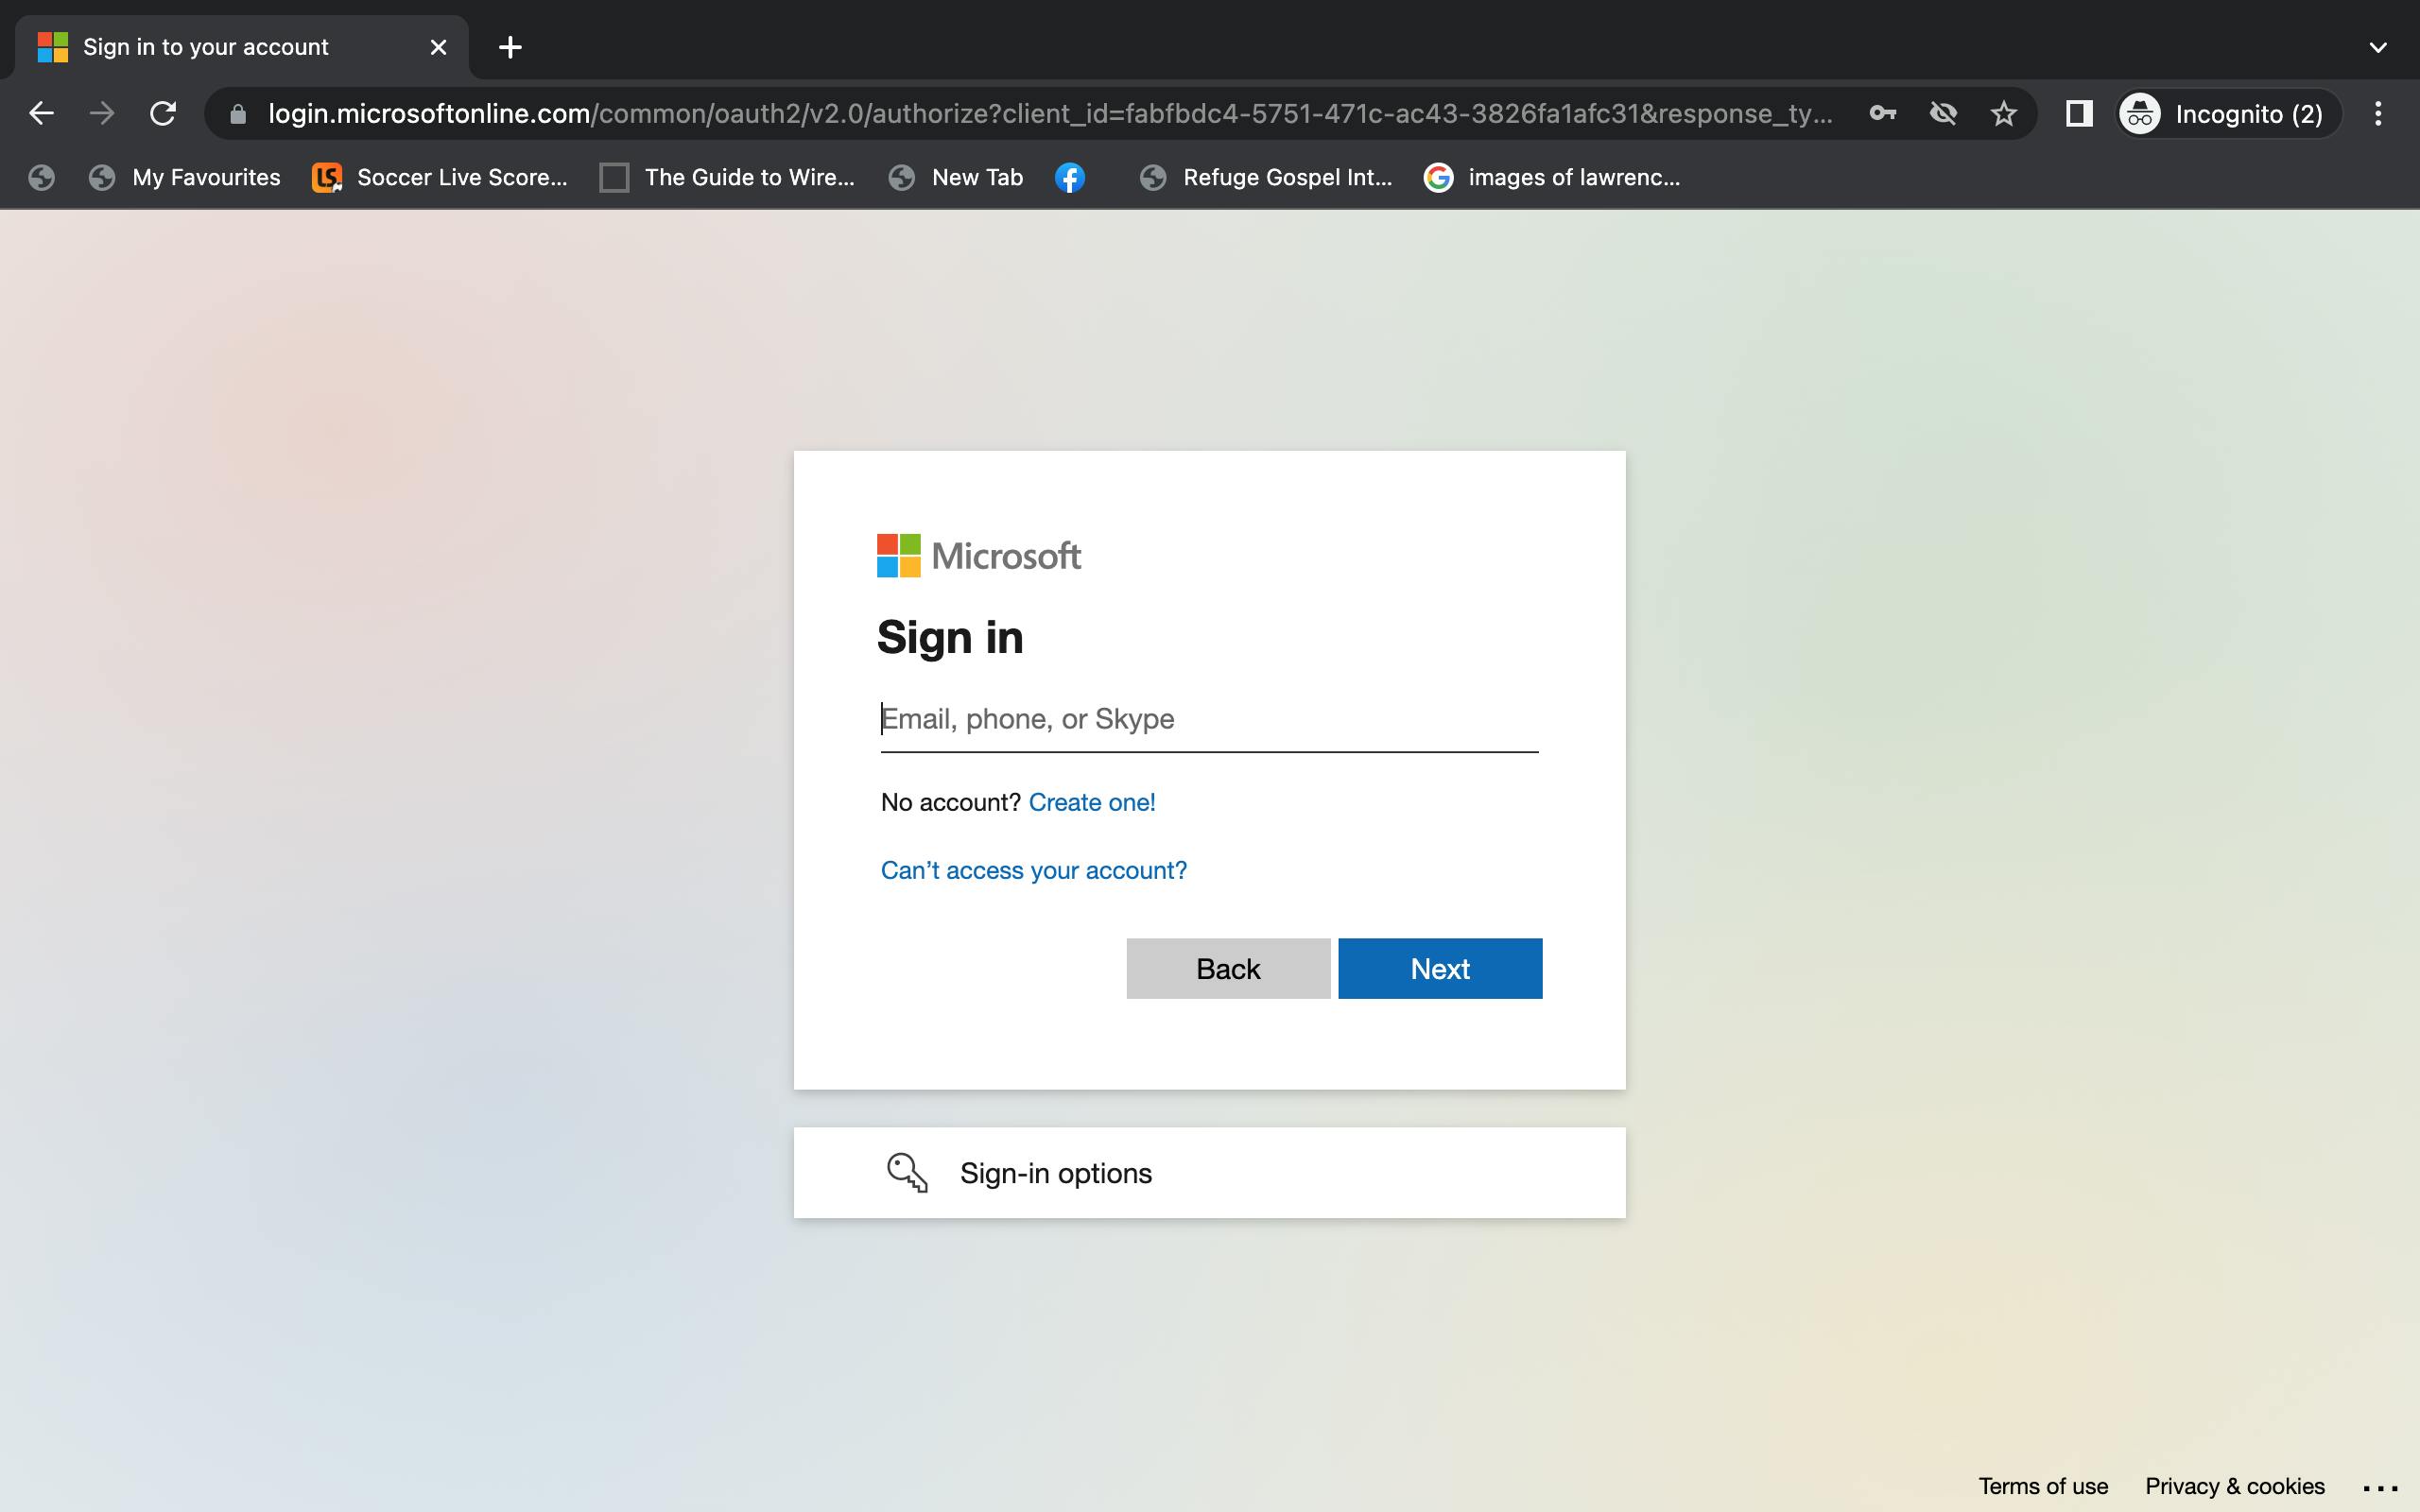
If you do not know what a Microsoft account is, or need help setting up one then please read this article How to create a new Microsoft account
If you followed through the authentication process you will have this screen.
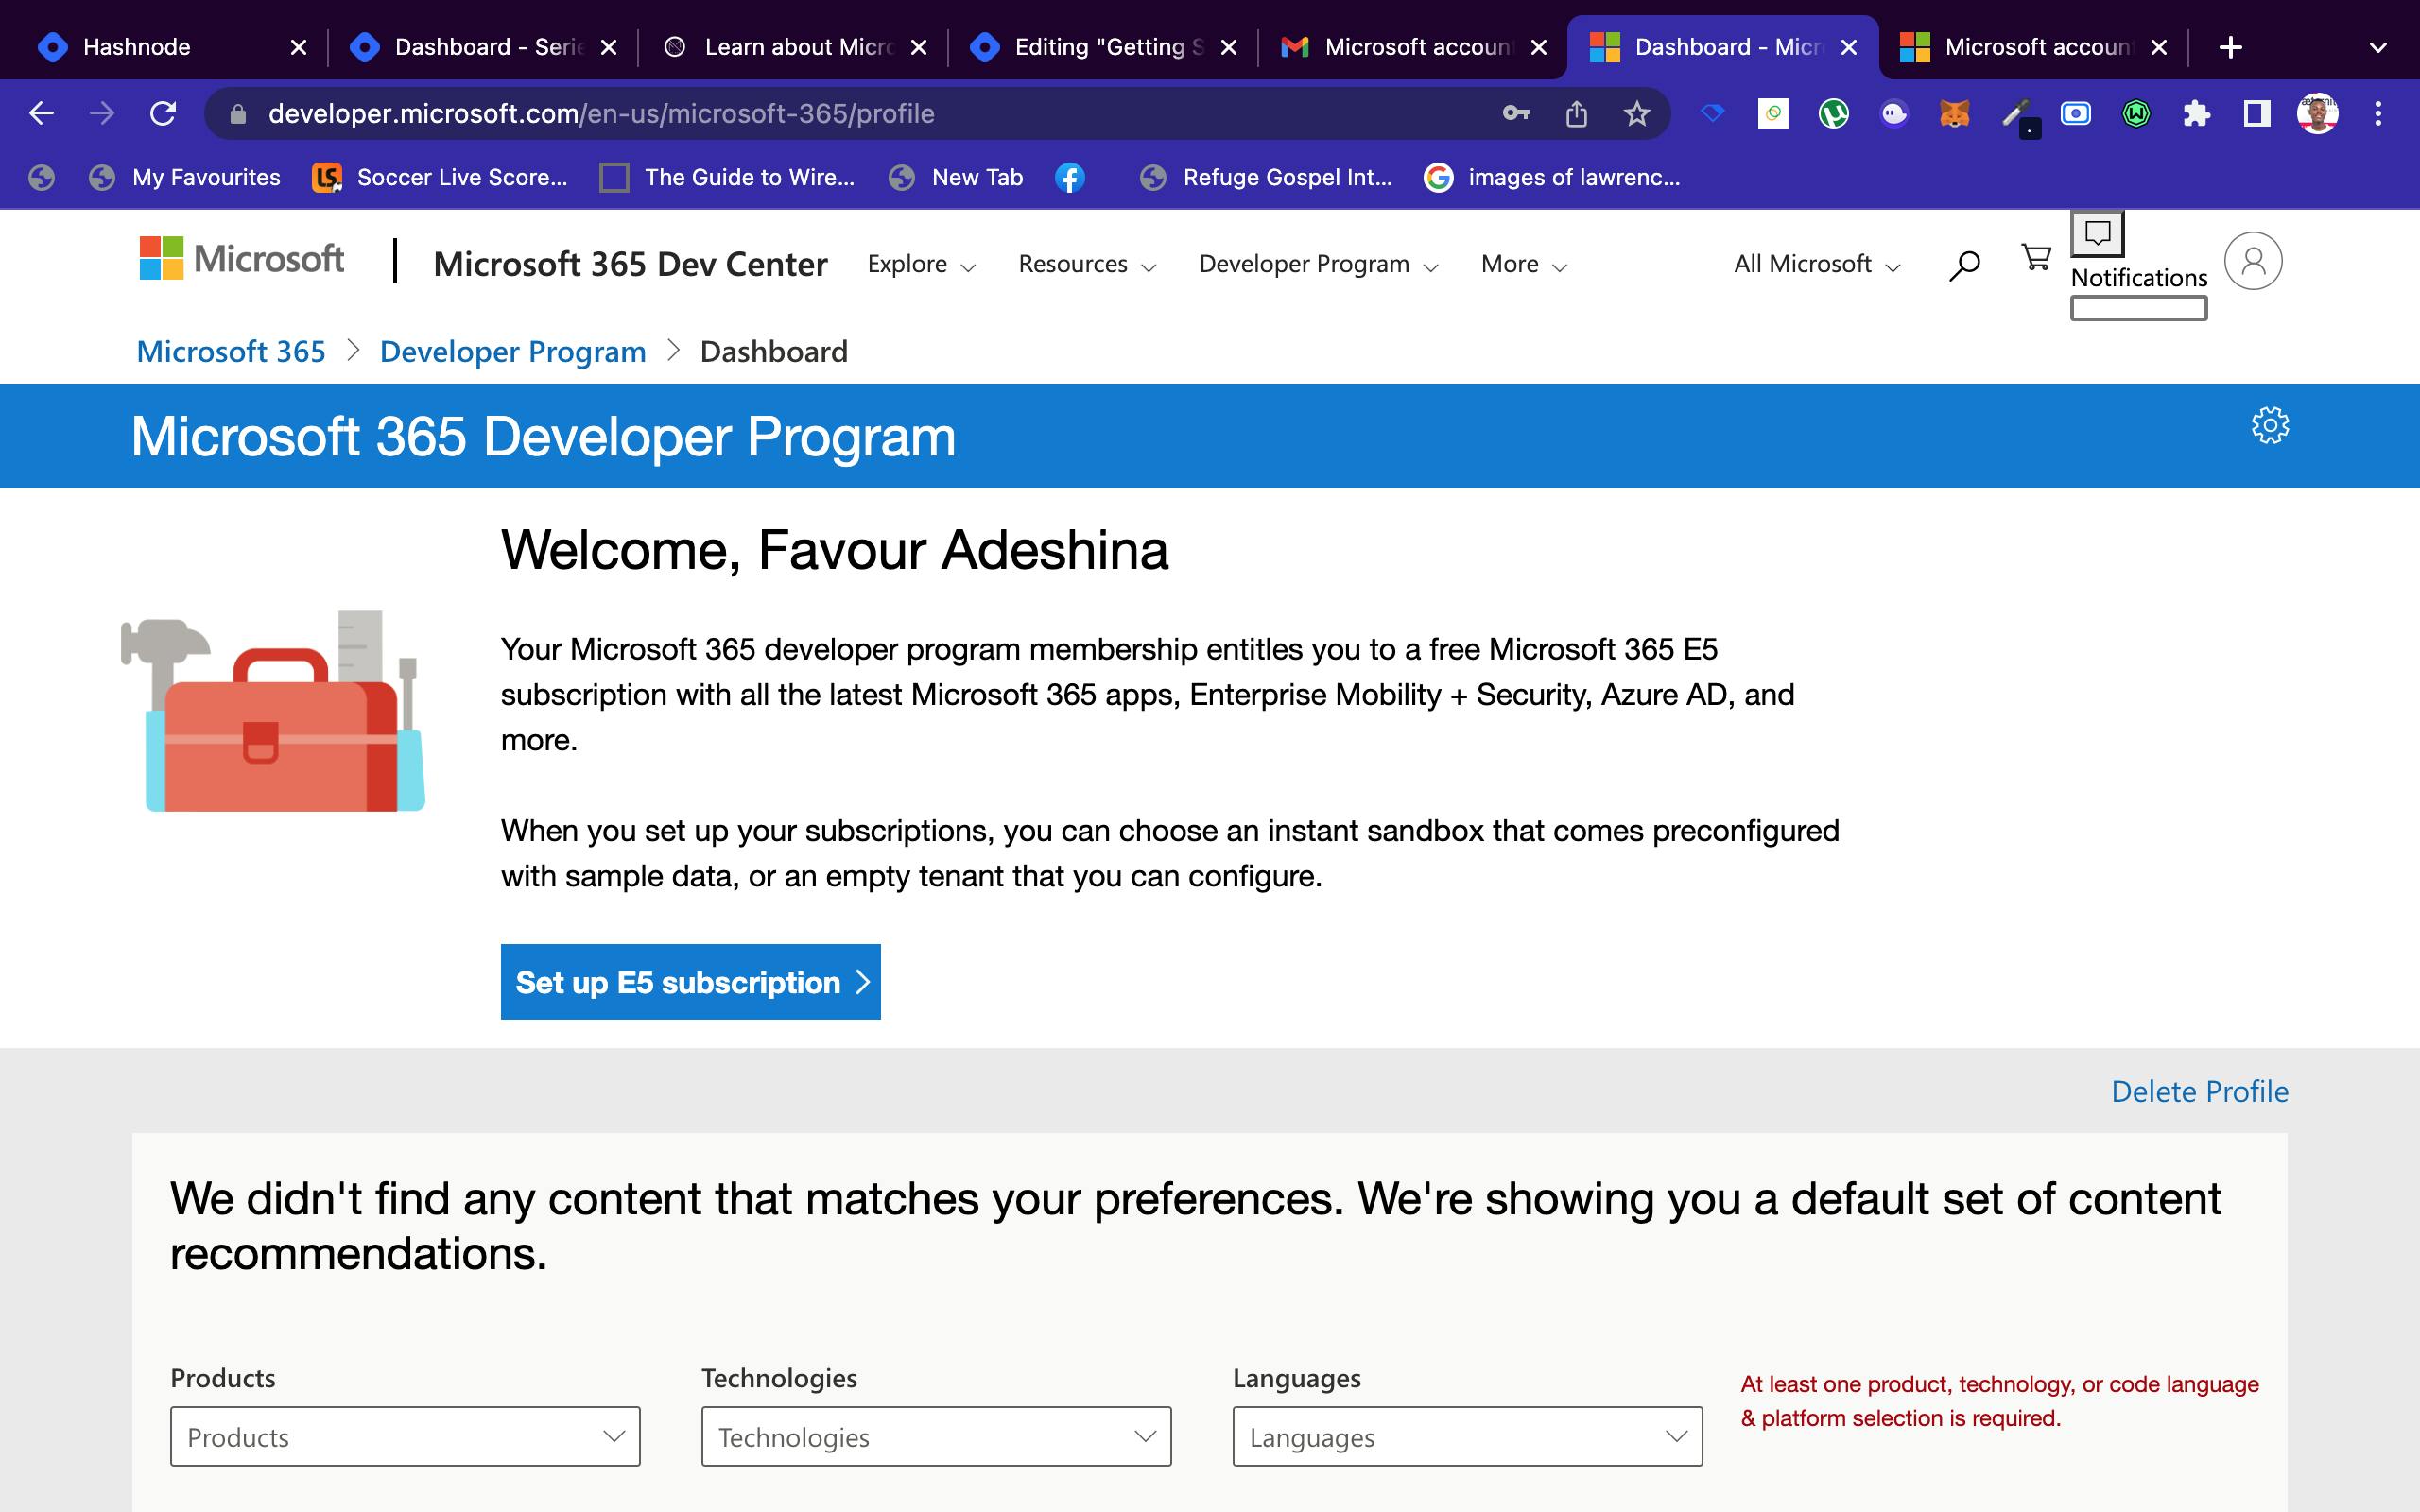
4.Click on the Button Setup E5 Subscription, and then click on instant sandbox

5.Add a valid Phone Number for security and then get your verification code
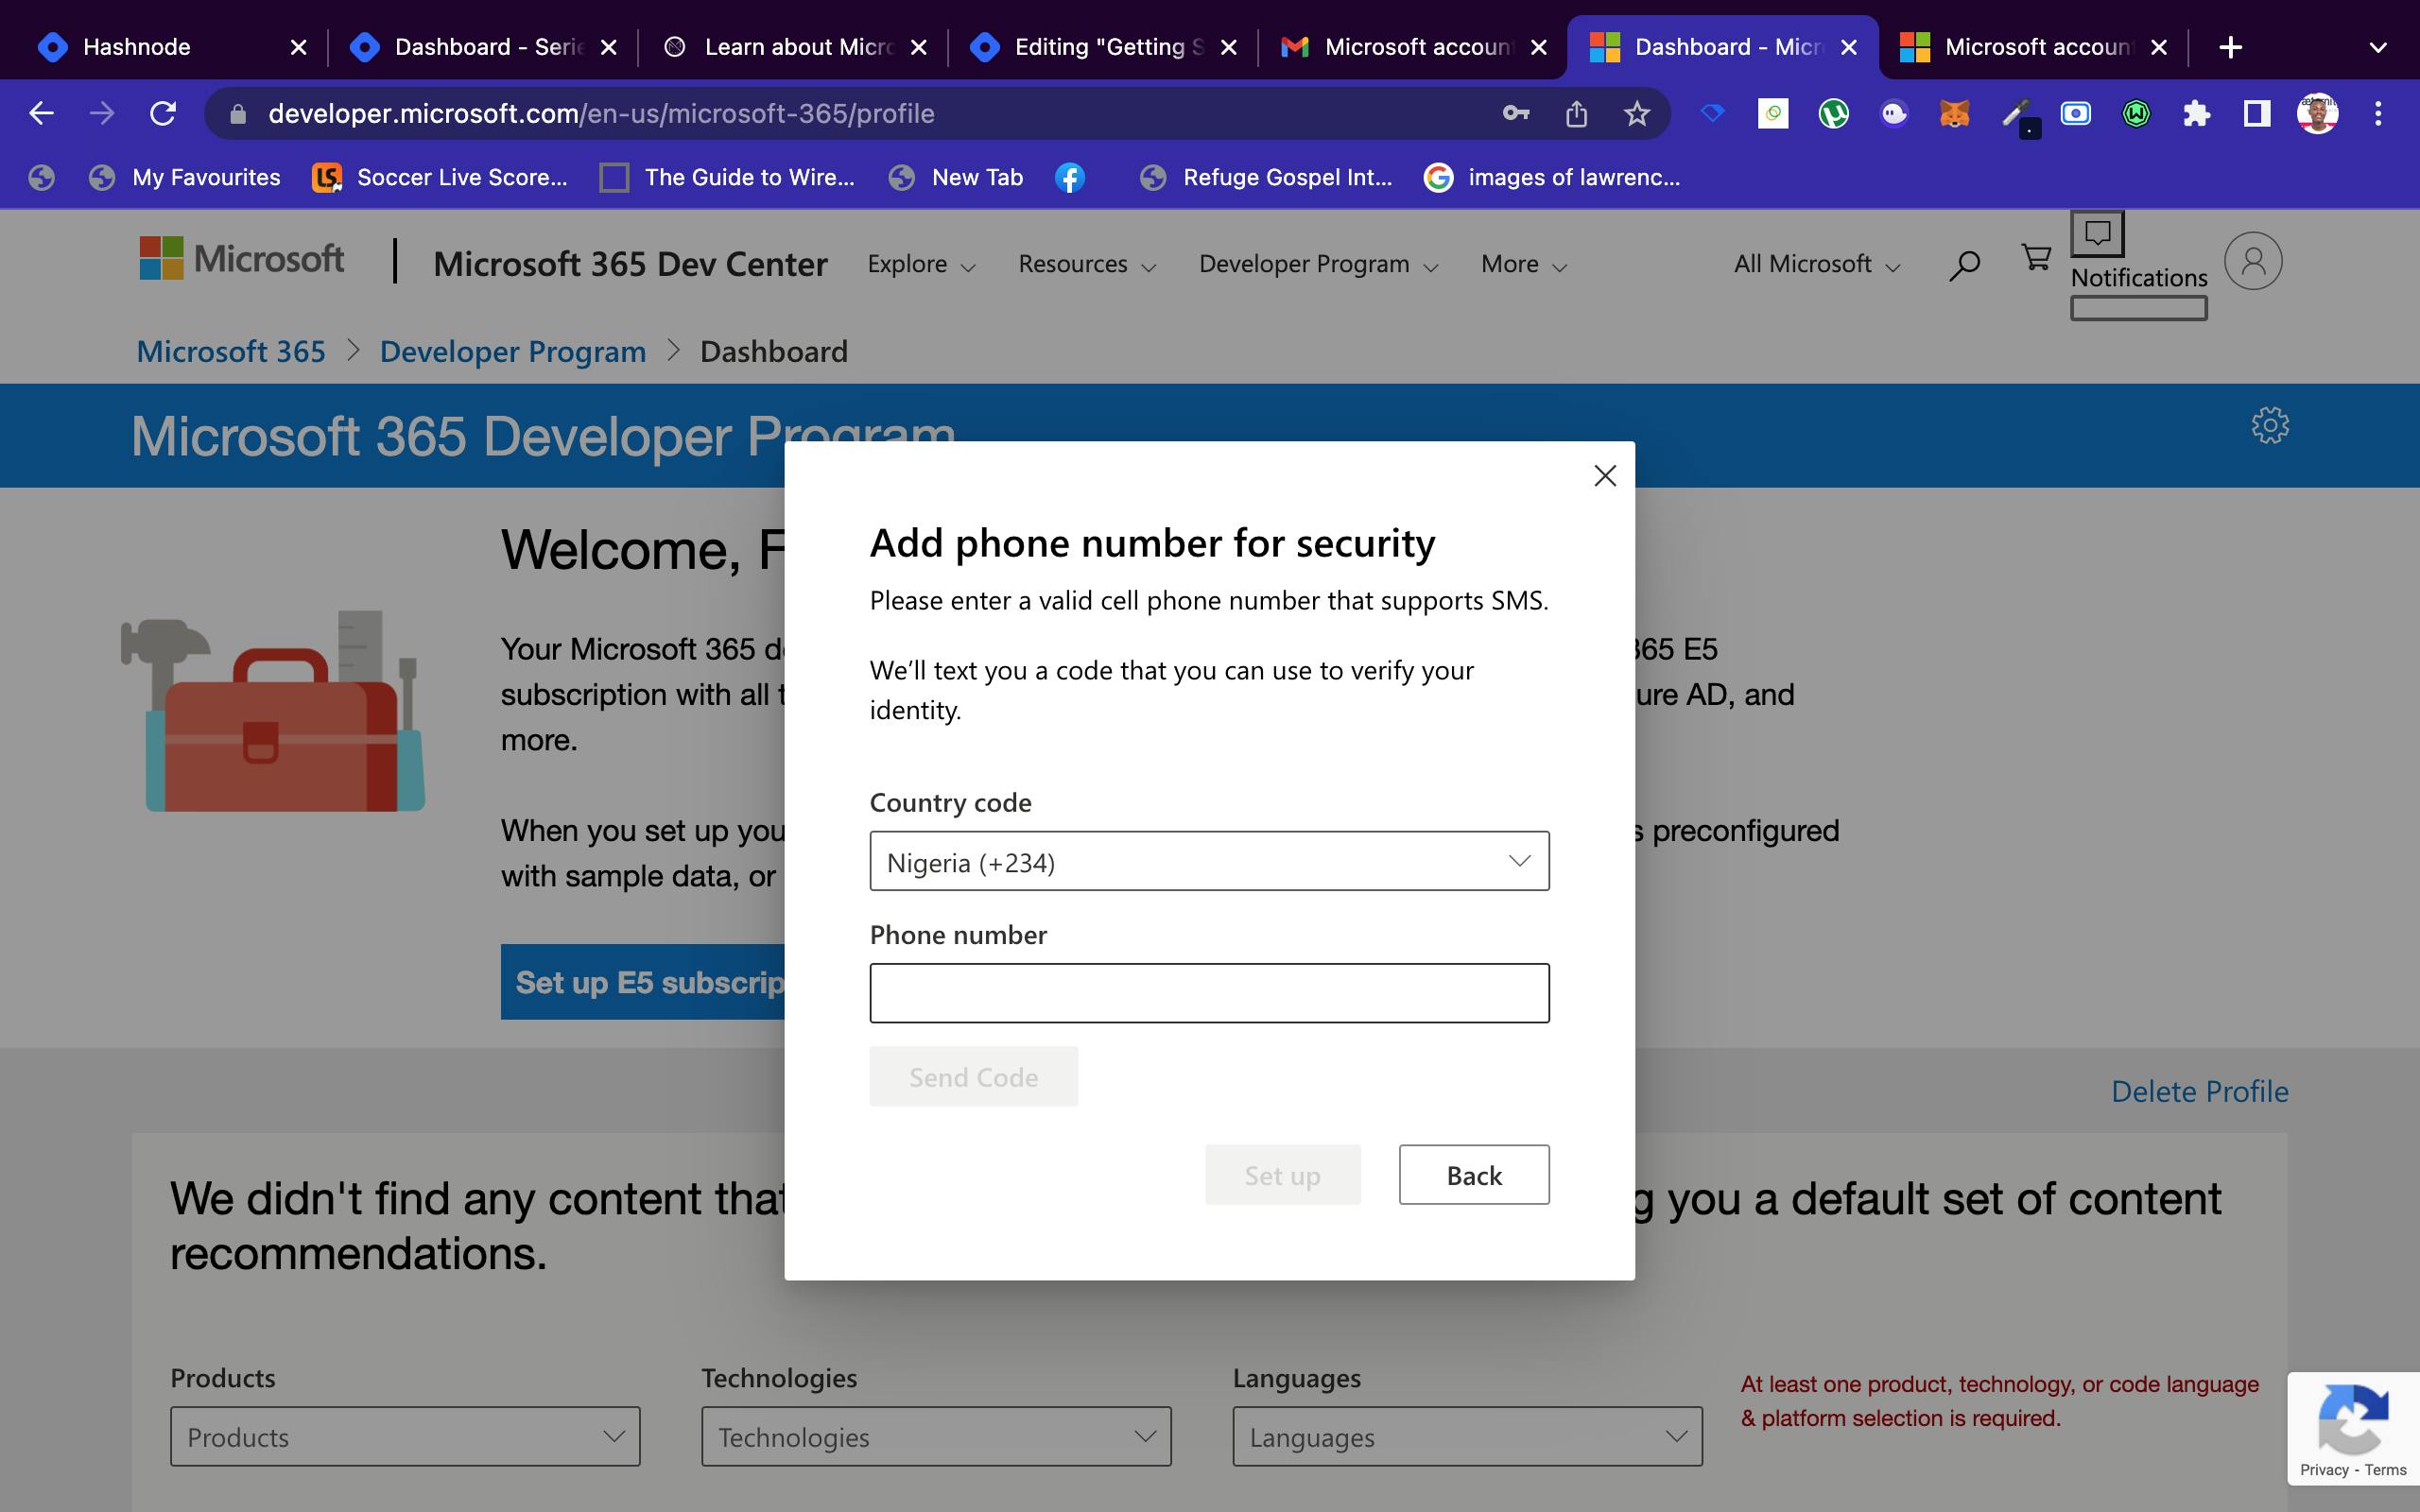
6.And then you successfully have your E5 Subscription, which will allow you premium access to Office Applications for the next 90 days.
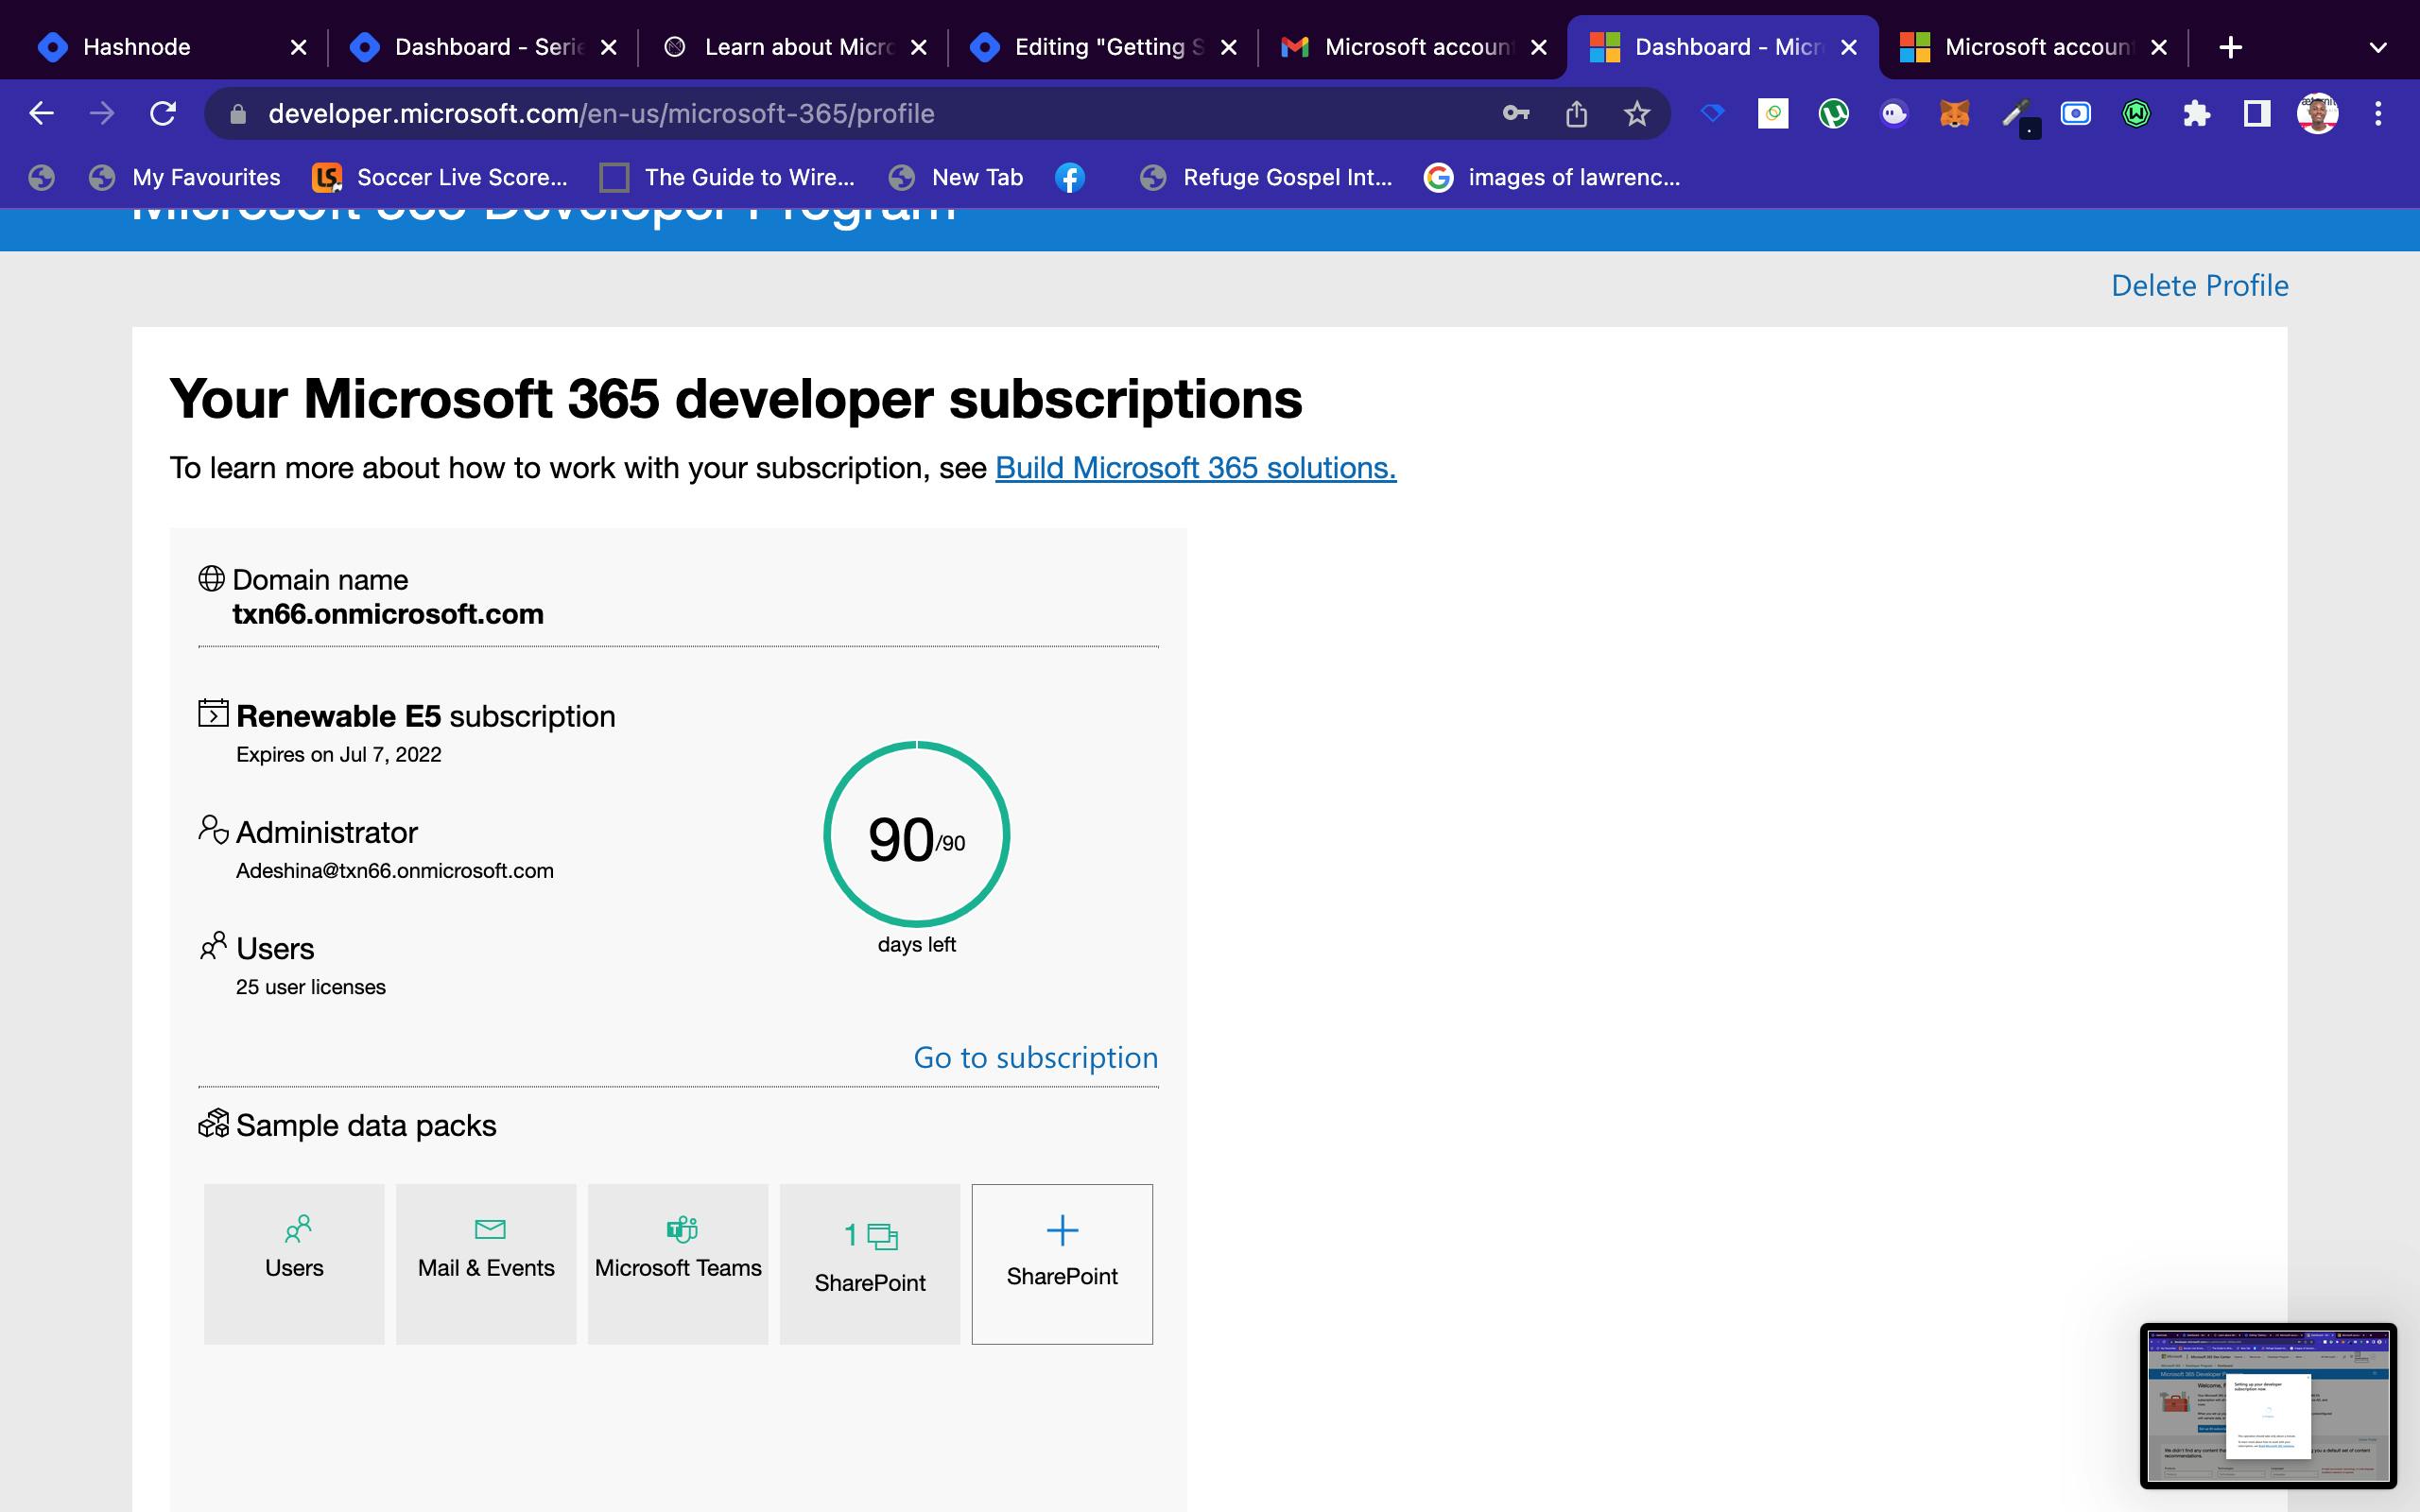
Note: This subscription is available for free for just 90 days after which you will need to pay for it, but by joining the Microsoft Learn Student Ambassador program, you have access to all Office applications for free, throughout your ambassadorship period. This and other amazing benefits include subscriptions for various Microsoft Certification exams, to know more and become a Microsoft Learn Student Ambassador
Building a Canvas App
Now that we now have a subscription to access Office Applications, including our Power Platform products, we can now dive into PowerApps to start building our Canvas App.
Sign in with the email associated with the E5 Subscription
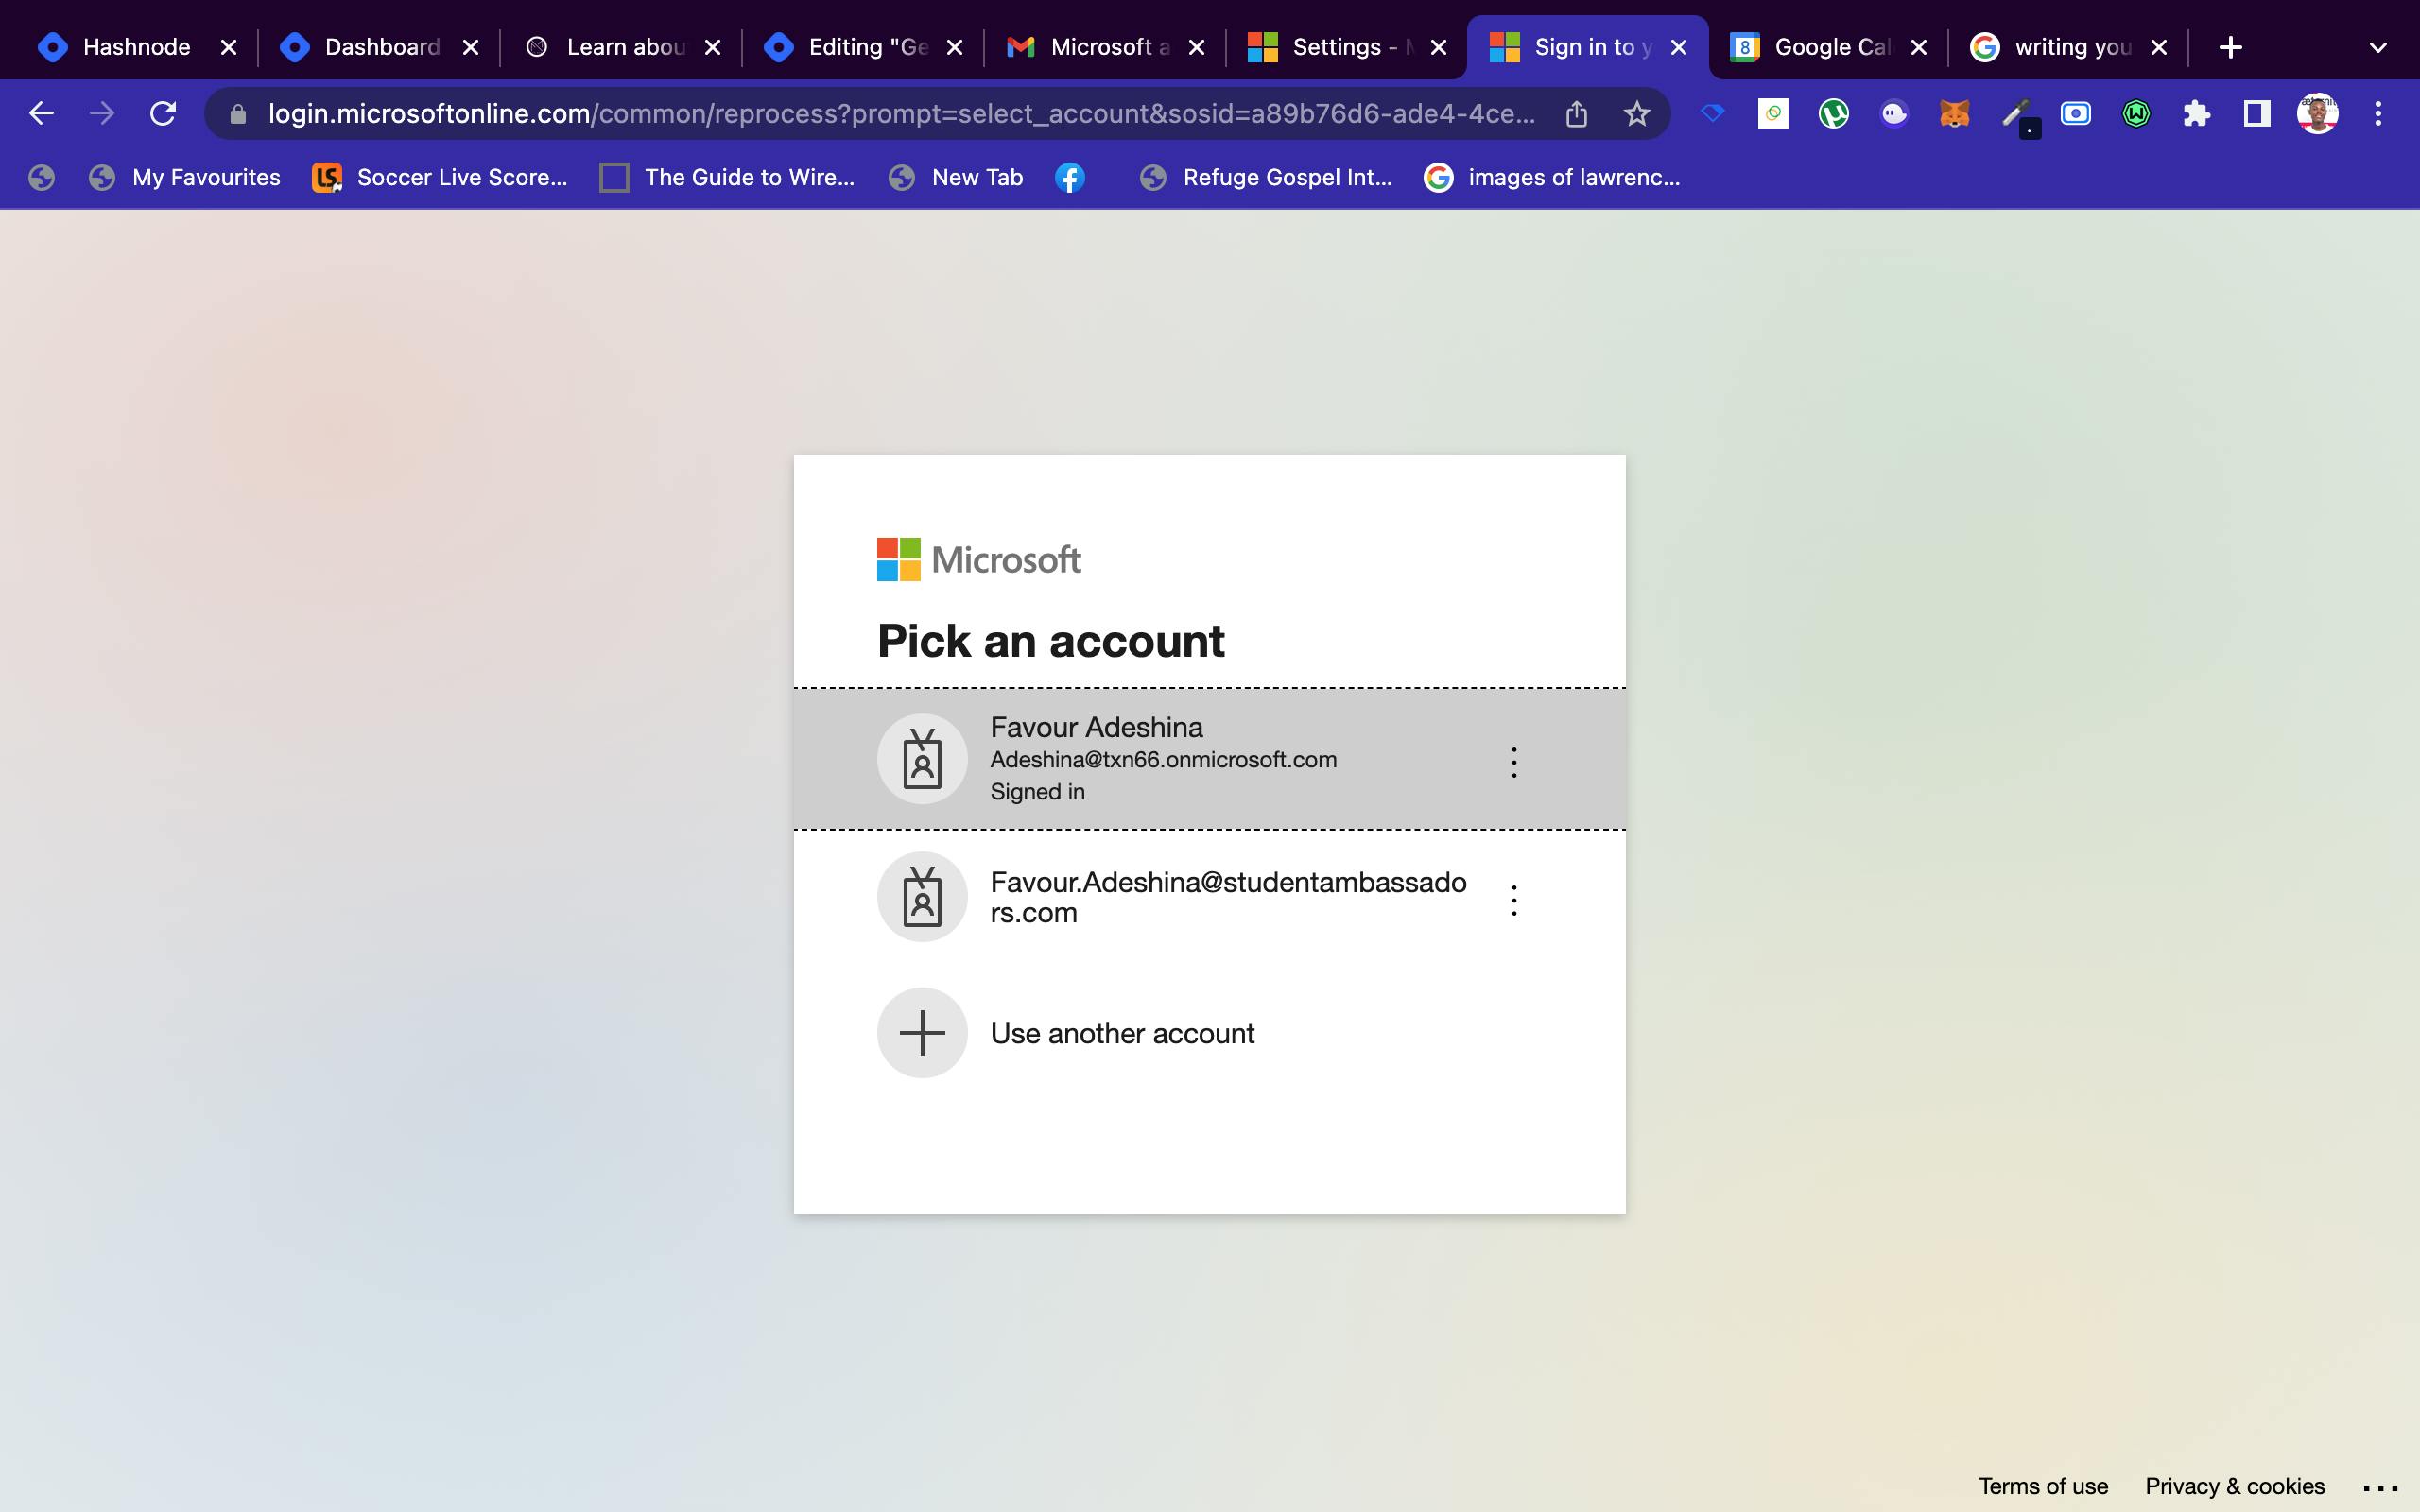
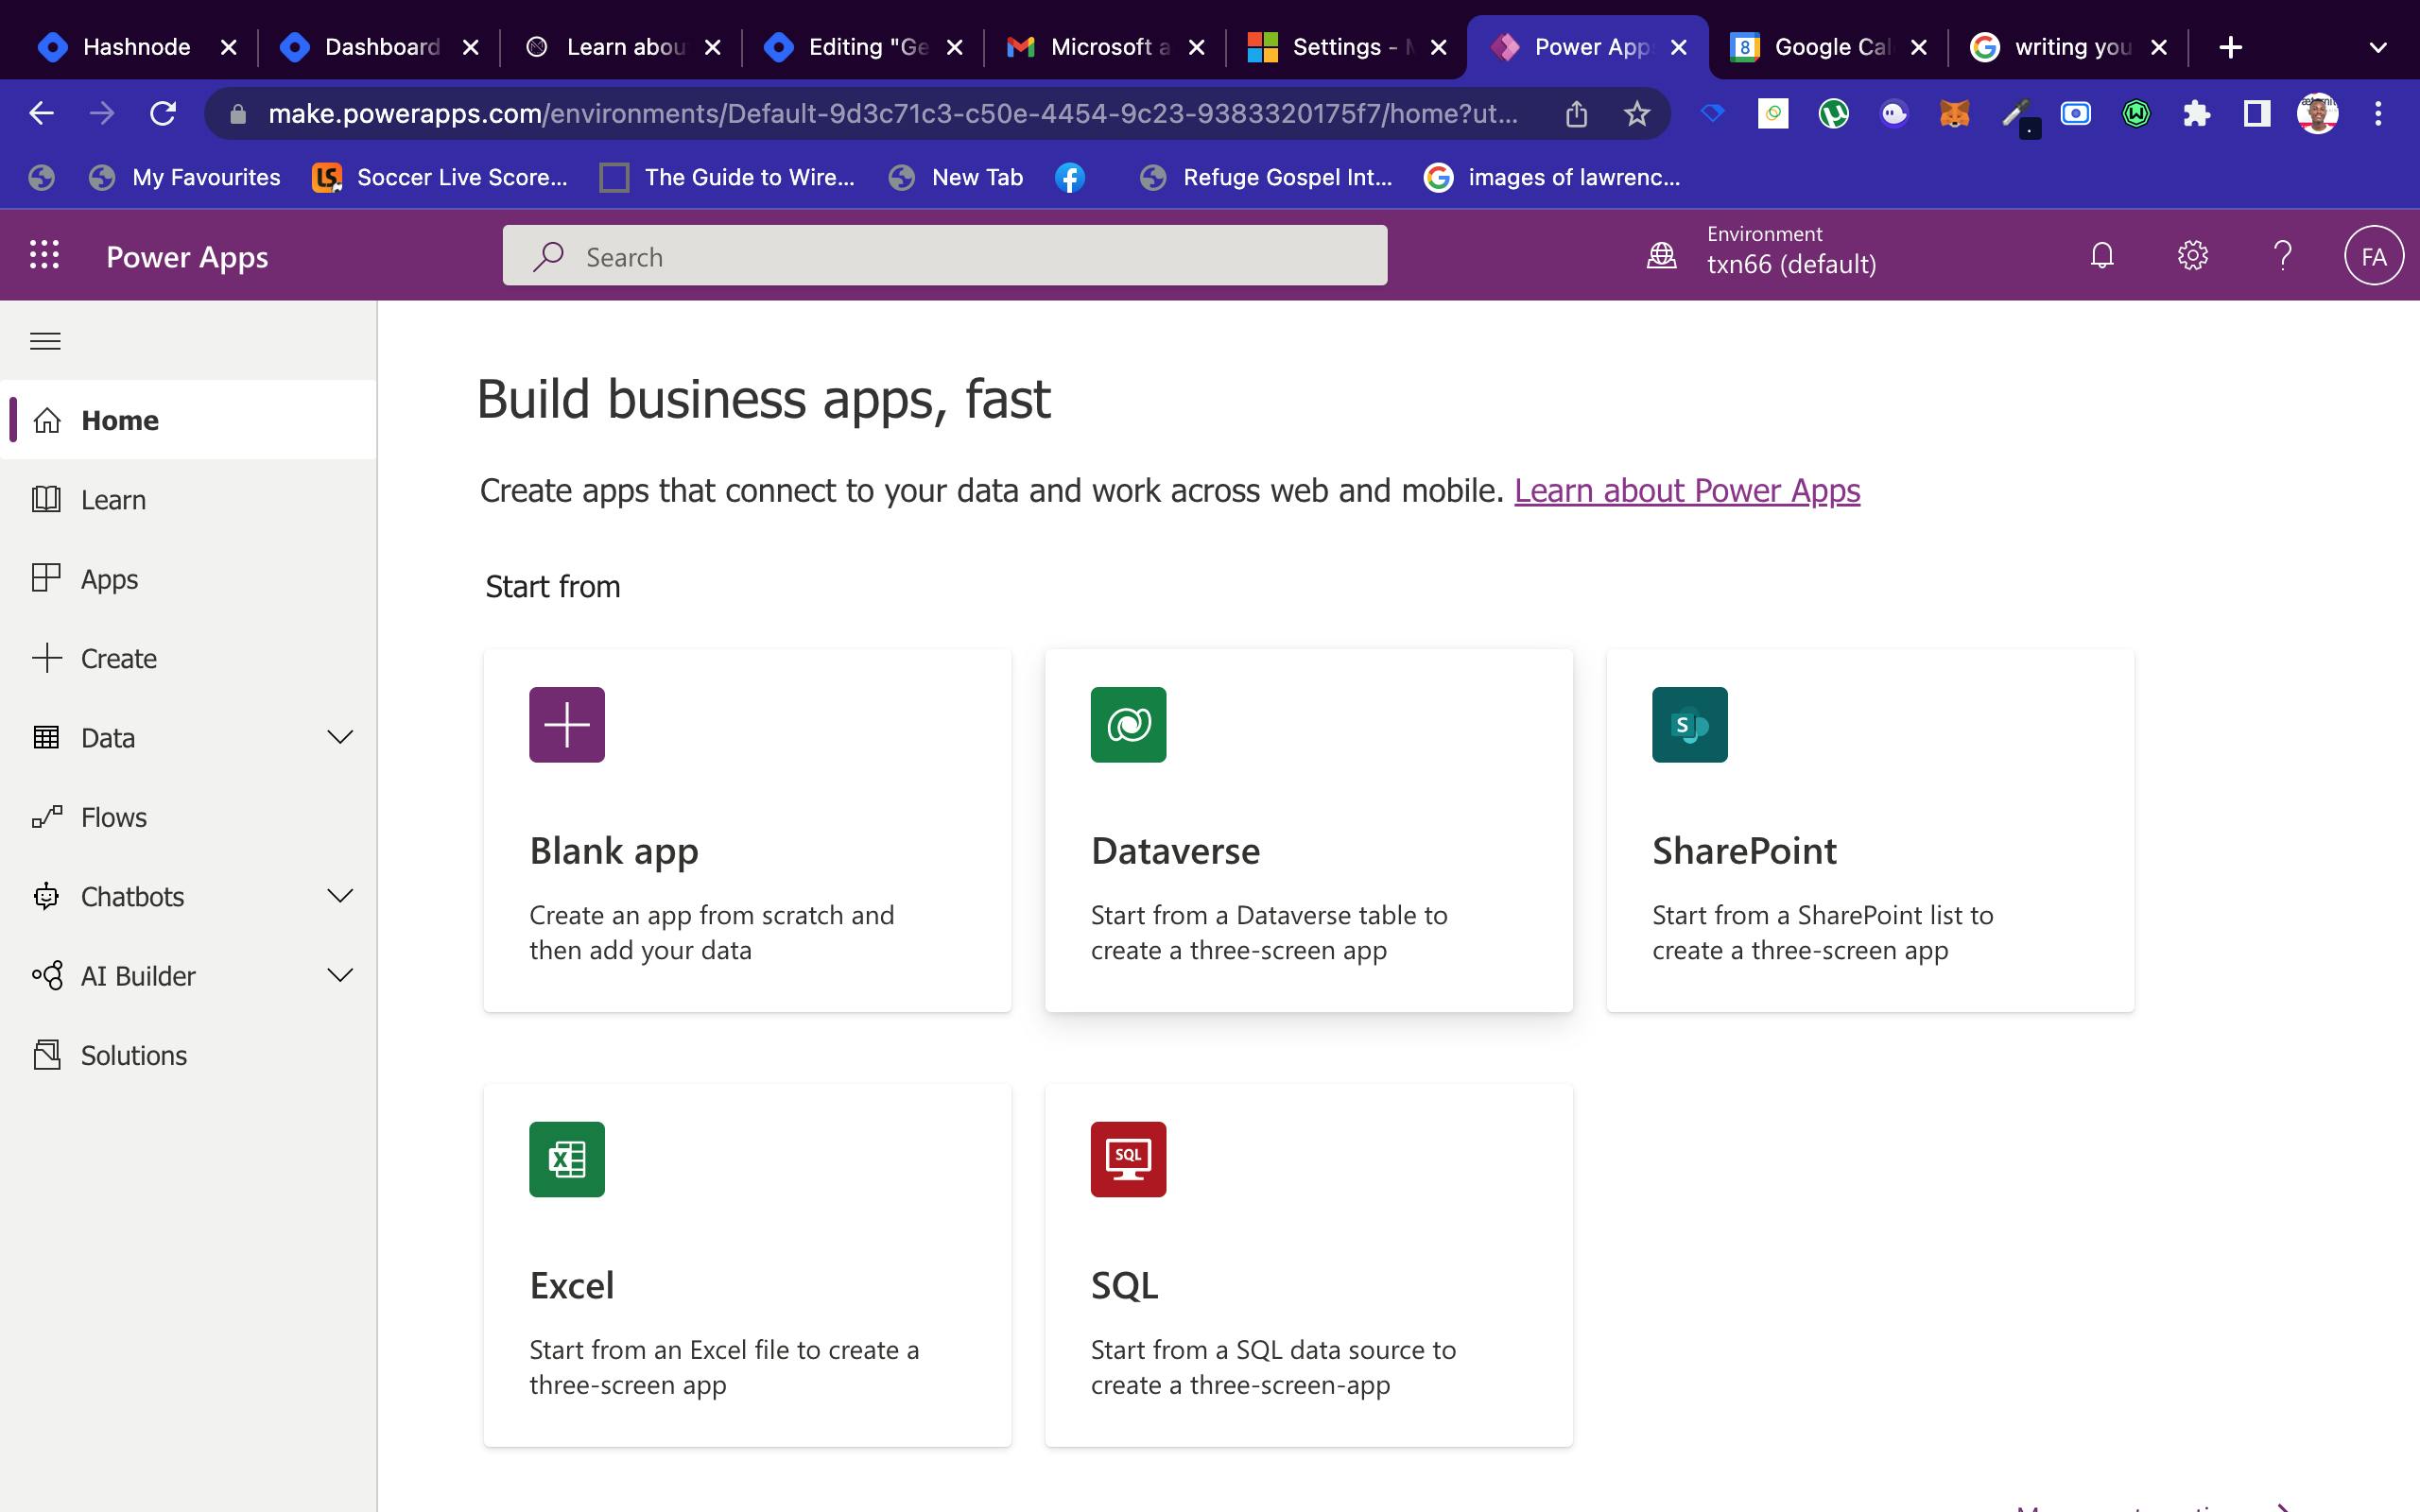
After successfully signing in to Power Apps, click on the Blank App card:
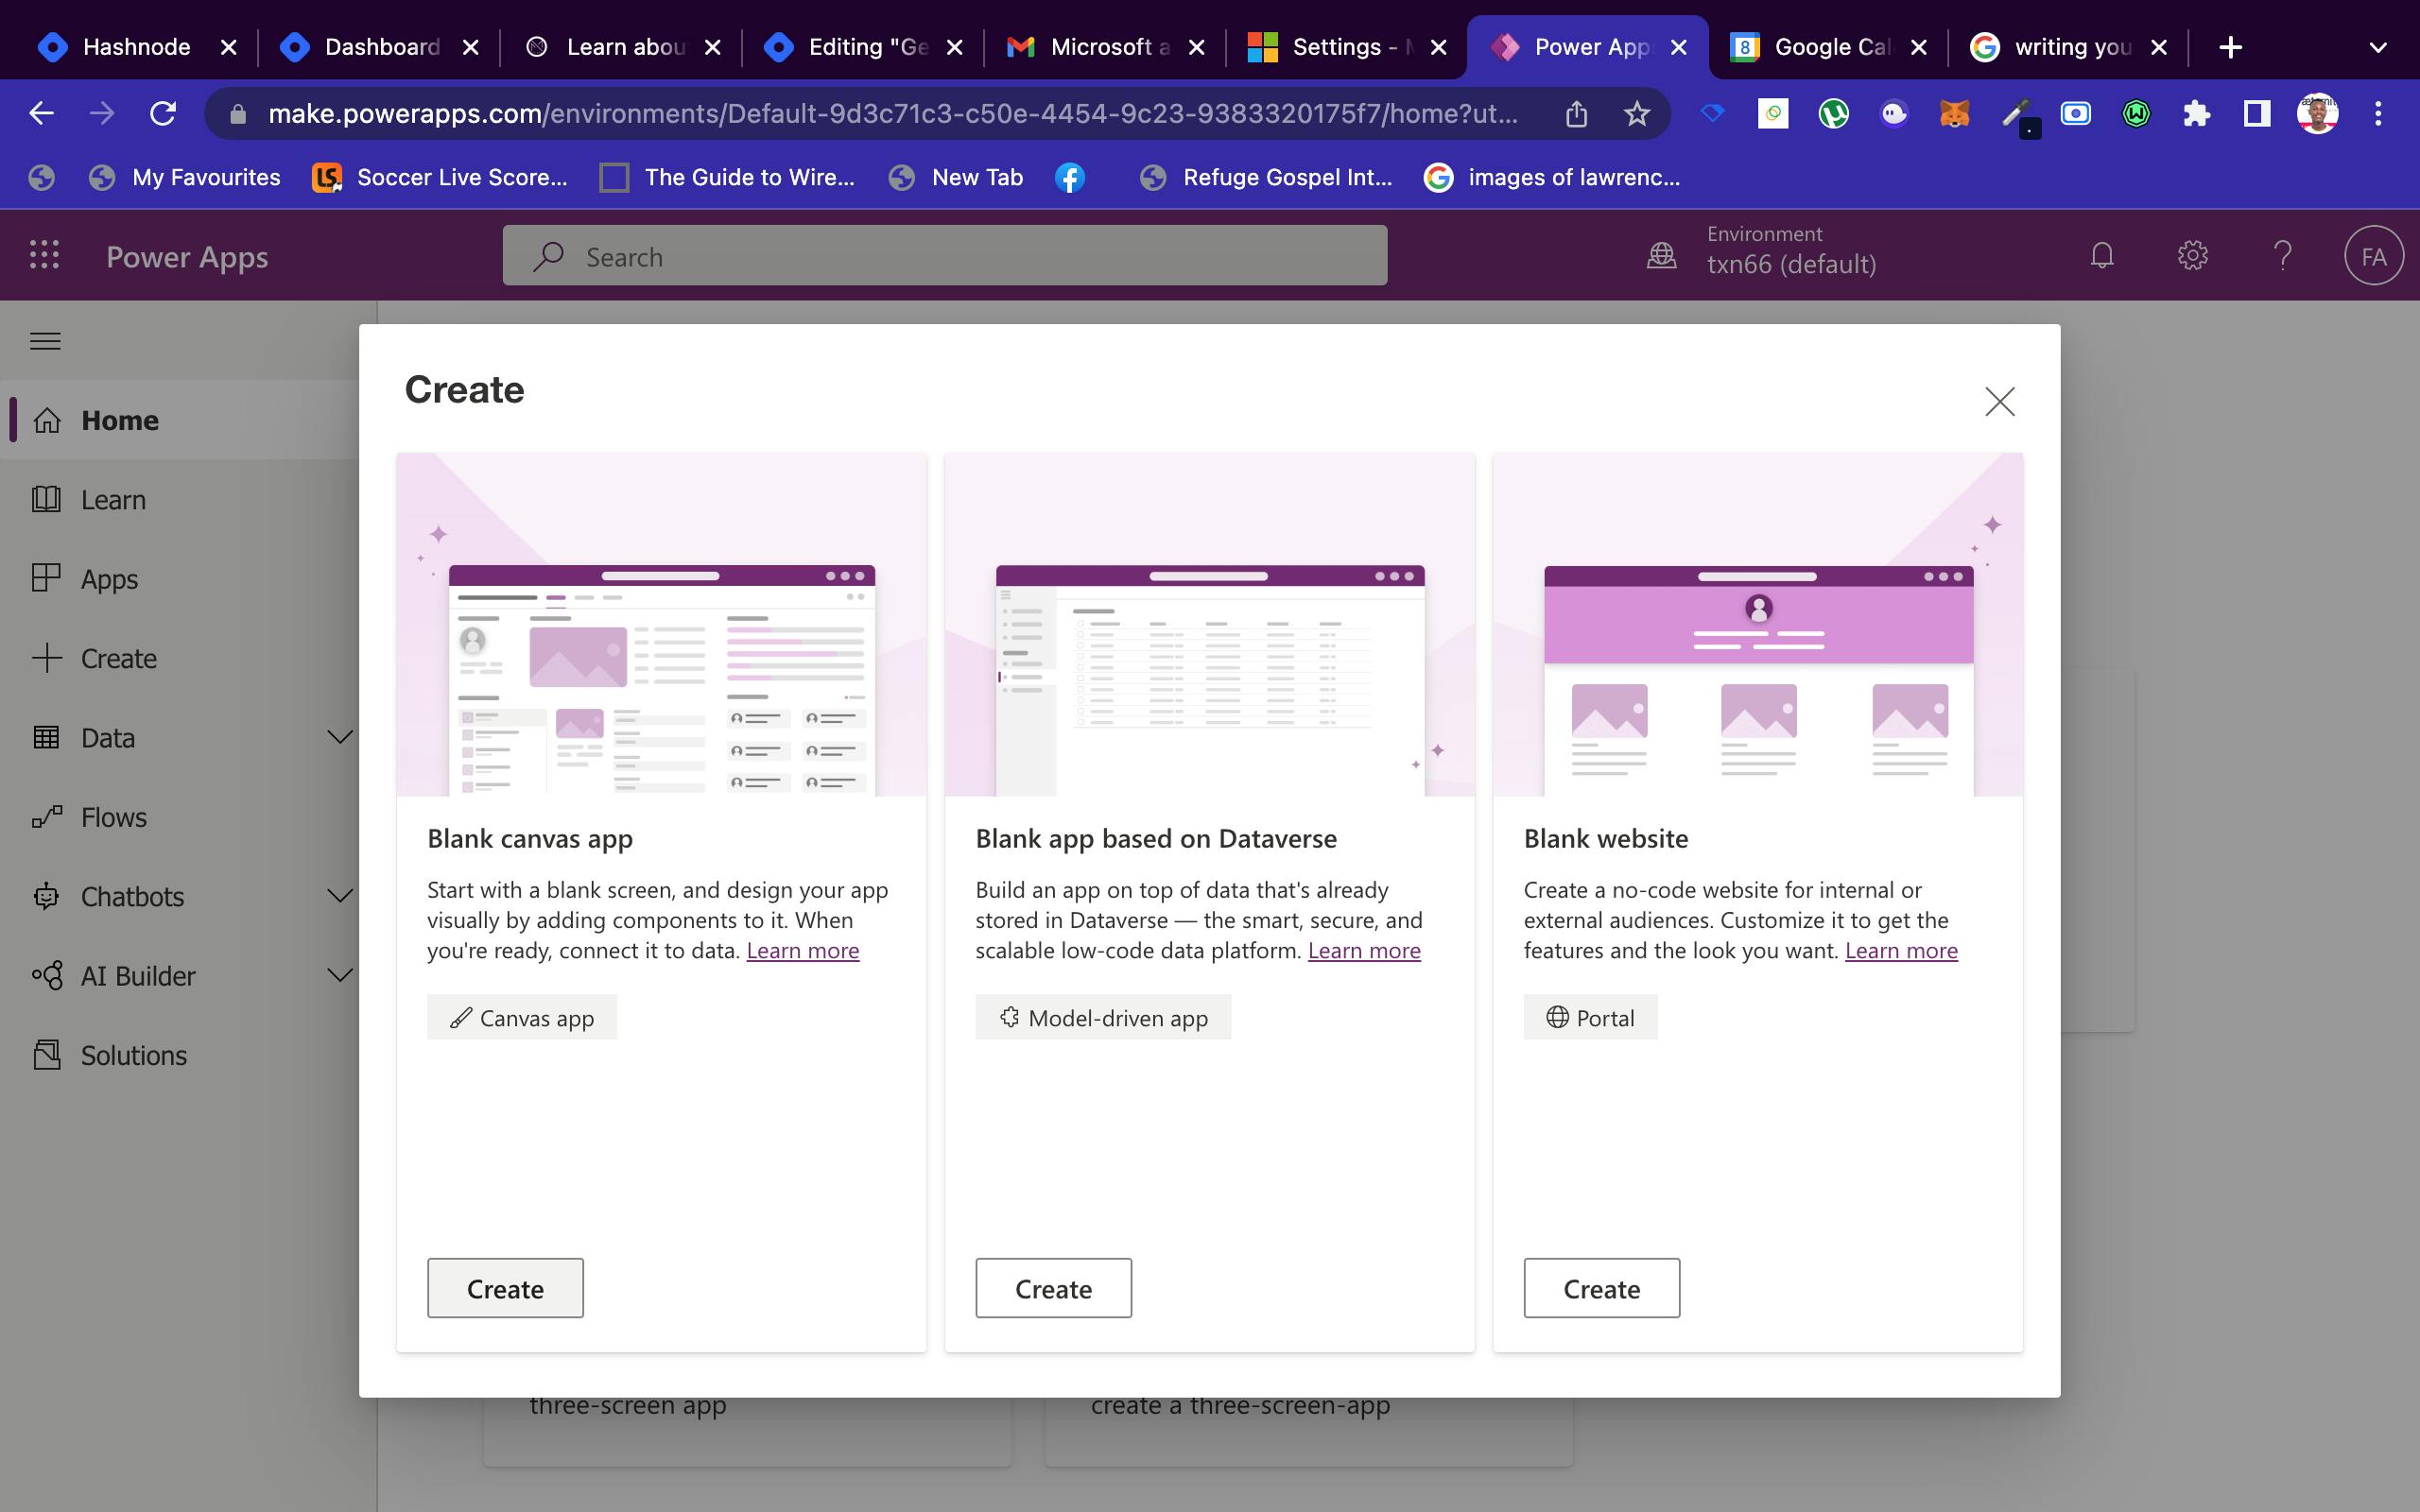
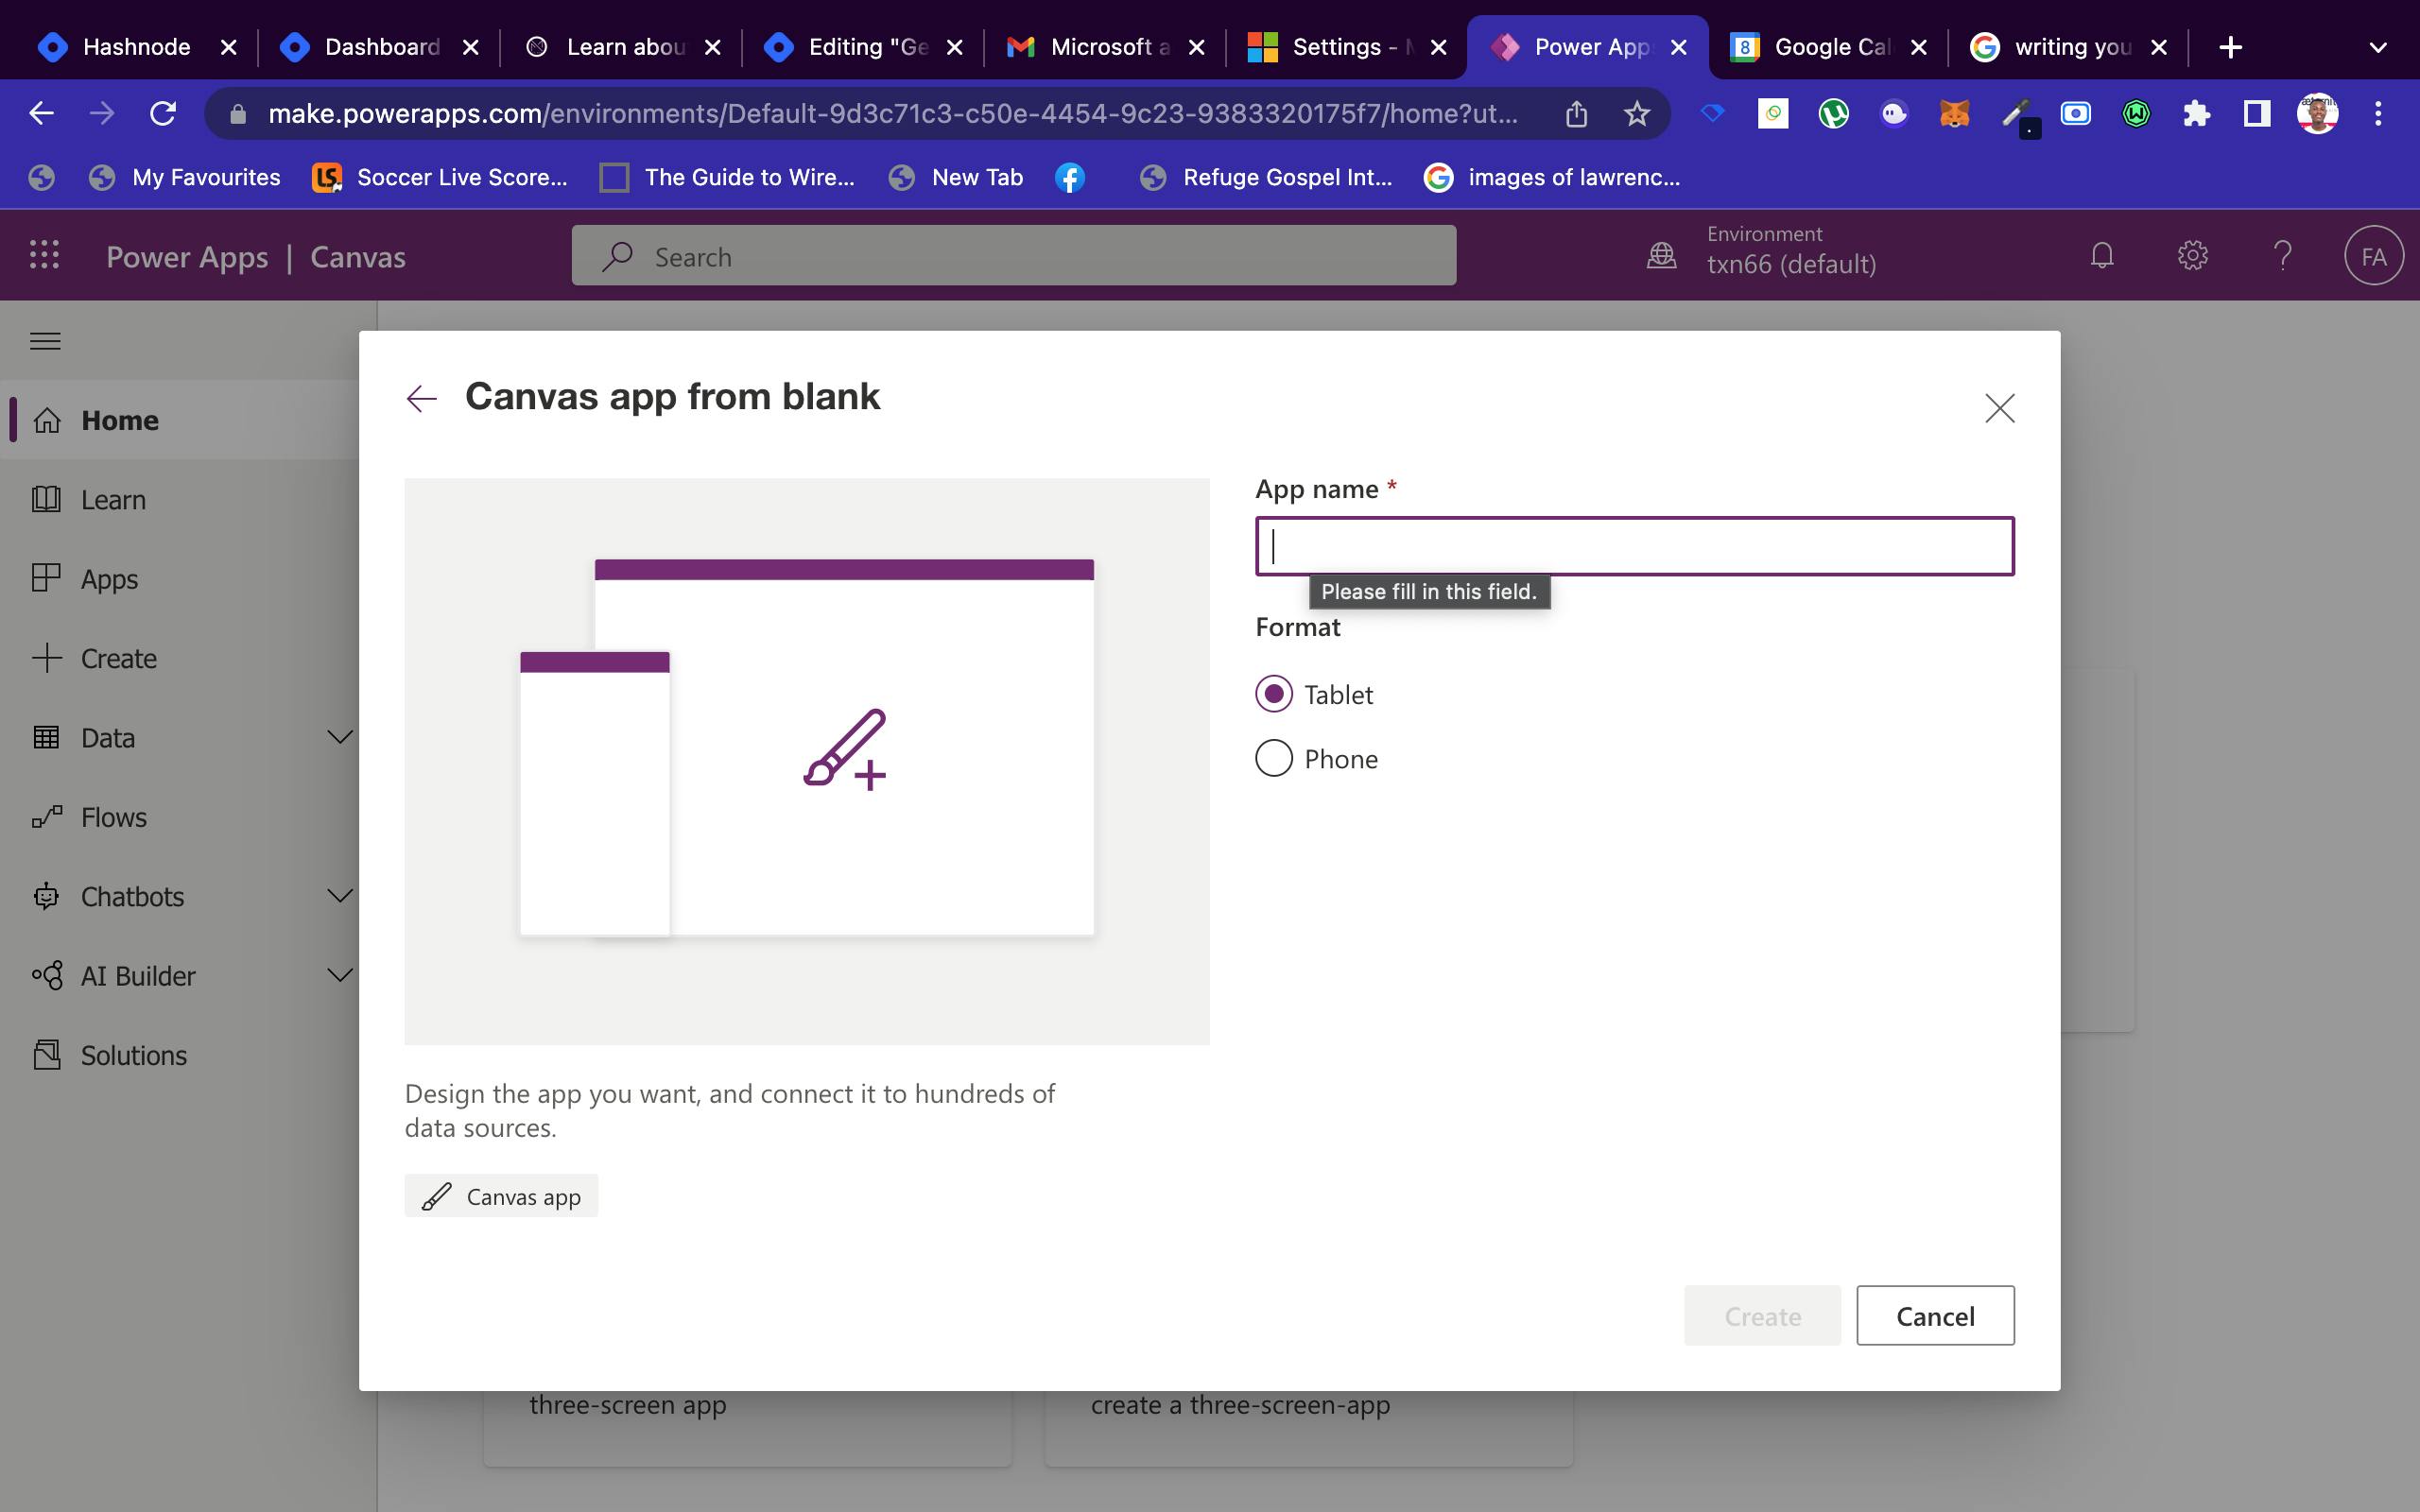
Click the create button, for us to create a Blank canvas app:
You then give the app a name and click on the Phone radio button option, for the app format
You will be provided with a blank screen to start working on.
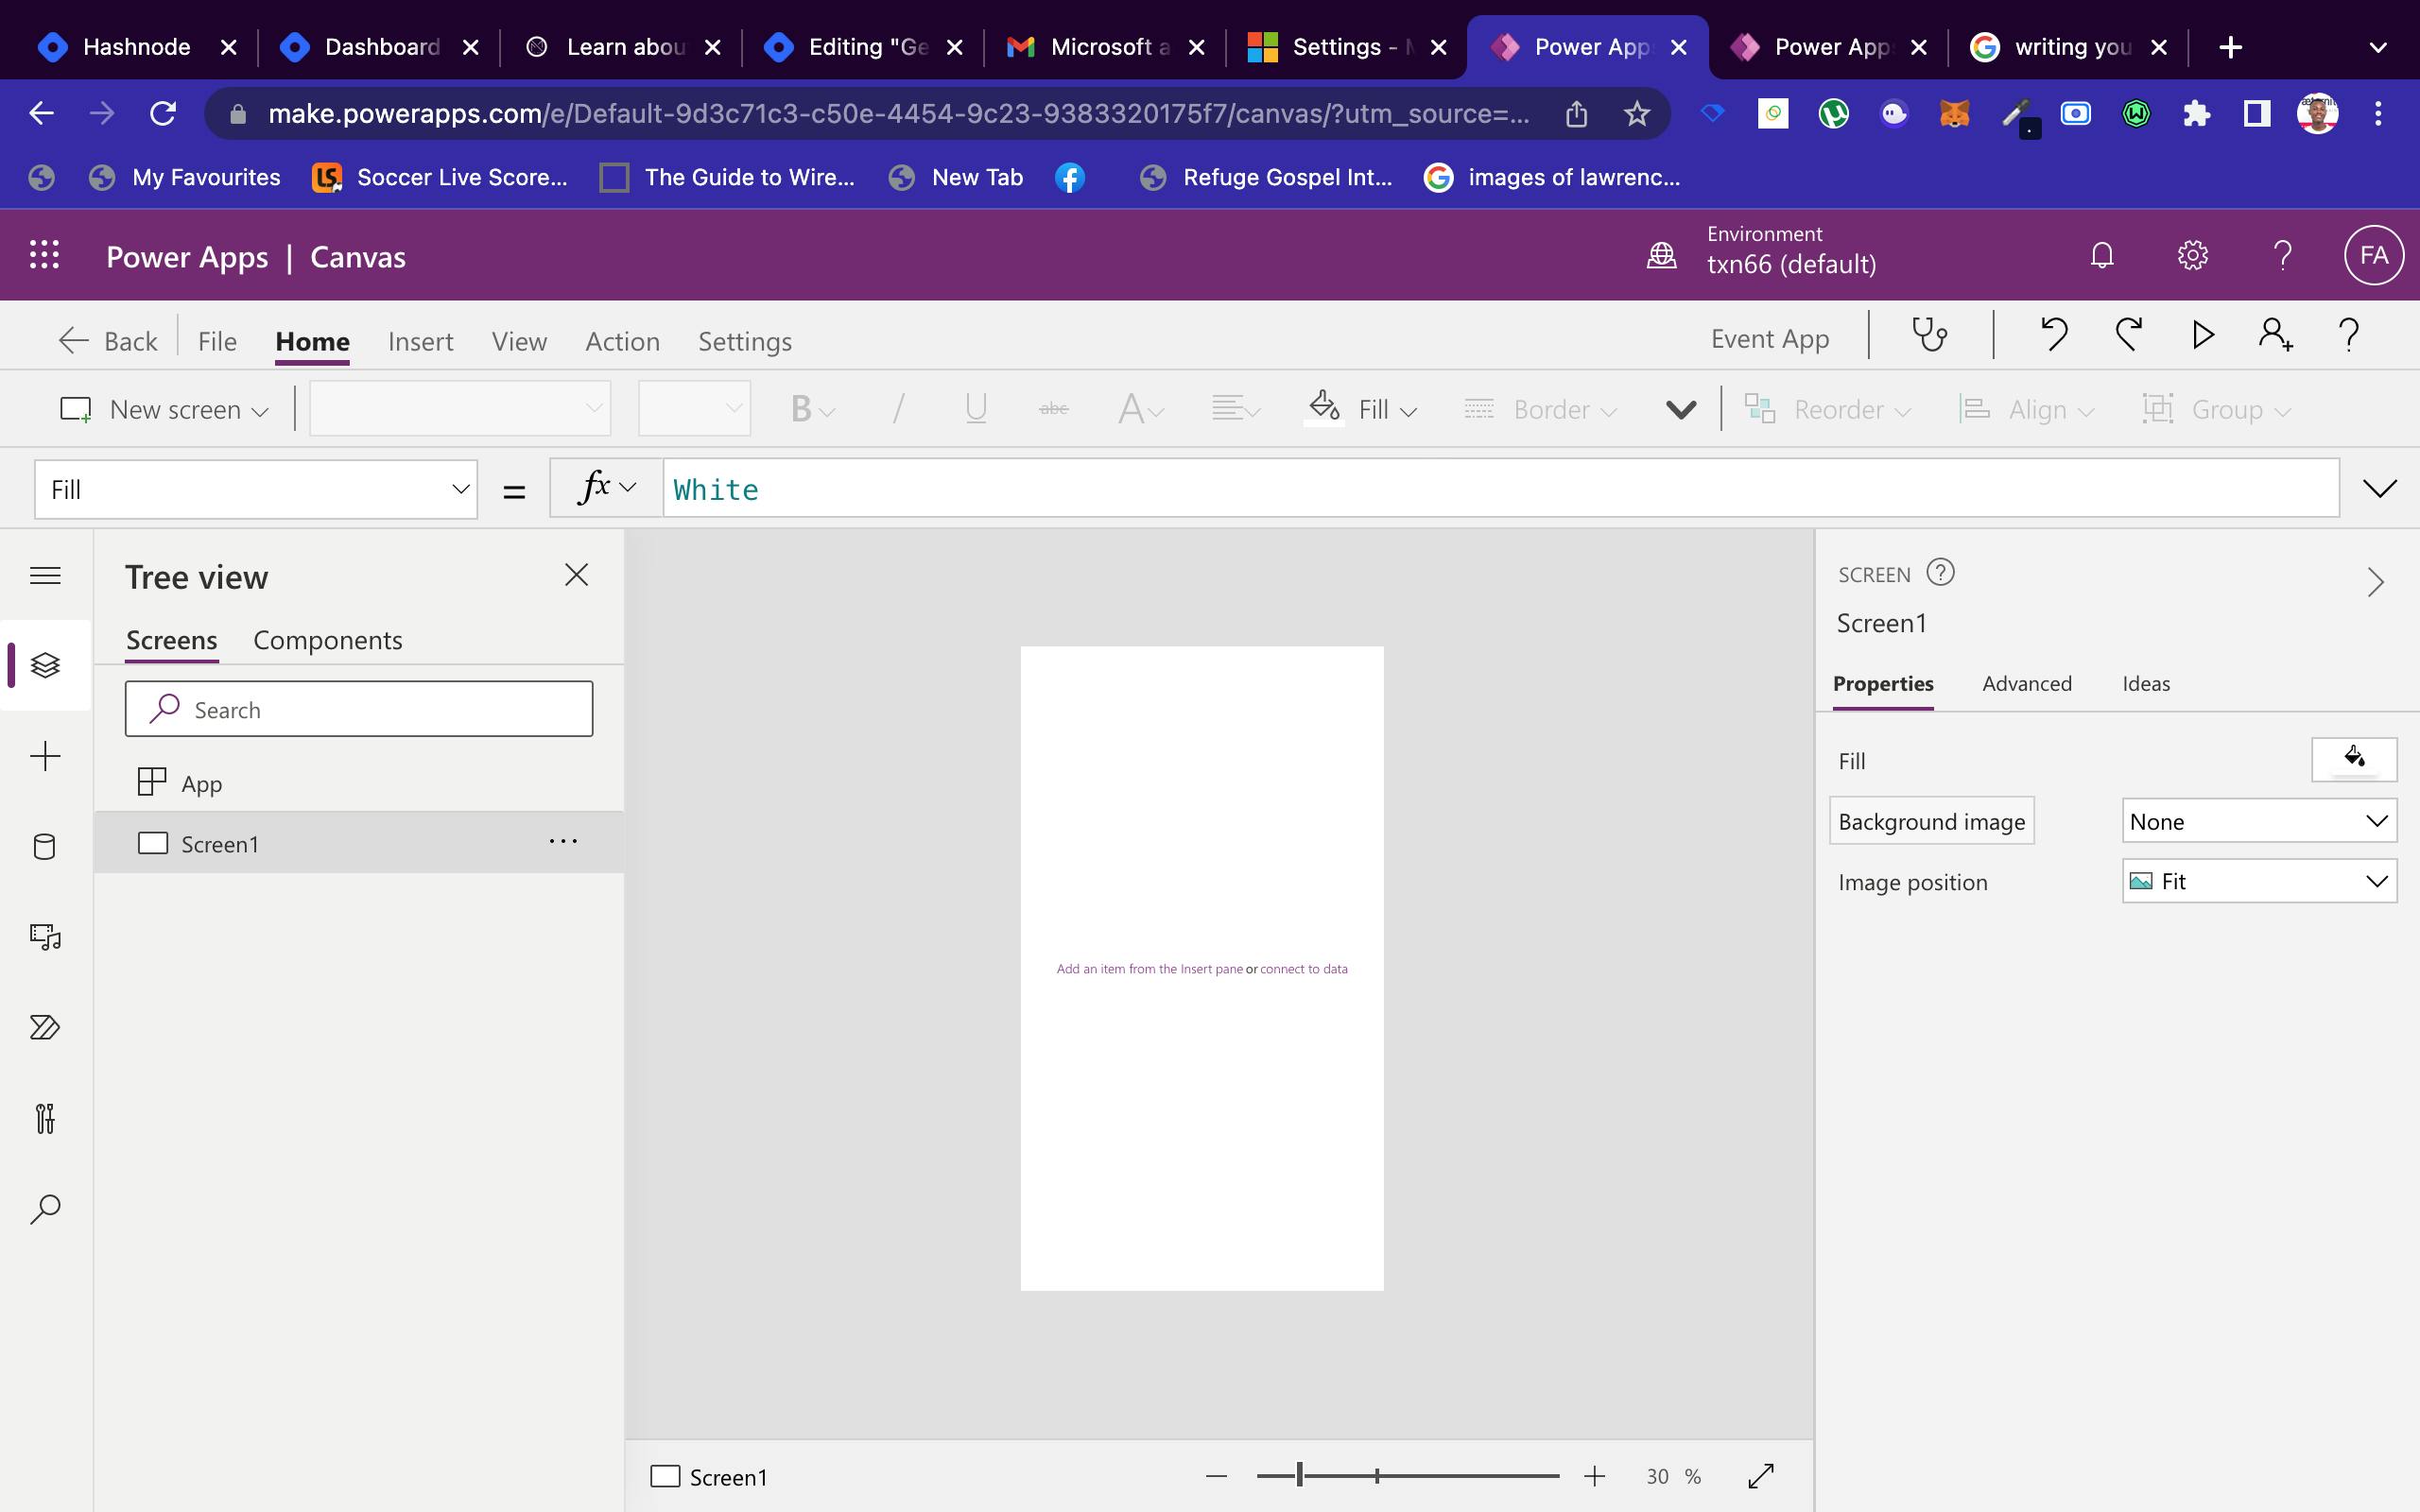
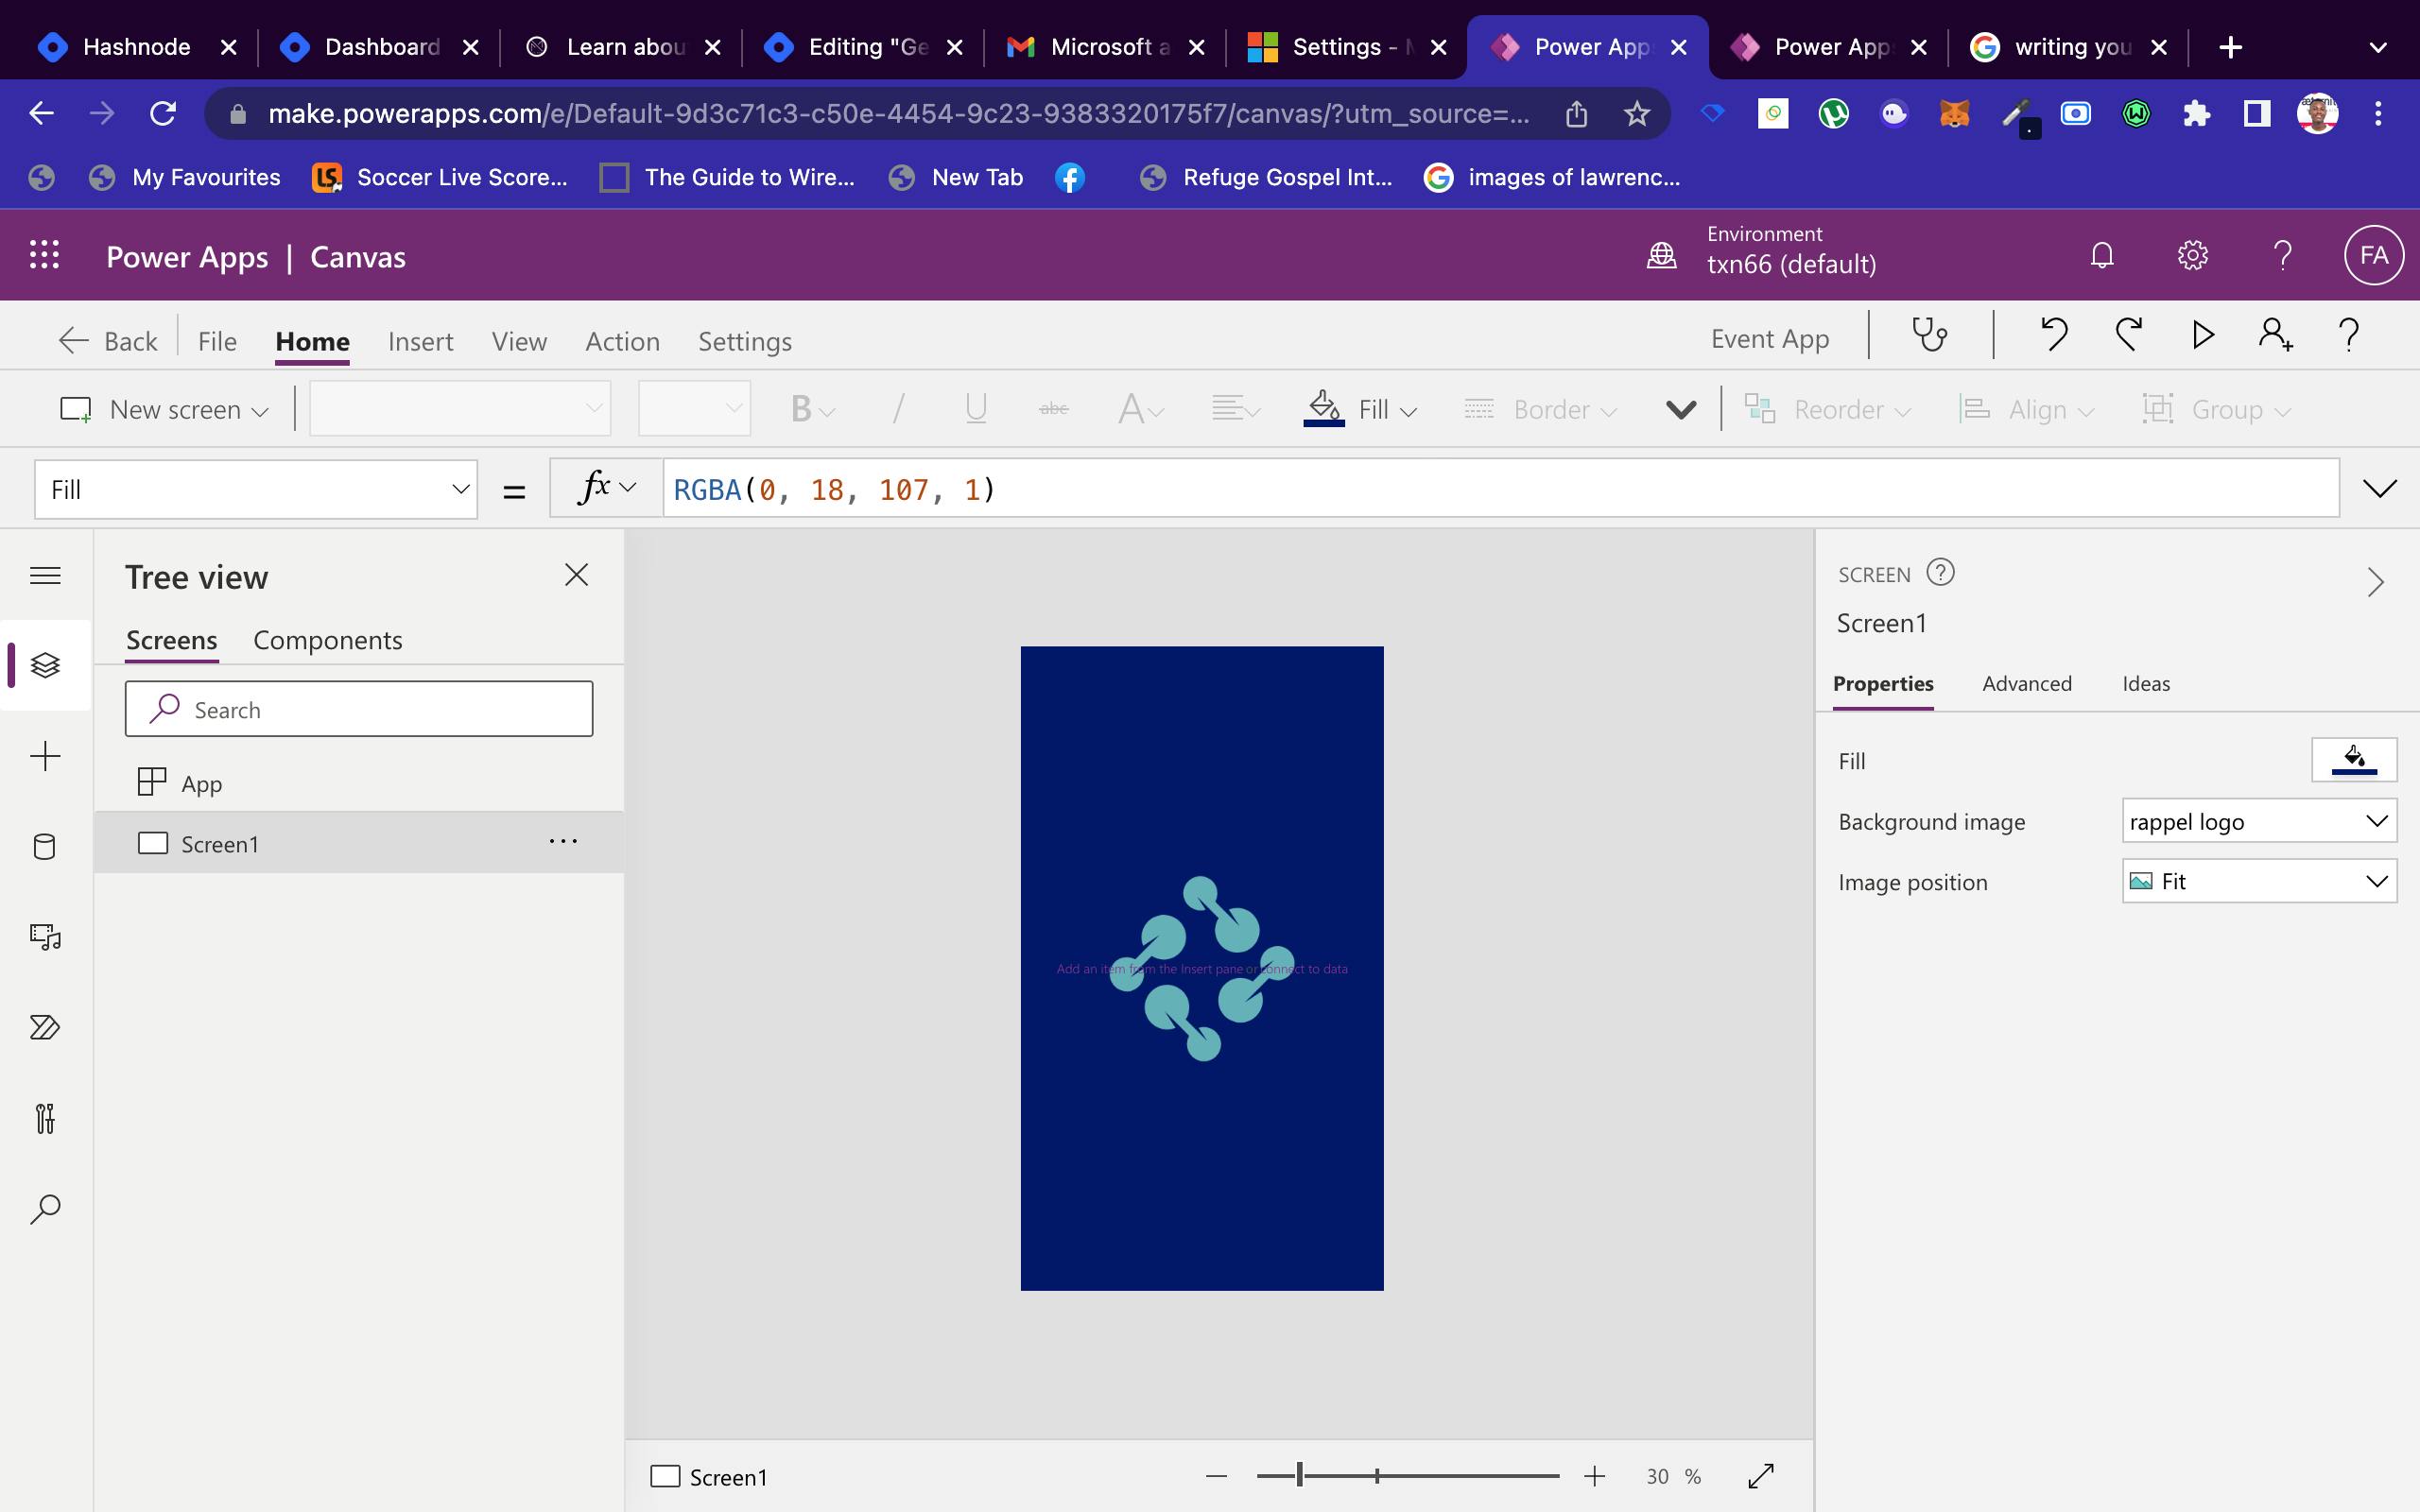
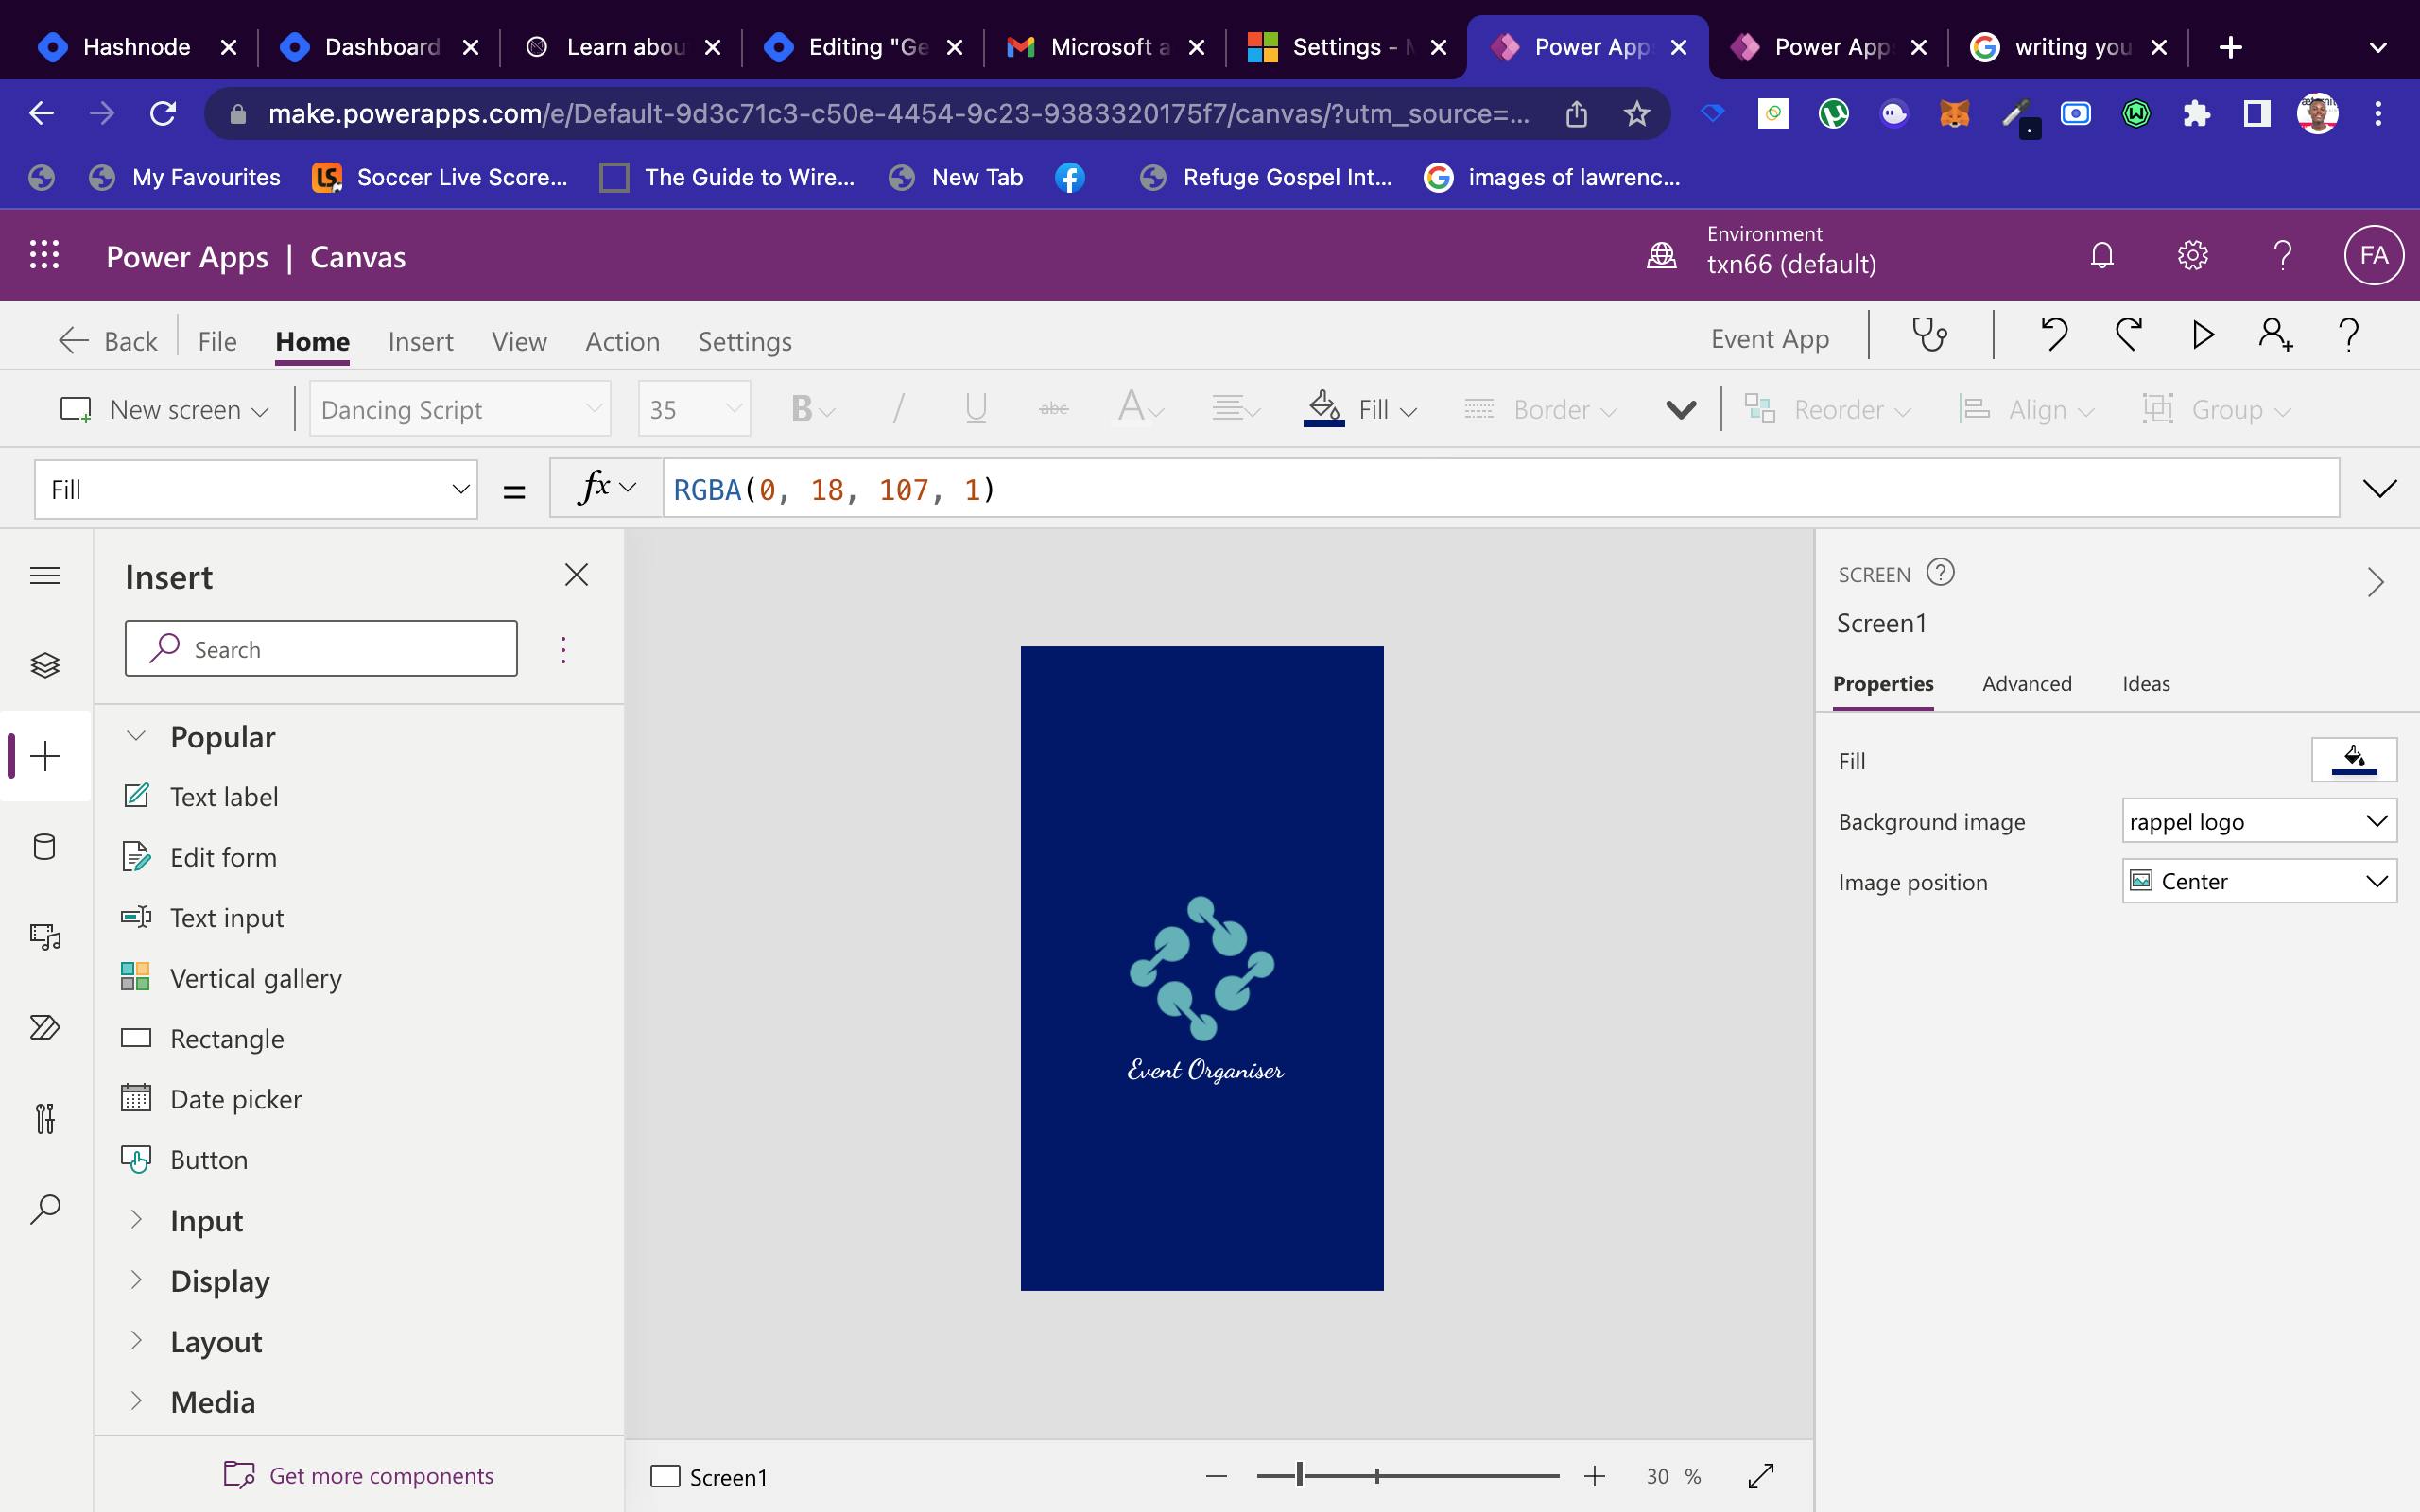
On the right side, in the properties settings, change the fill color to any color of choice and add a background image
Click on the add button on the left side of the screen, let us add a text label to our app
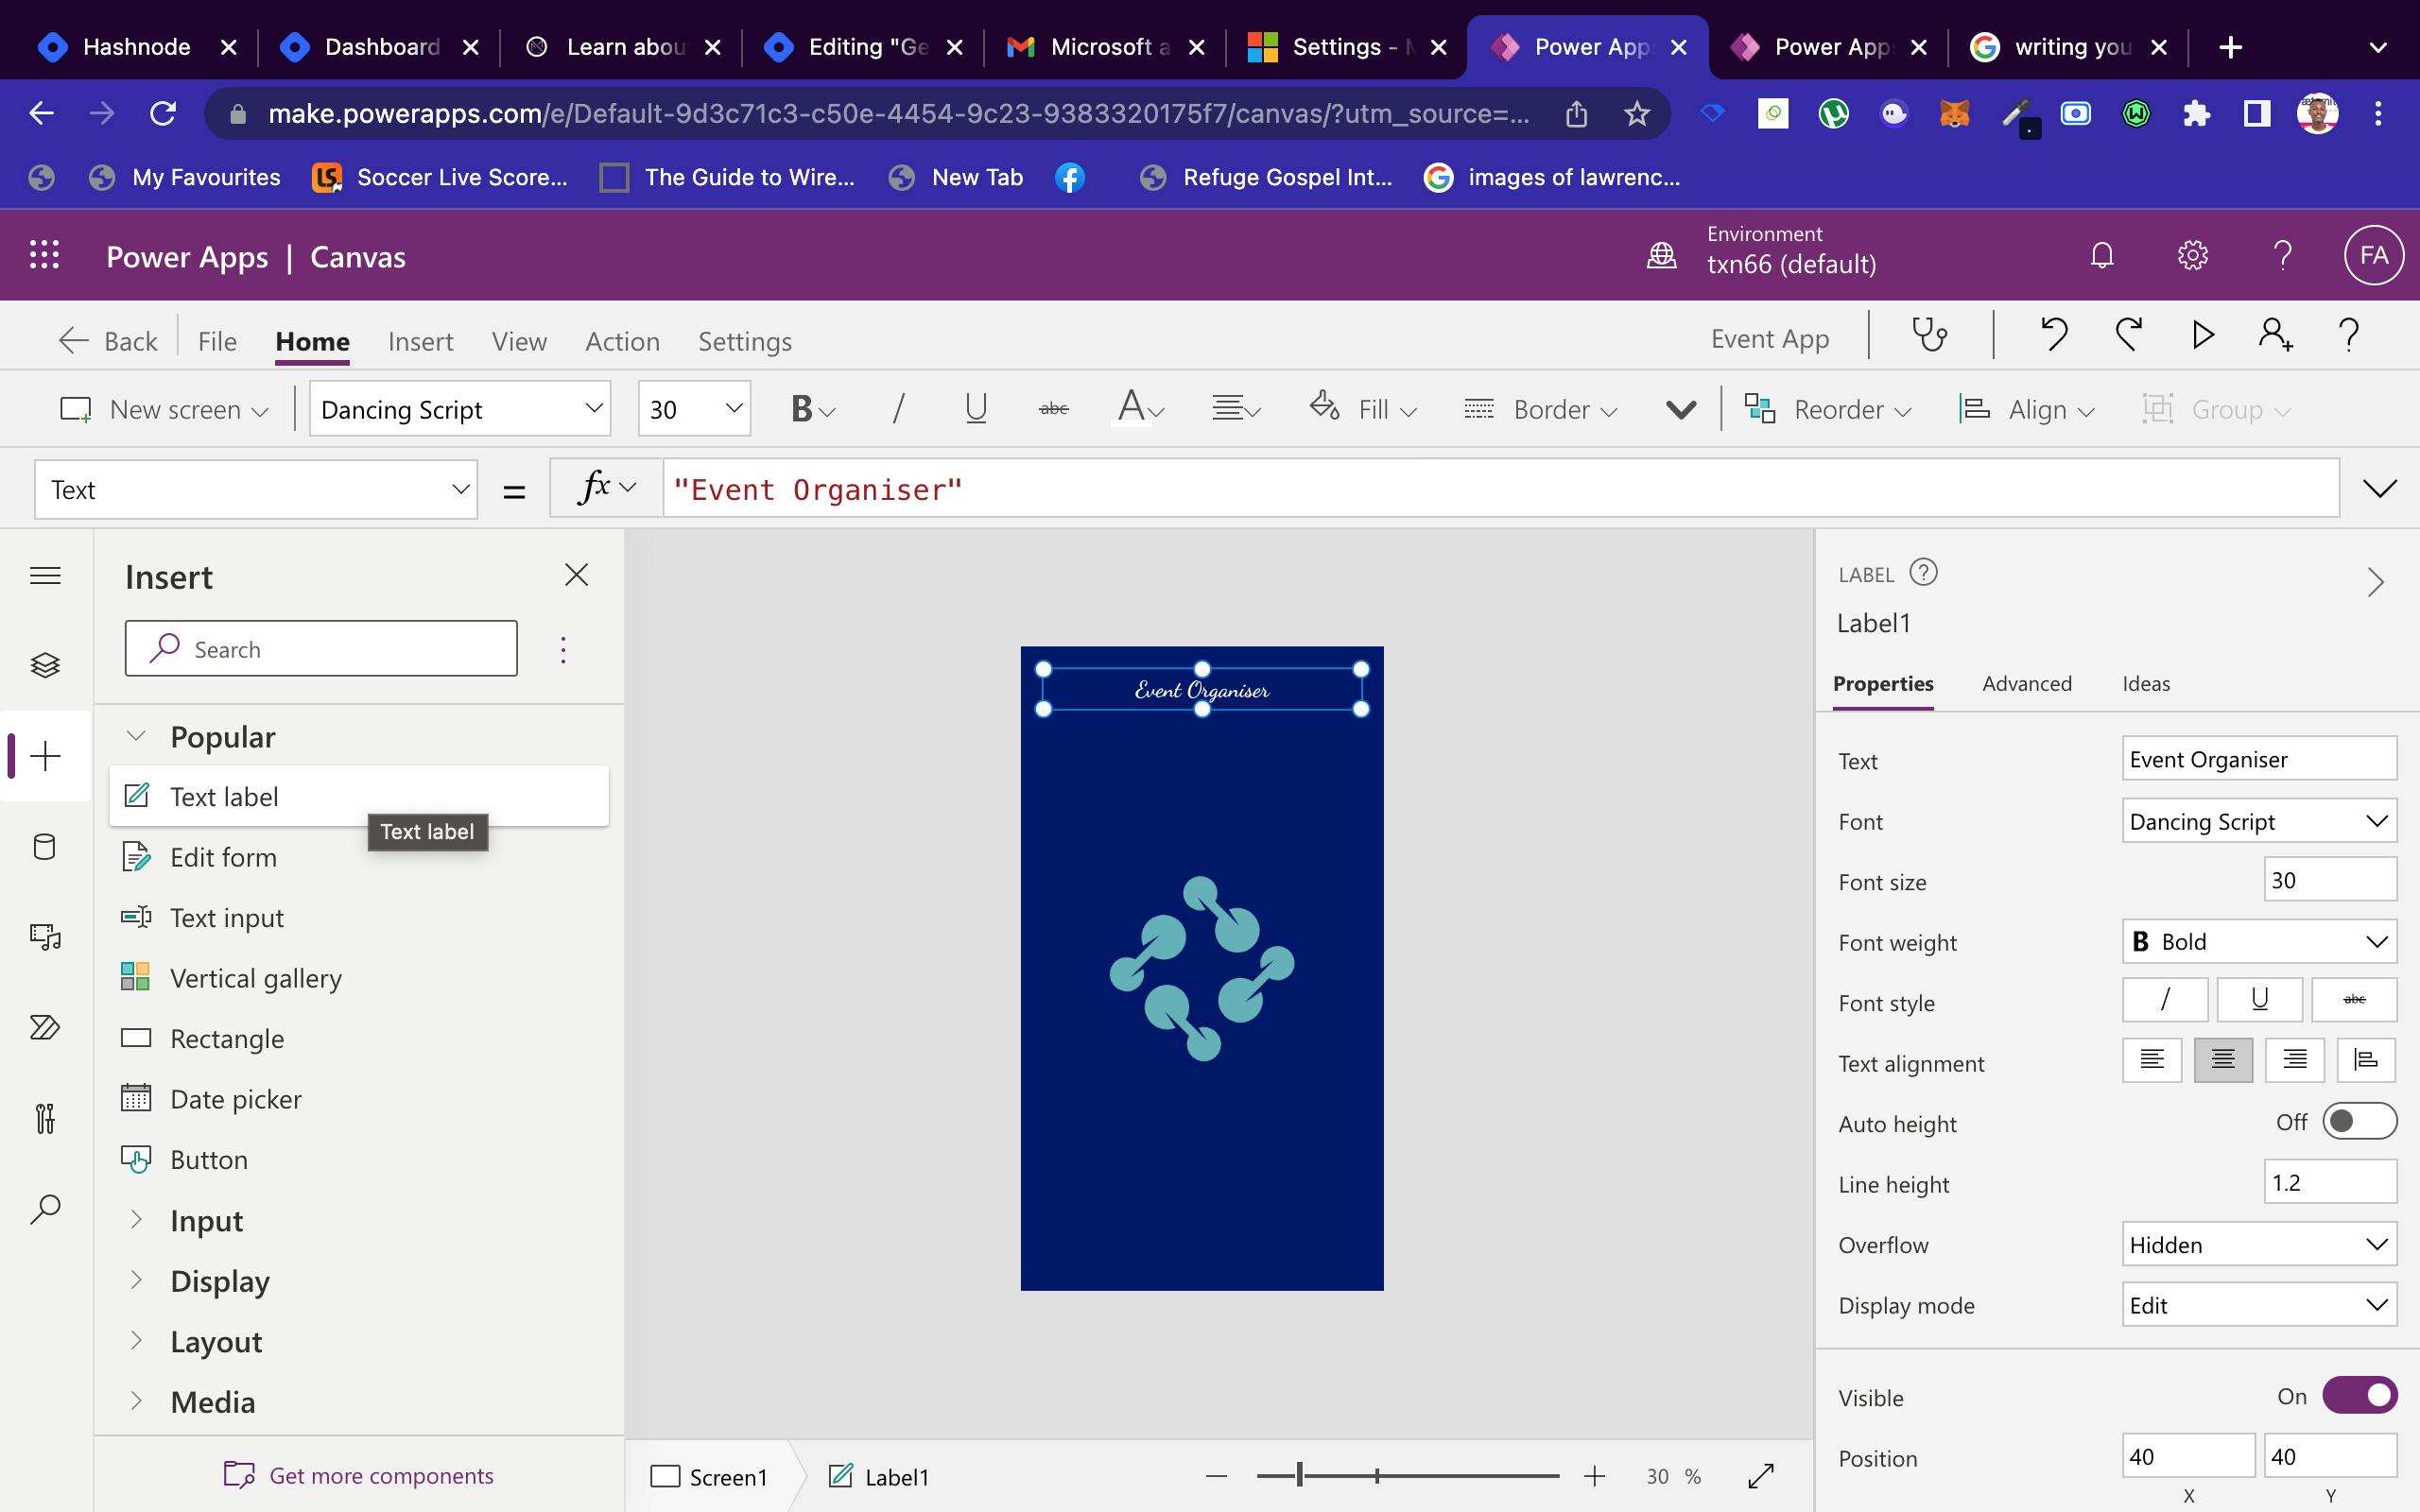
Enter a text as your app label. On the right side of the screen, you have the option to adjust the properties of the text label. This includes changing the font size, alignment, color, font weight, etc., kindly check them out to add more beauty to your app.
Now let us proceed to add a button to our app
Still, on the insert pane, scroll and locate the button as part of the insert tools/options and click on it. Then on the right side of the screen, add the button's text. Feel free to style the text more by checking out the other font options.
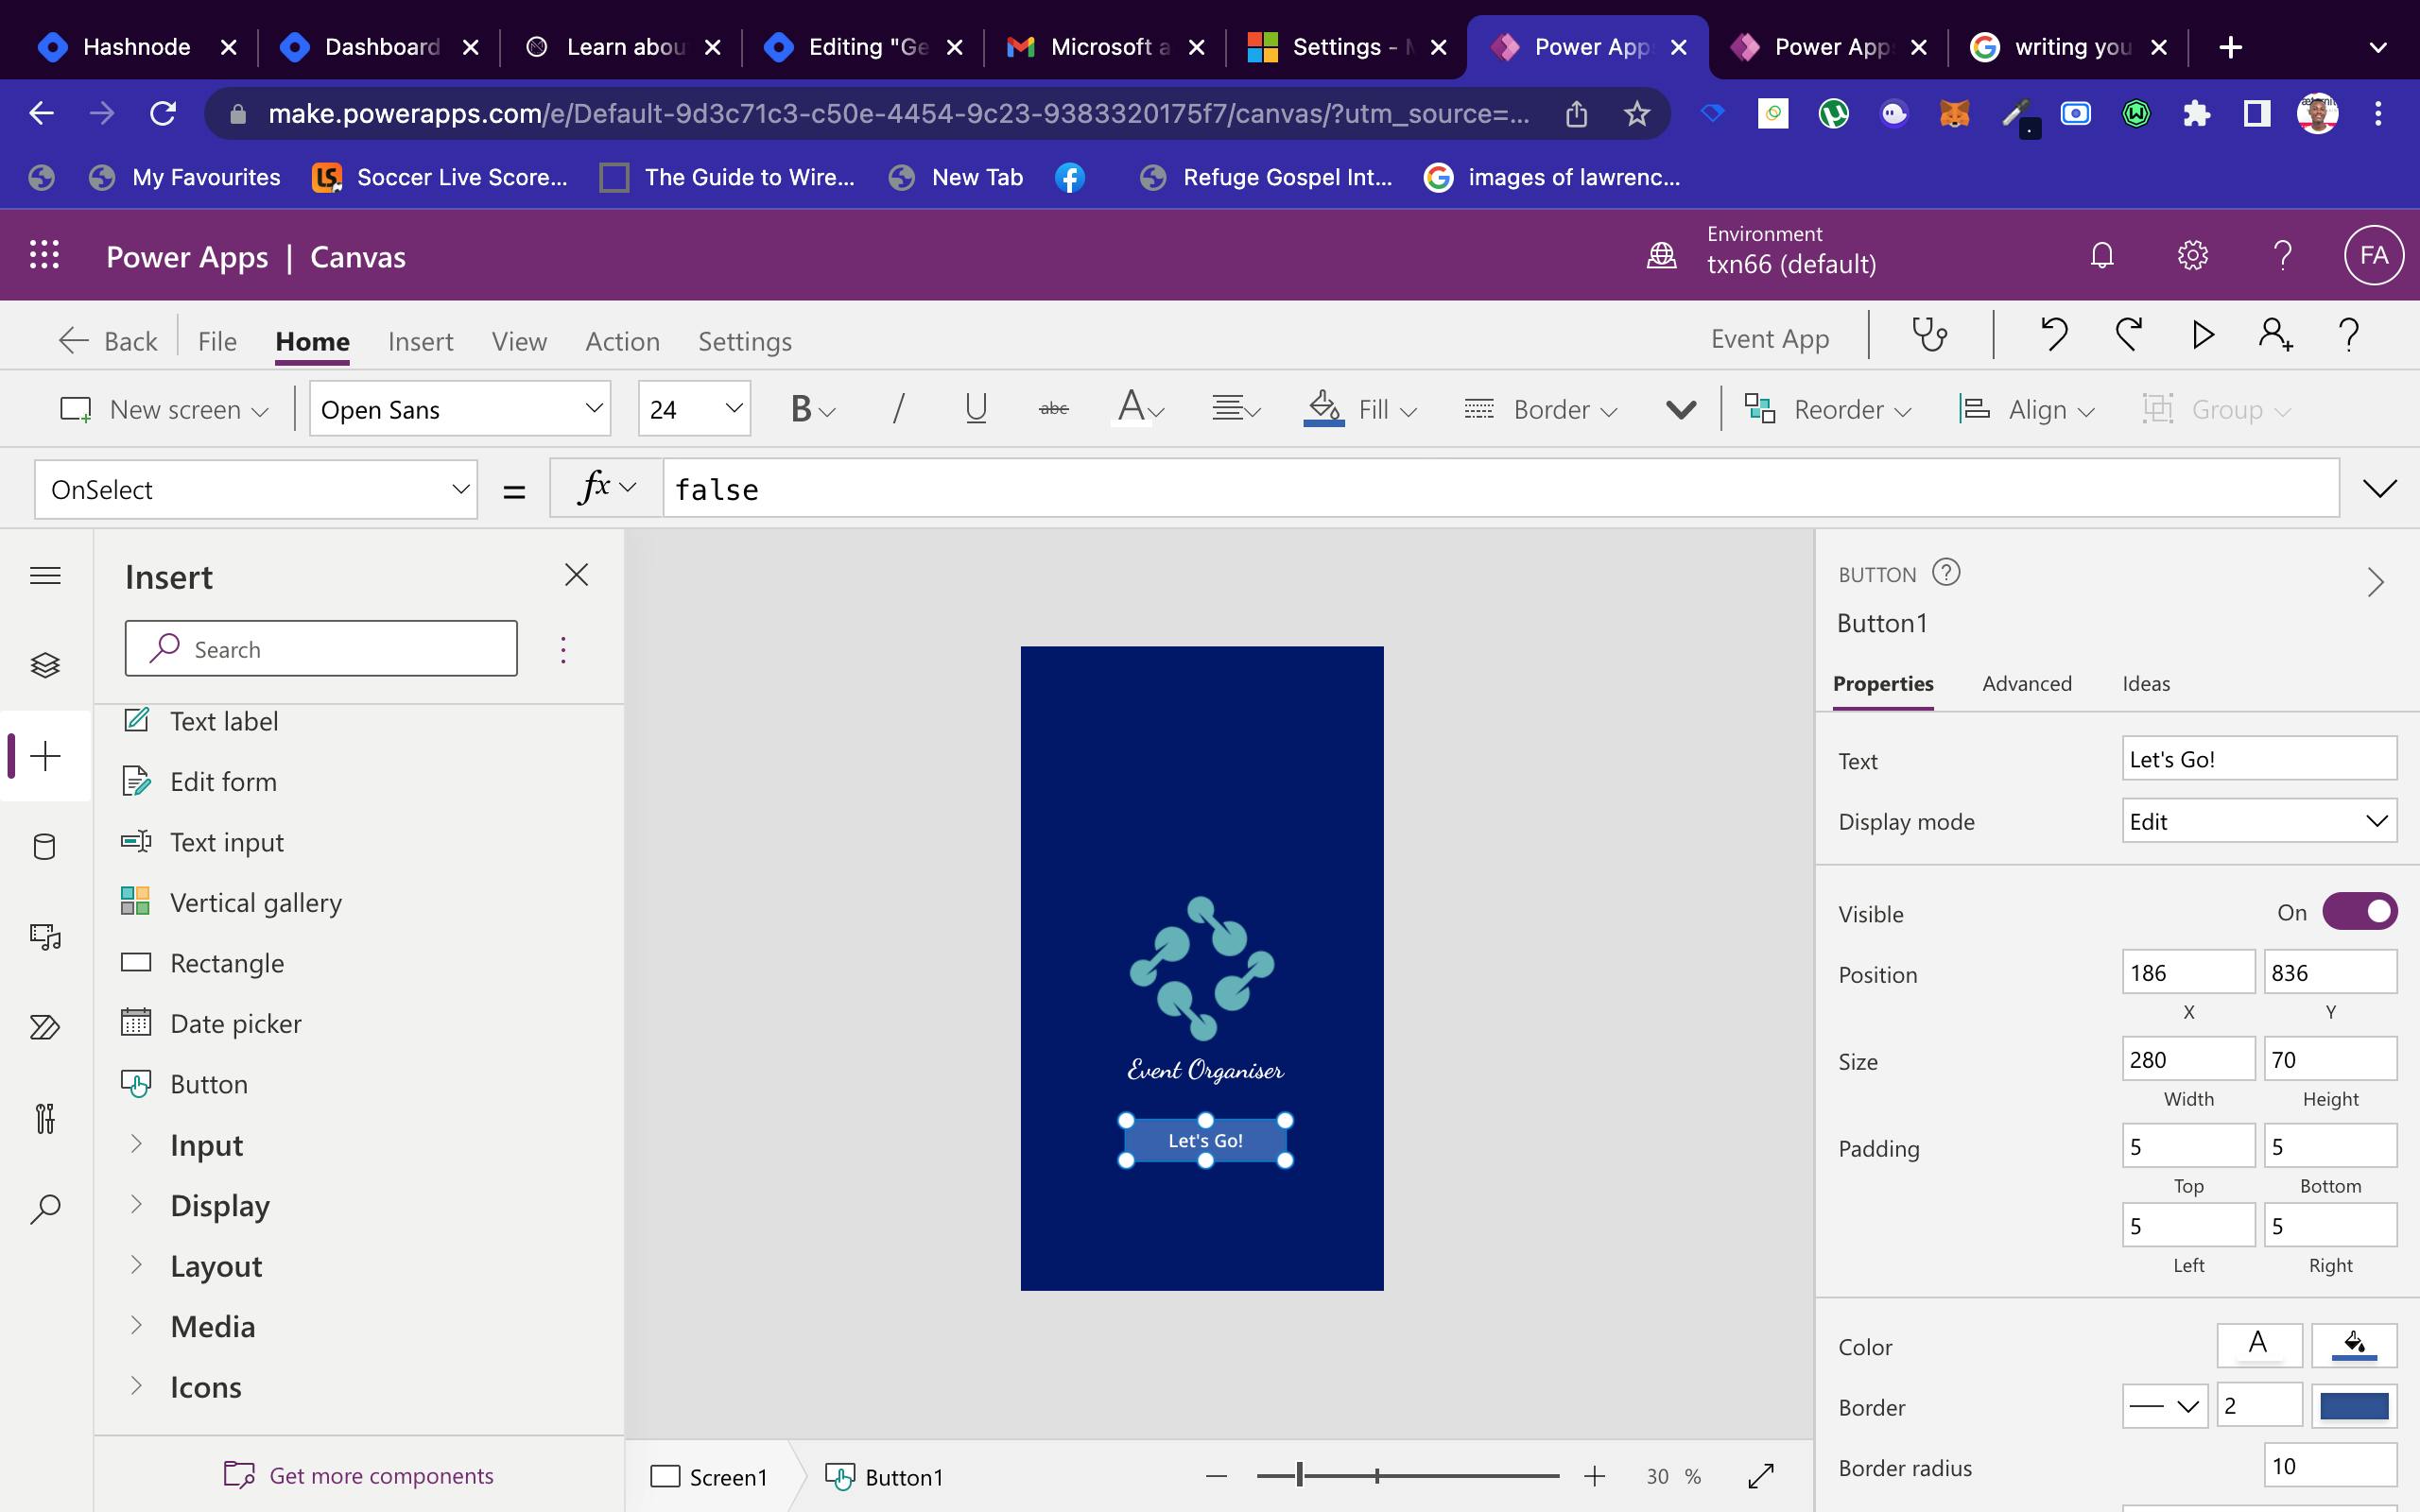
With the last task, we are done with screen 1, let us proceed to screen 2.
On the top menu, click on the New Screen button dropdown and select the tutorial Screen option
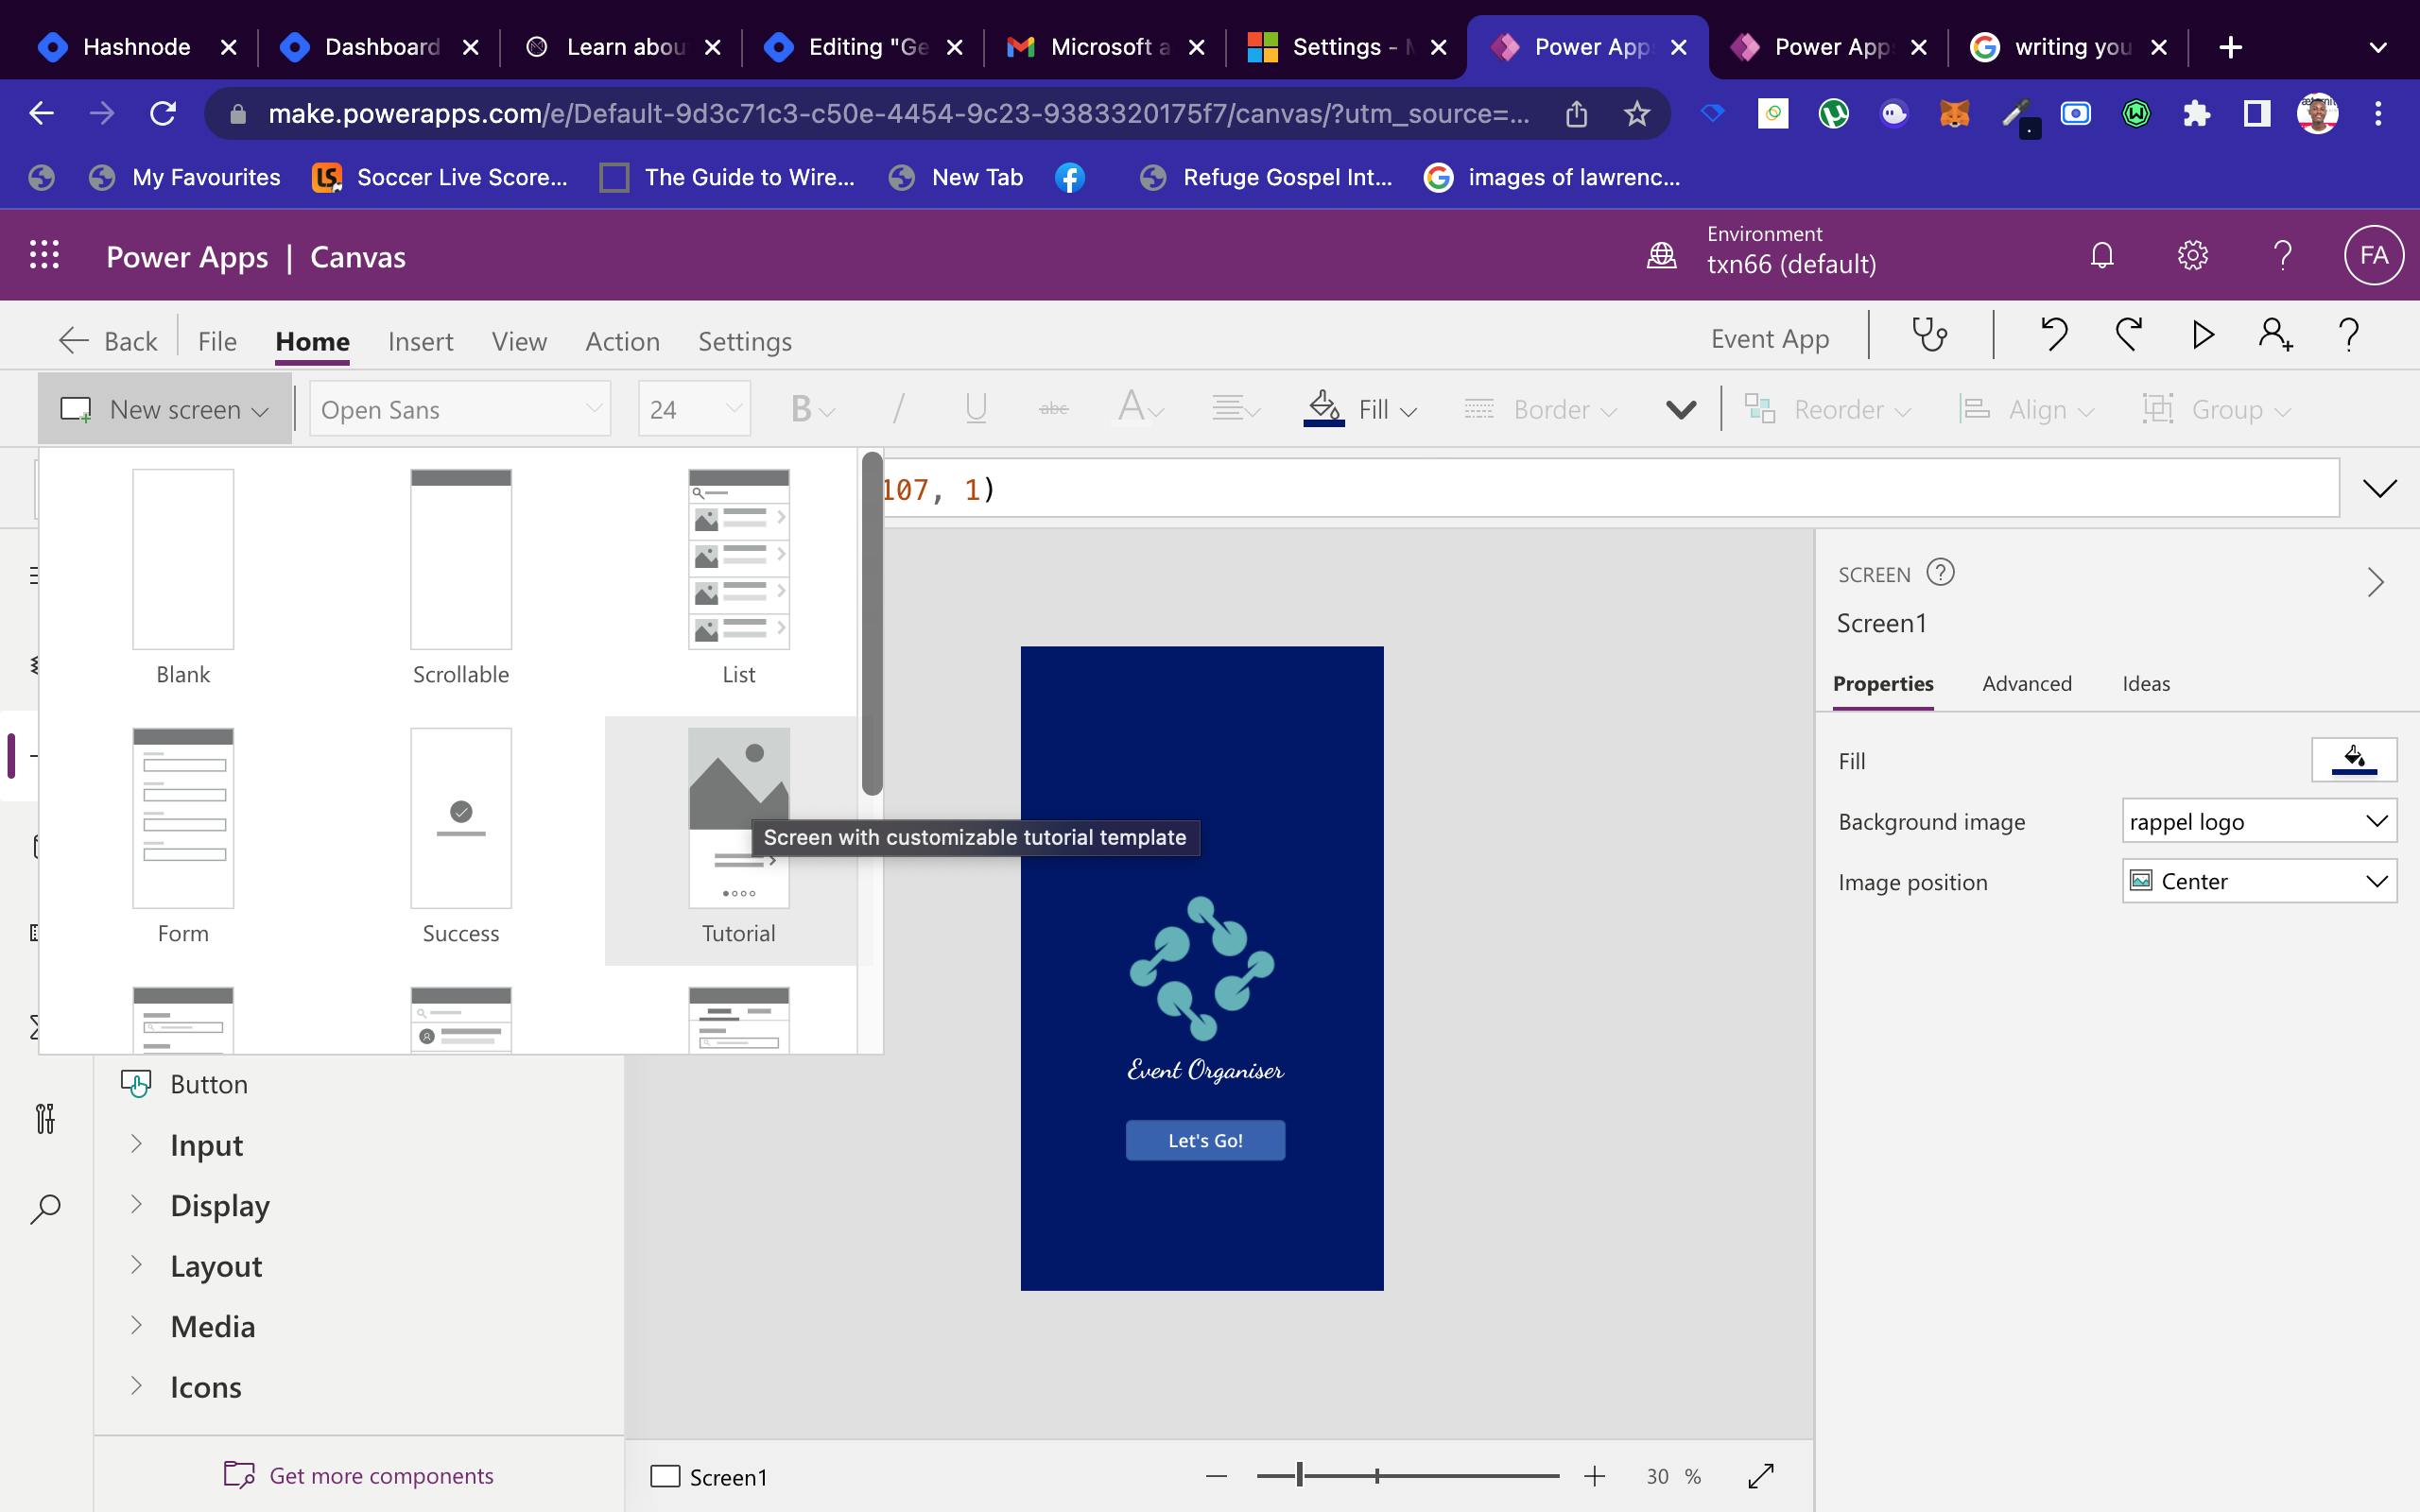
A Tutorial Screen shows people how to use your app.
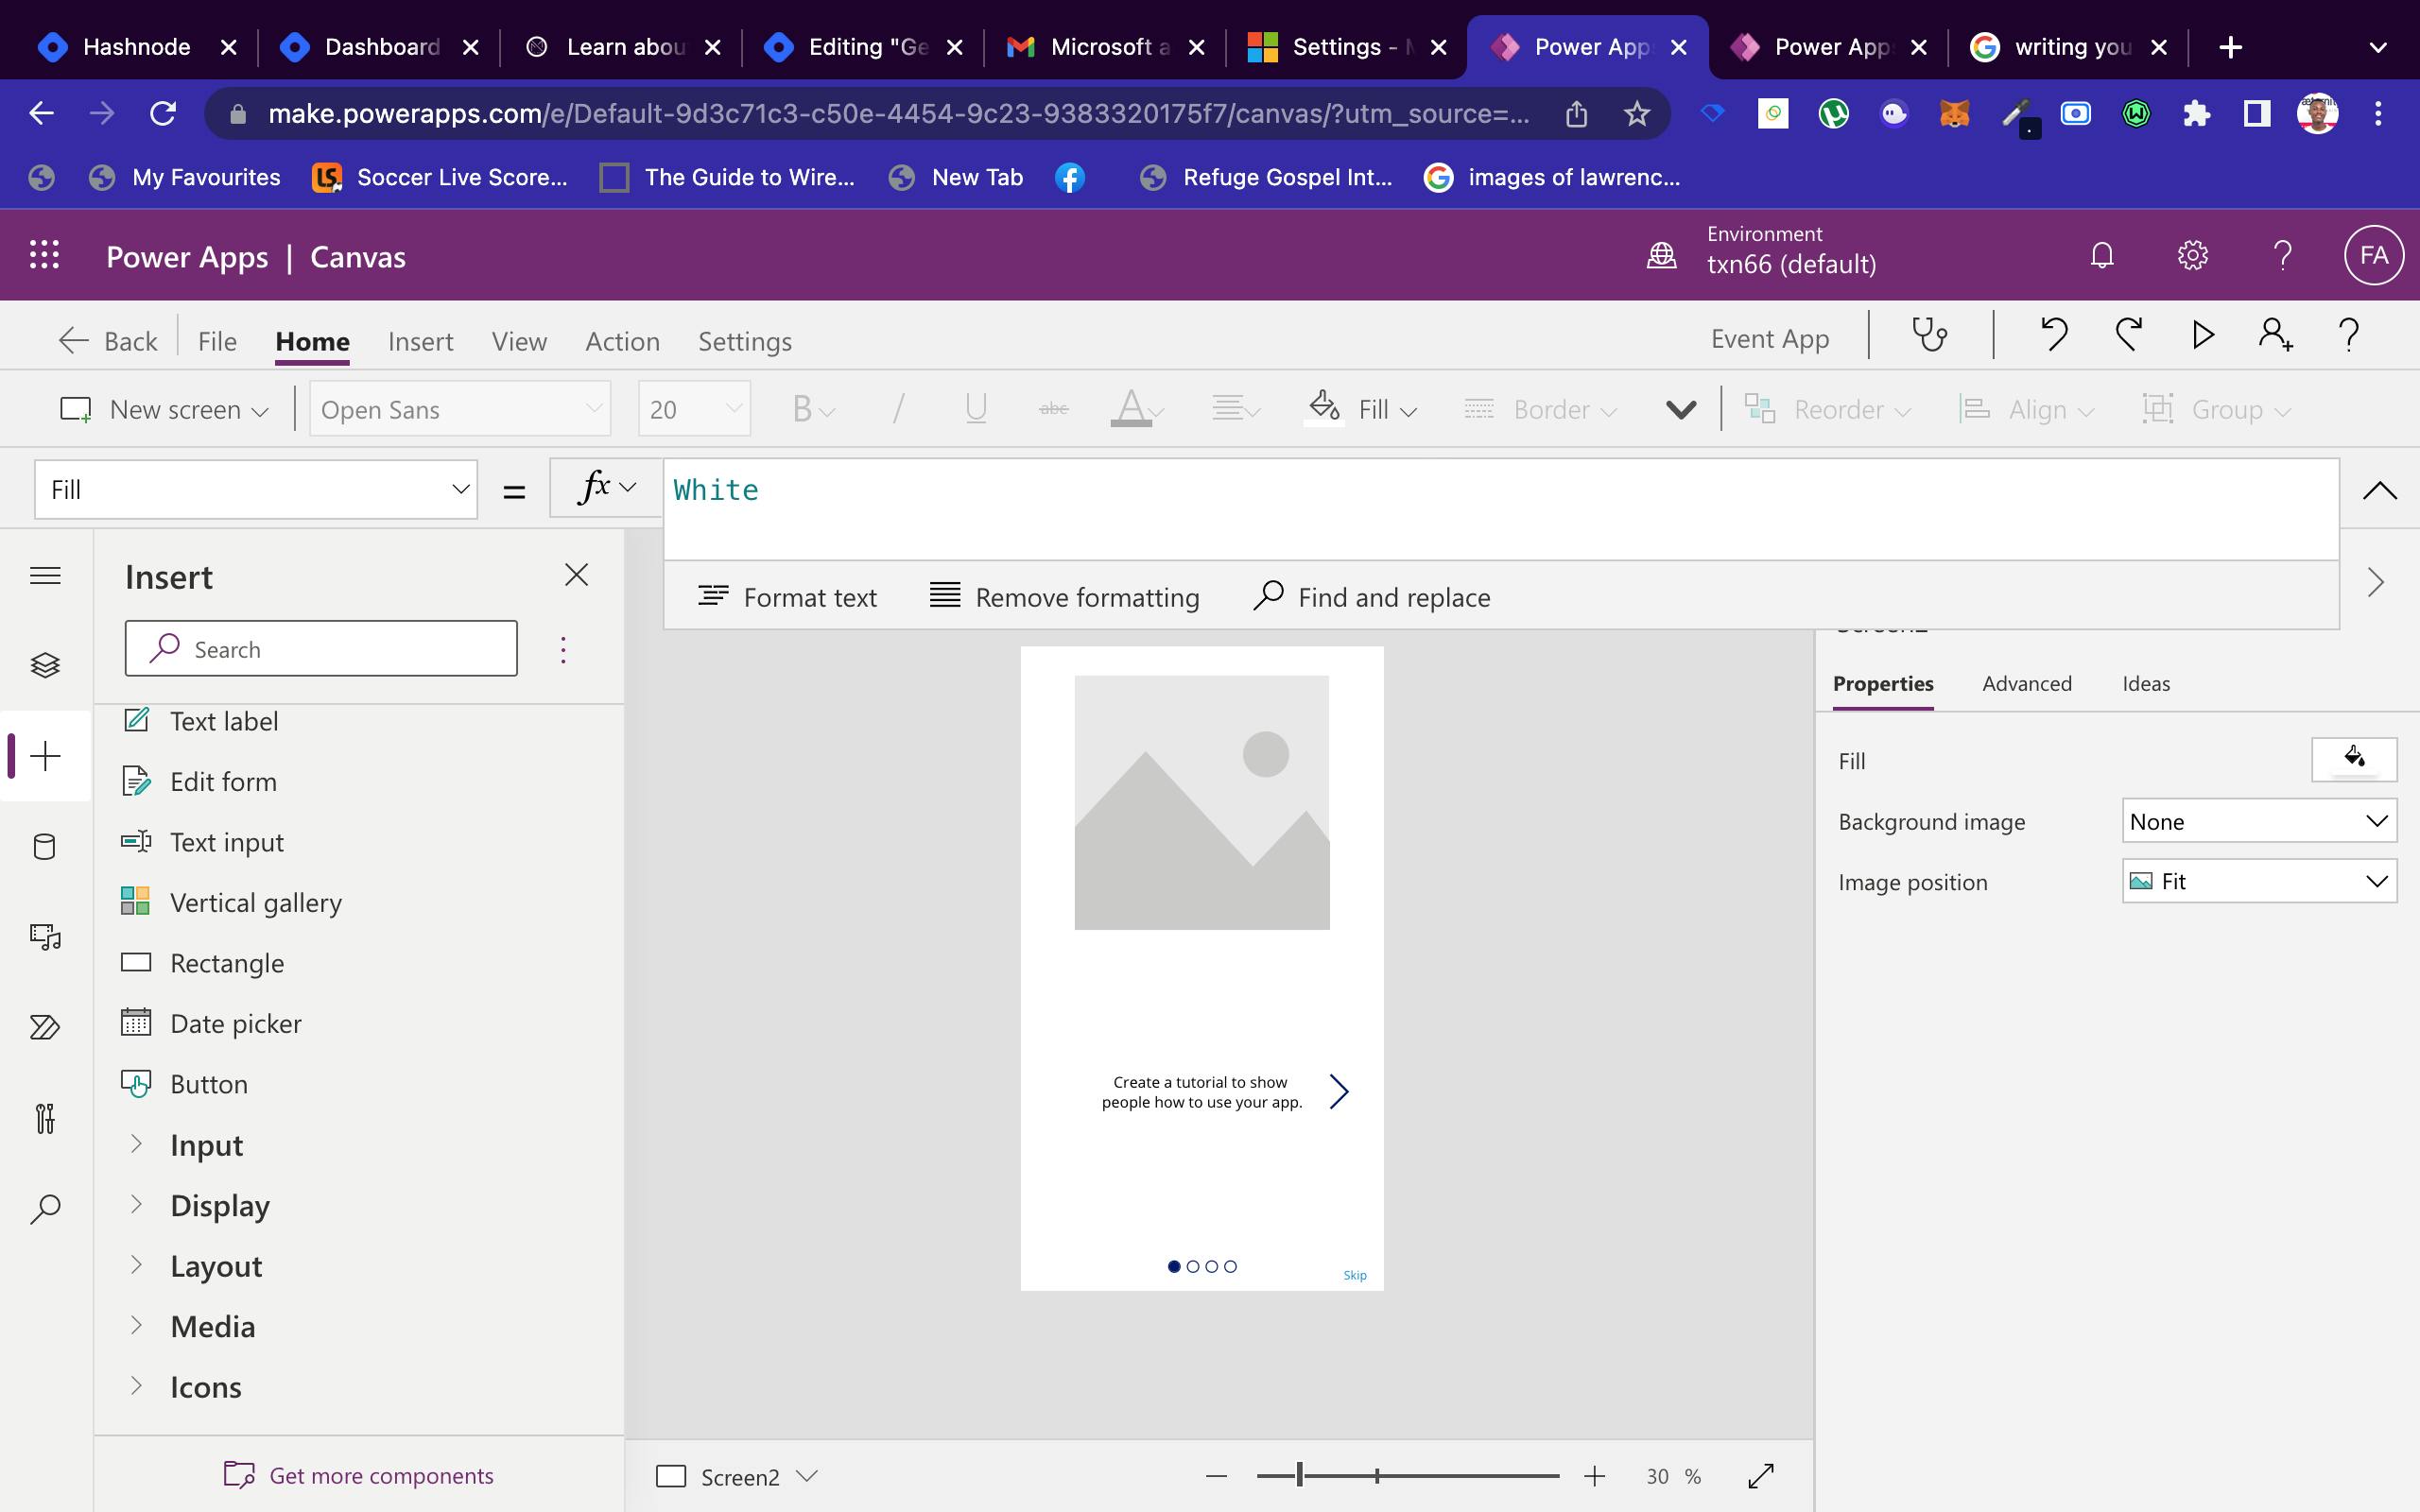
Click on the image placeholder on the screen and notice the code beside the function button
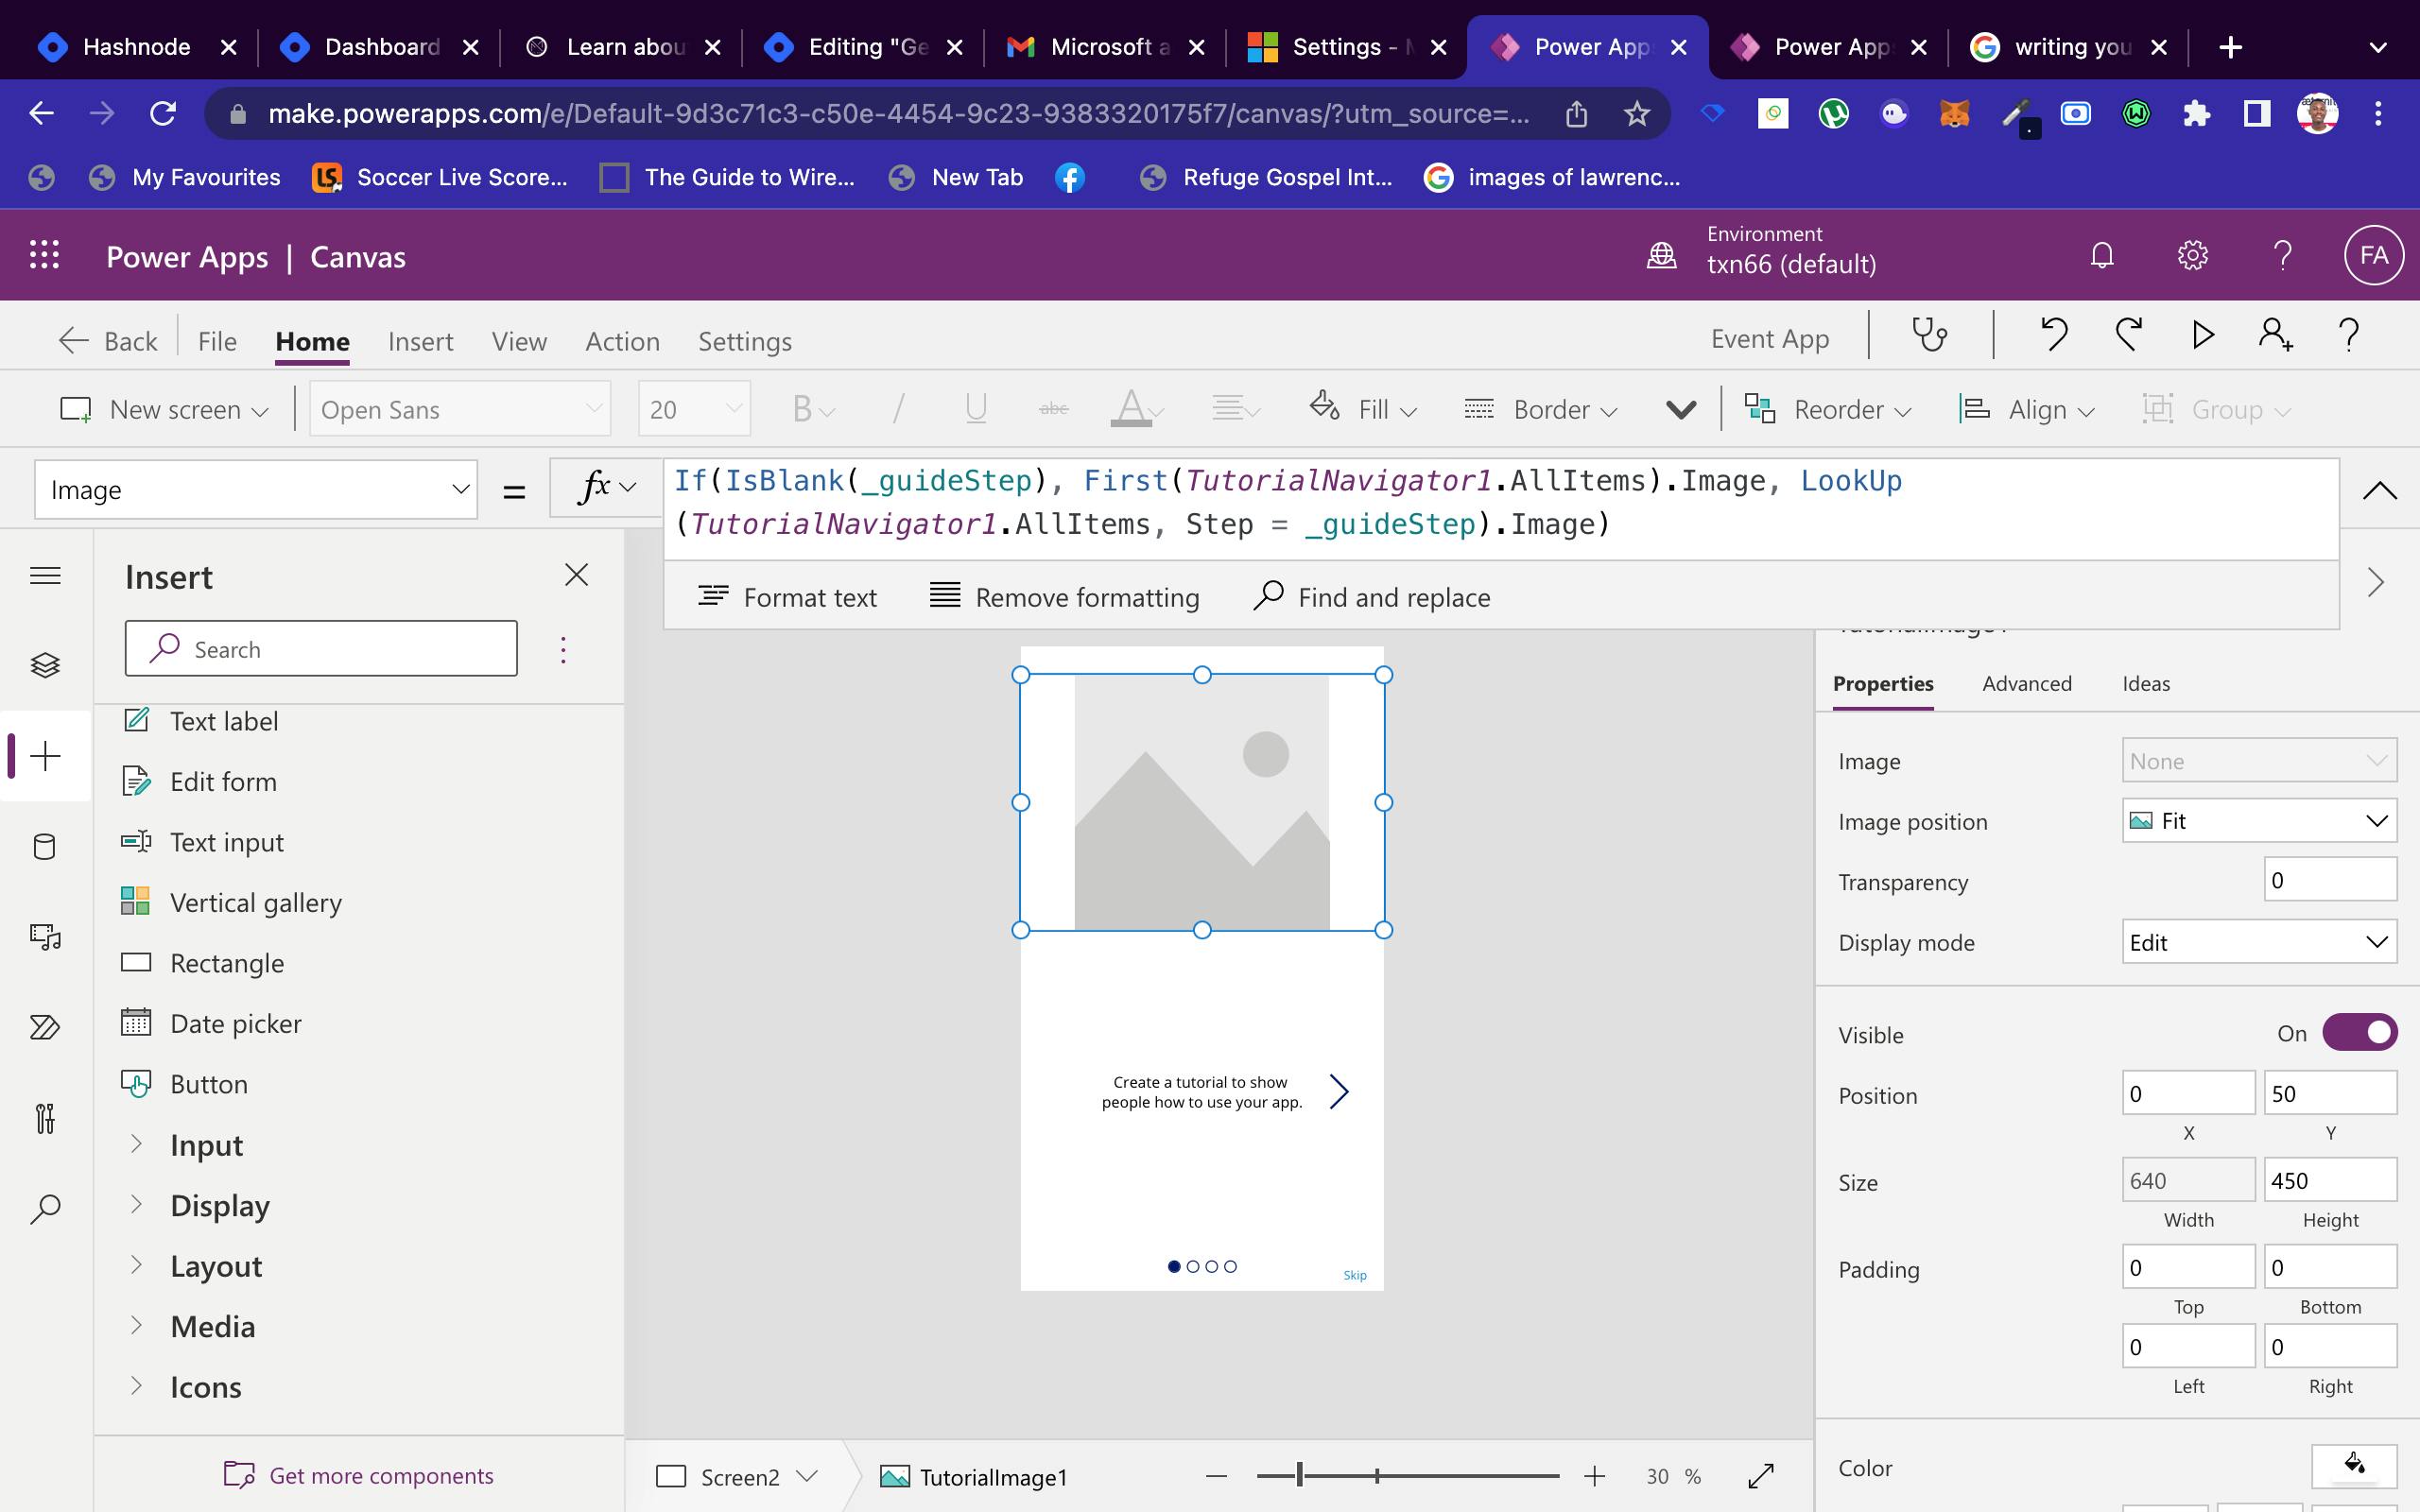
Replace the code with this;
If(IsBlank(_guideStep), First(TutorialNavigator1.AllItems).Text, LookUp(TutorialNavigator1.AllItems, Step = _guideStep).Text)
We changed the code to remove the image placeholder that comes with the tutorial screen as we won't be needing it for this app.
Our screen now looks like this:
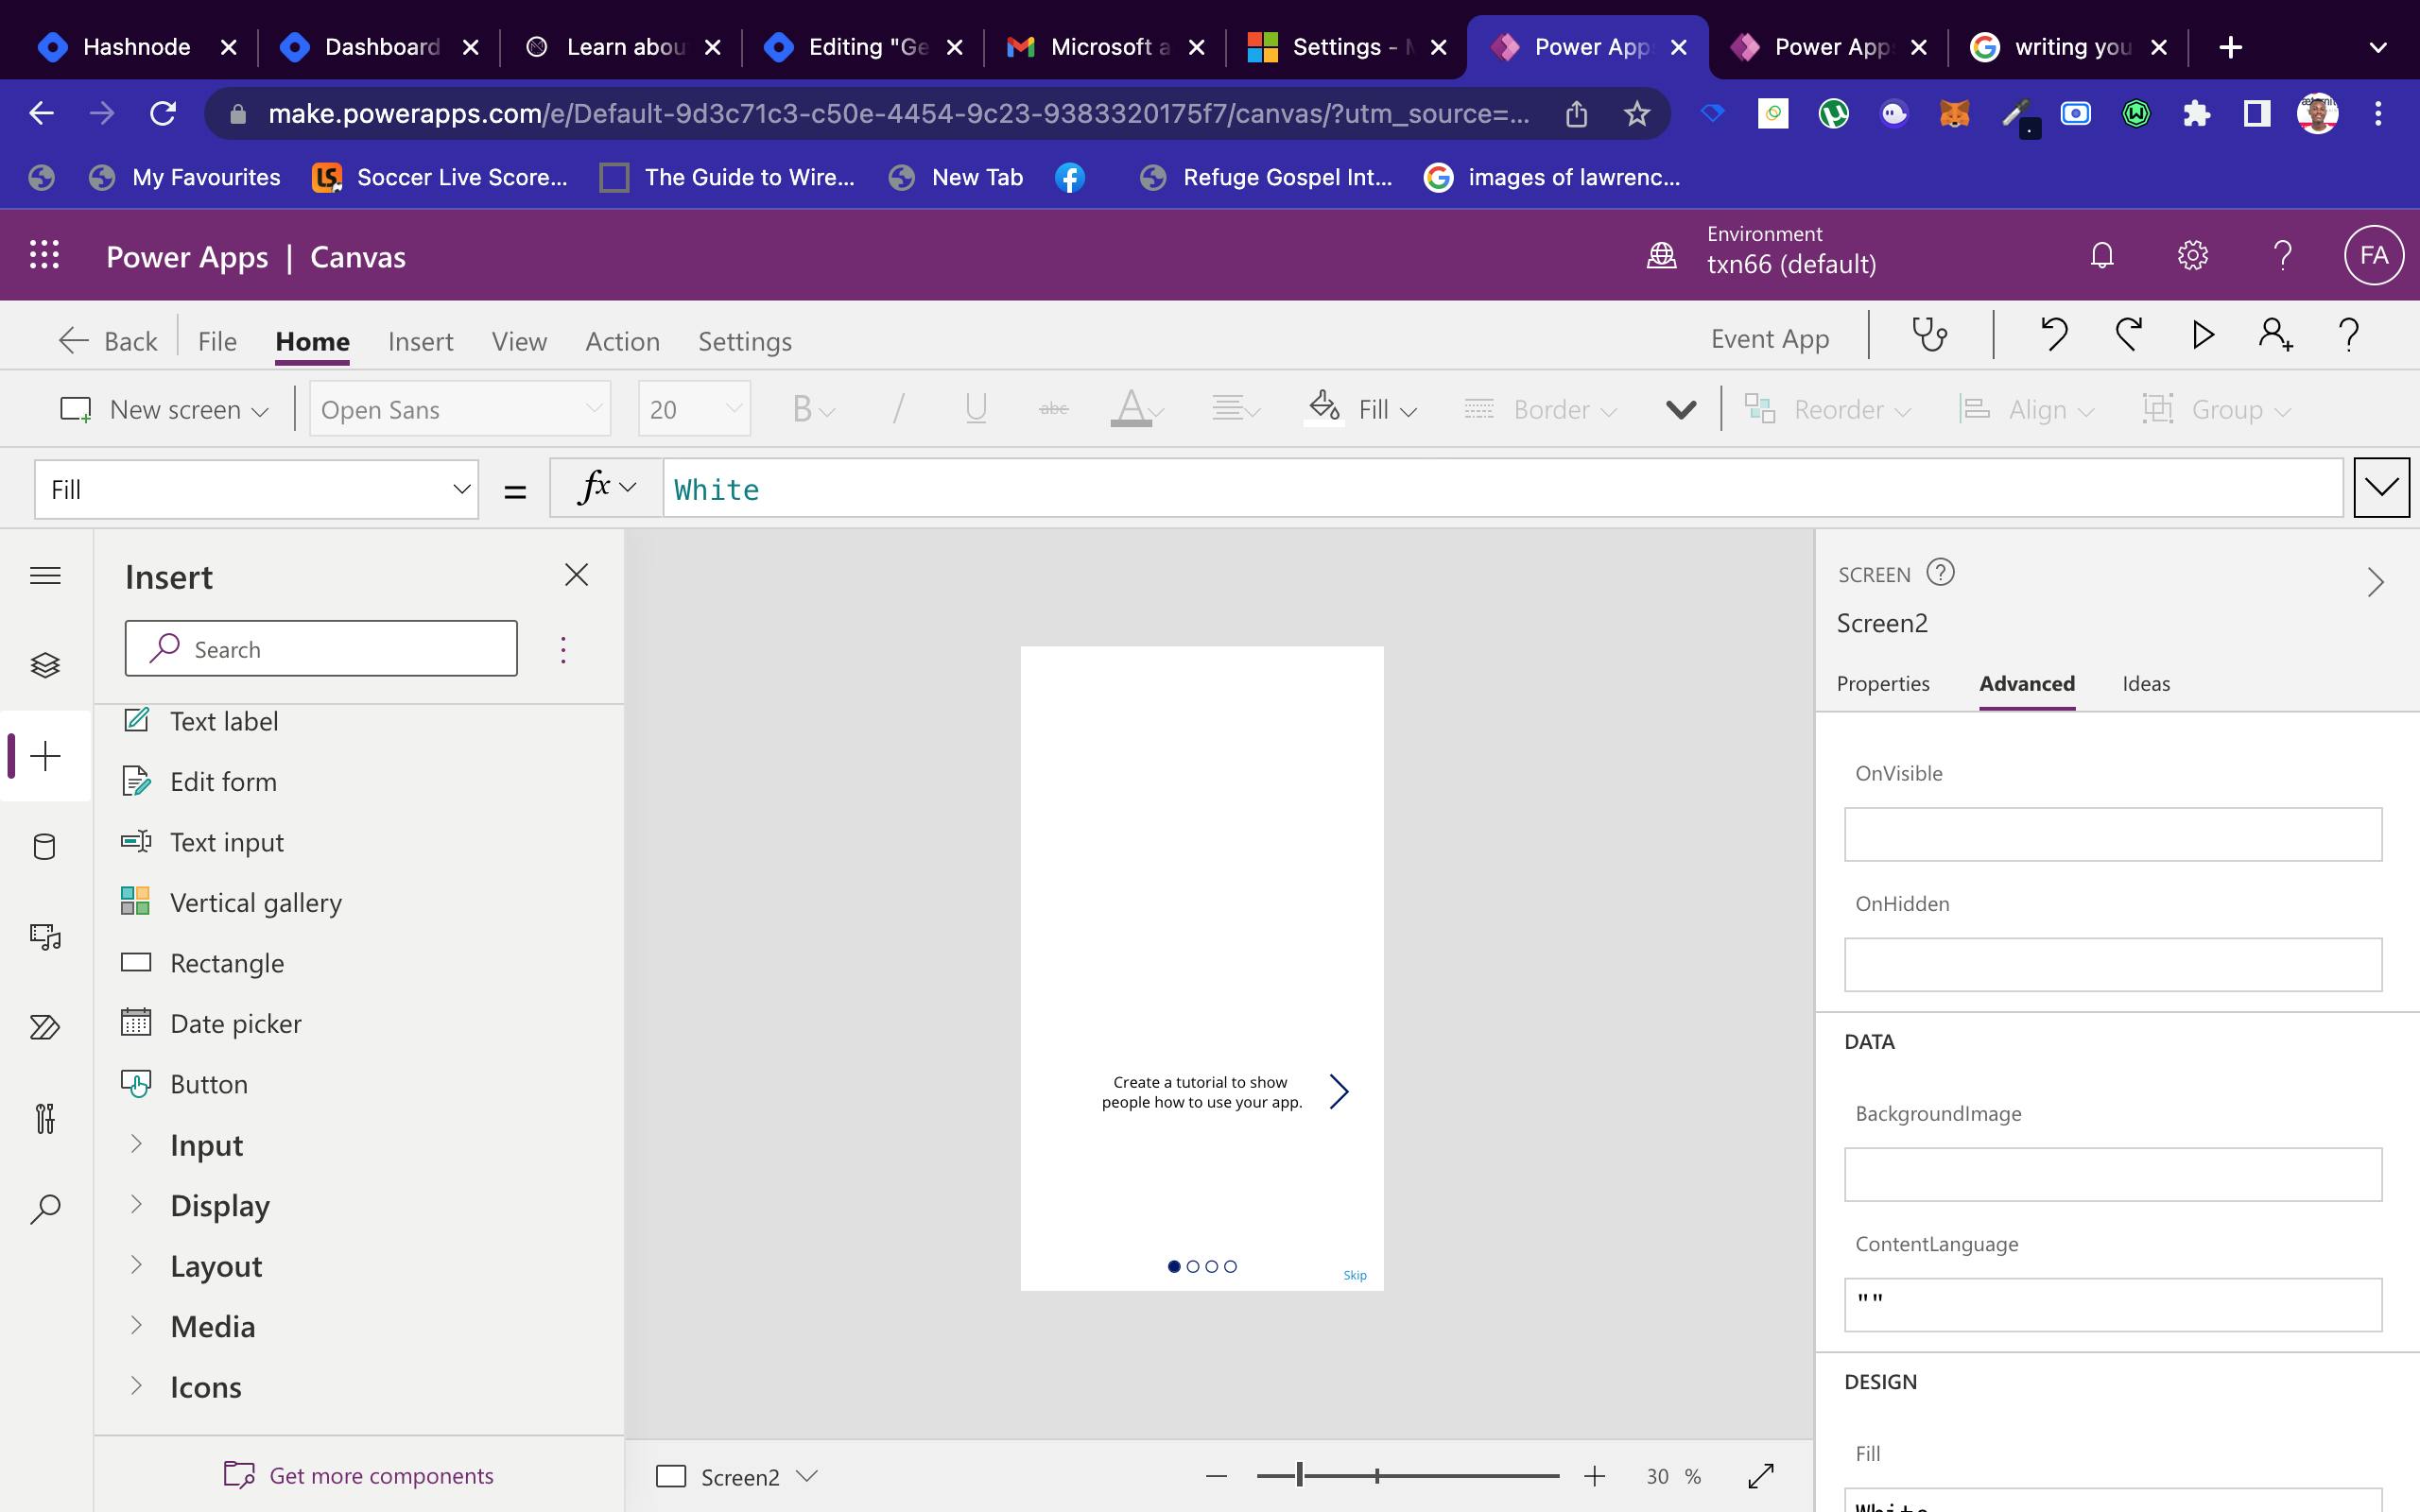
Now let us add a background image and adjust the background and the fill color.
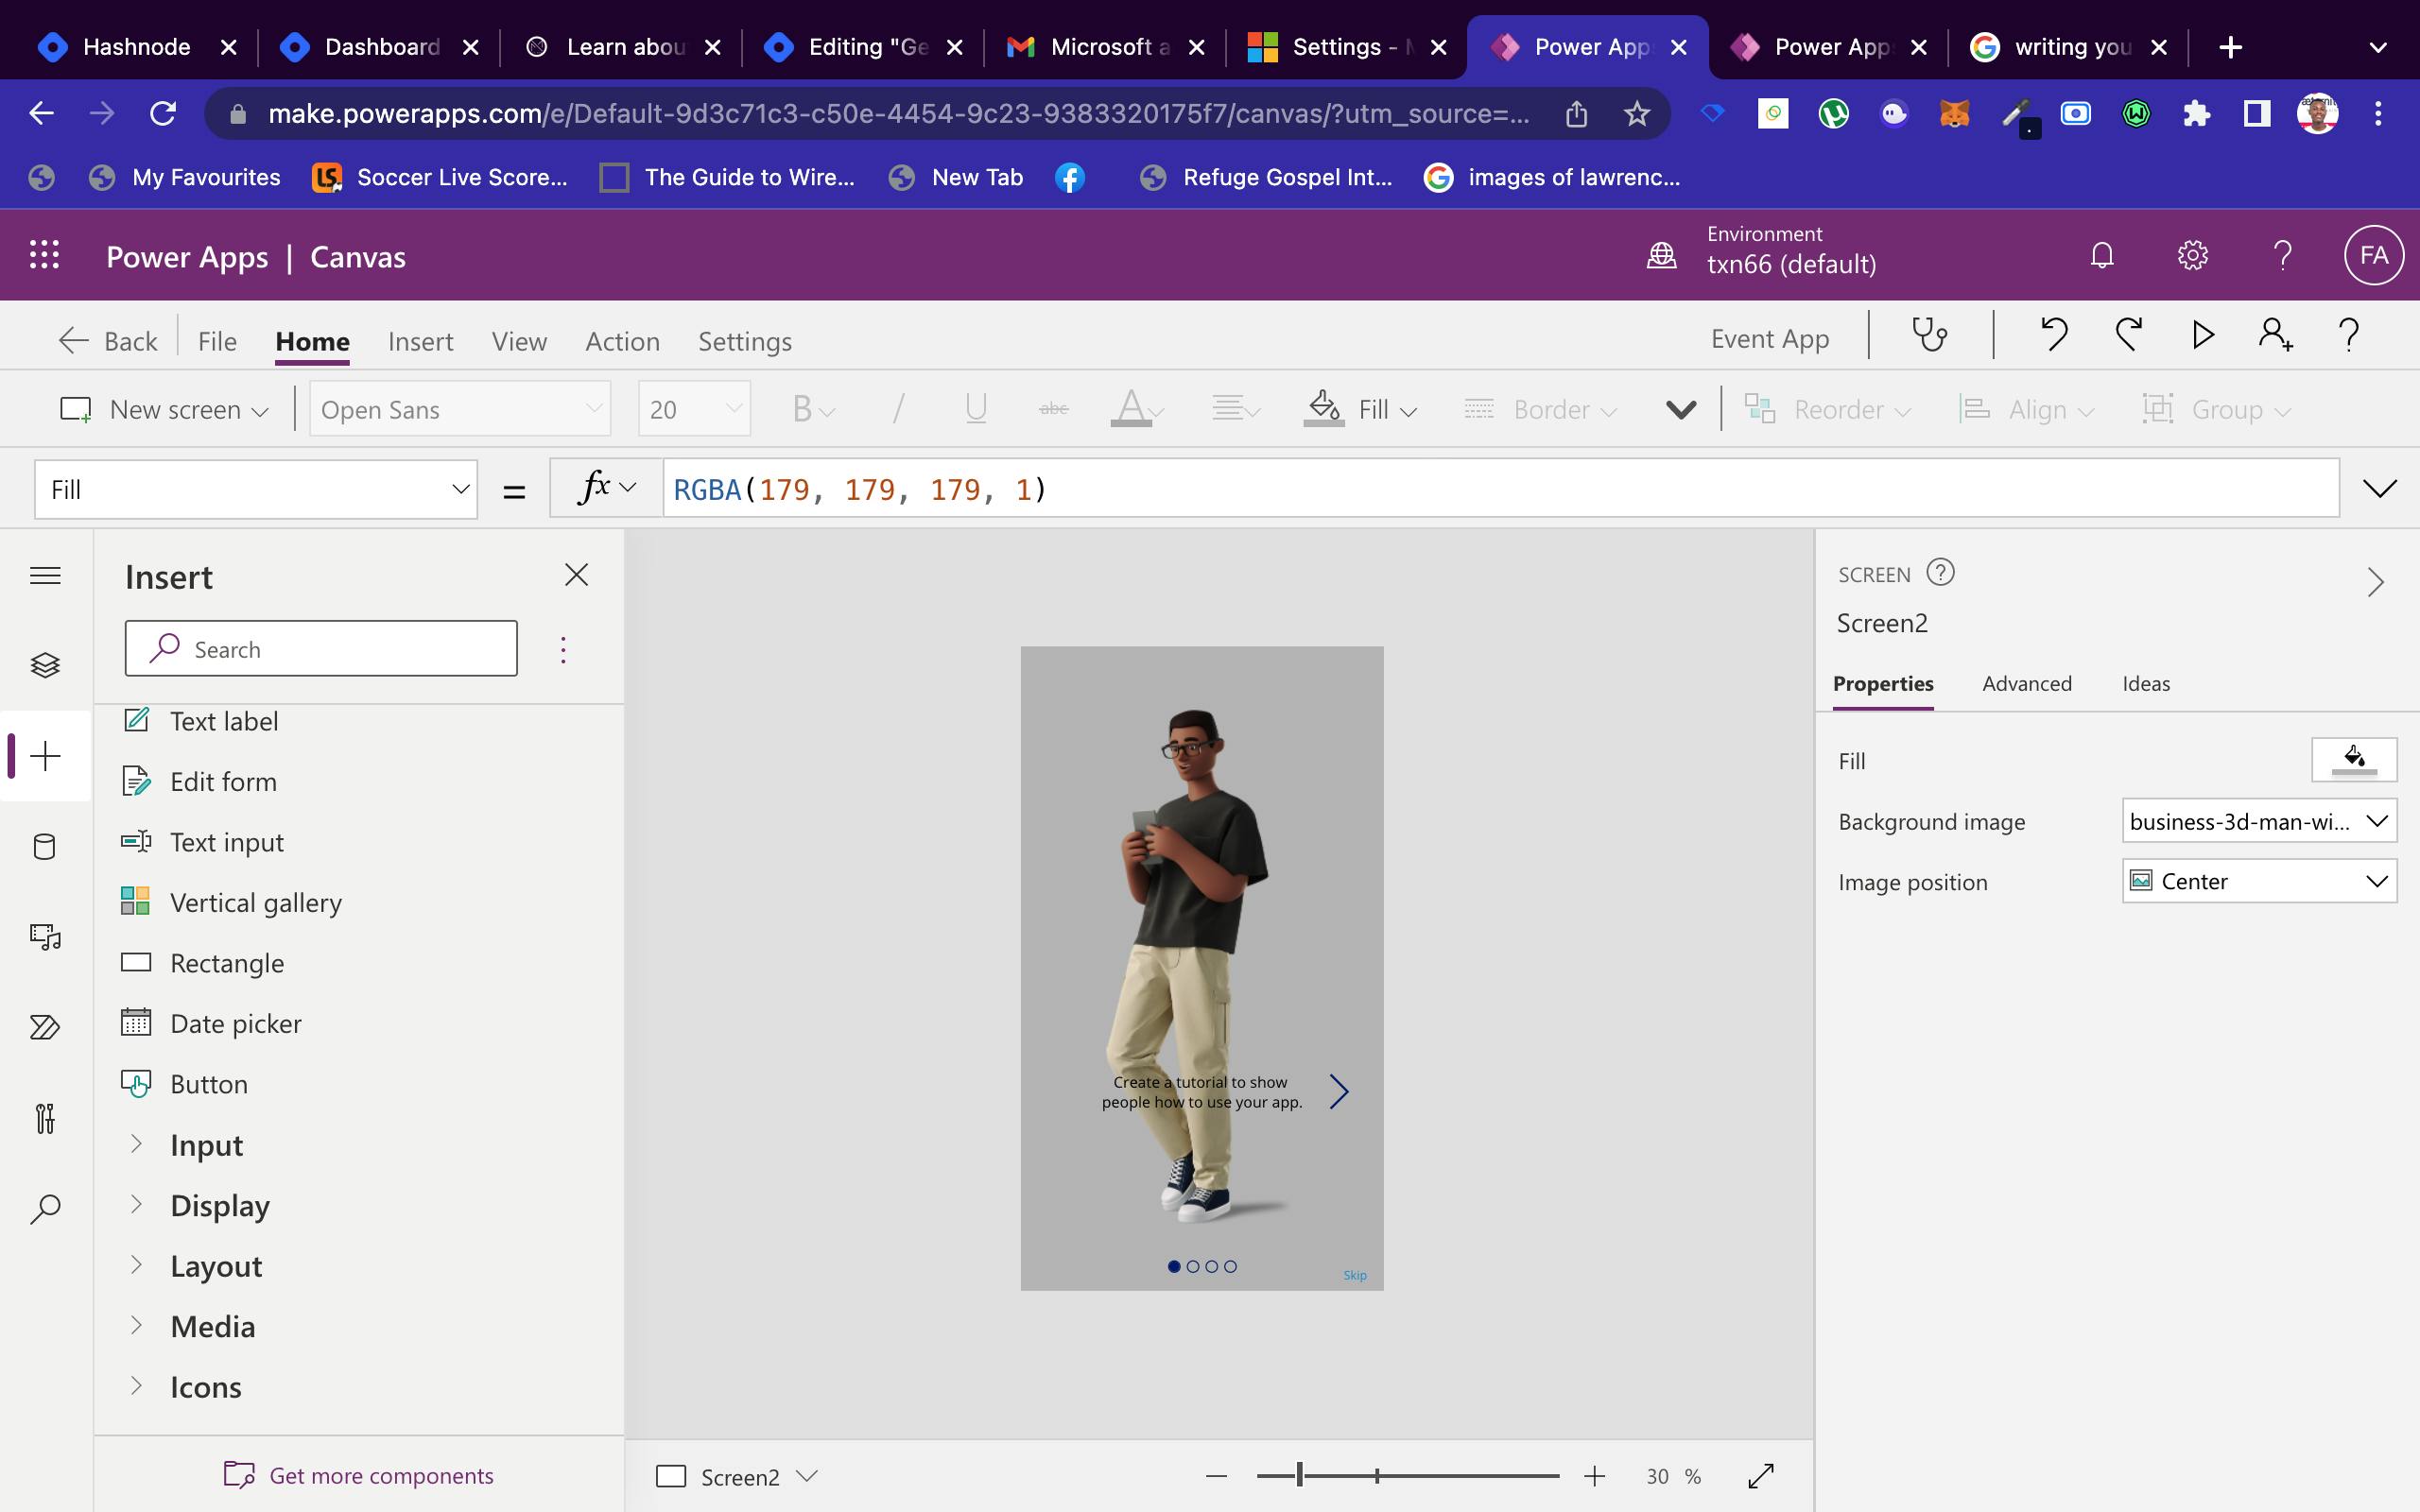
Now let us change the "Create a tutorial to show people how to use your app" text and other default text in the app. To do this click the TutorialNavigator1 Gallery tool.
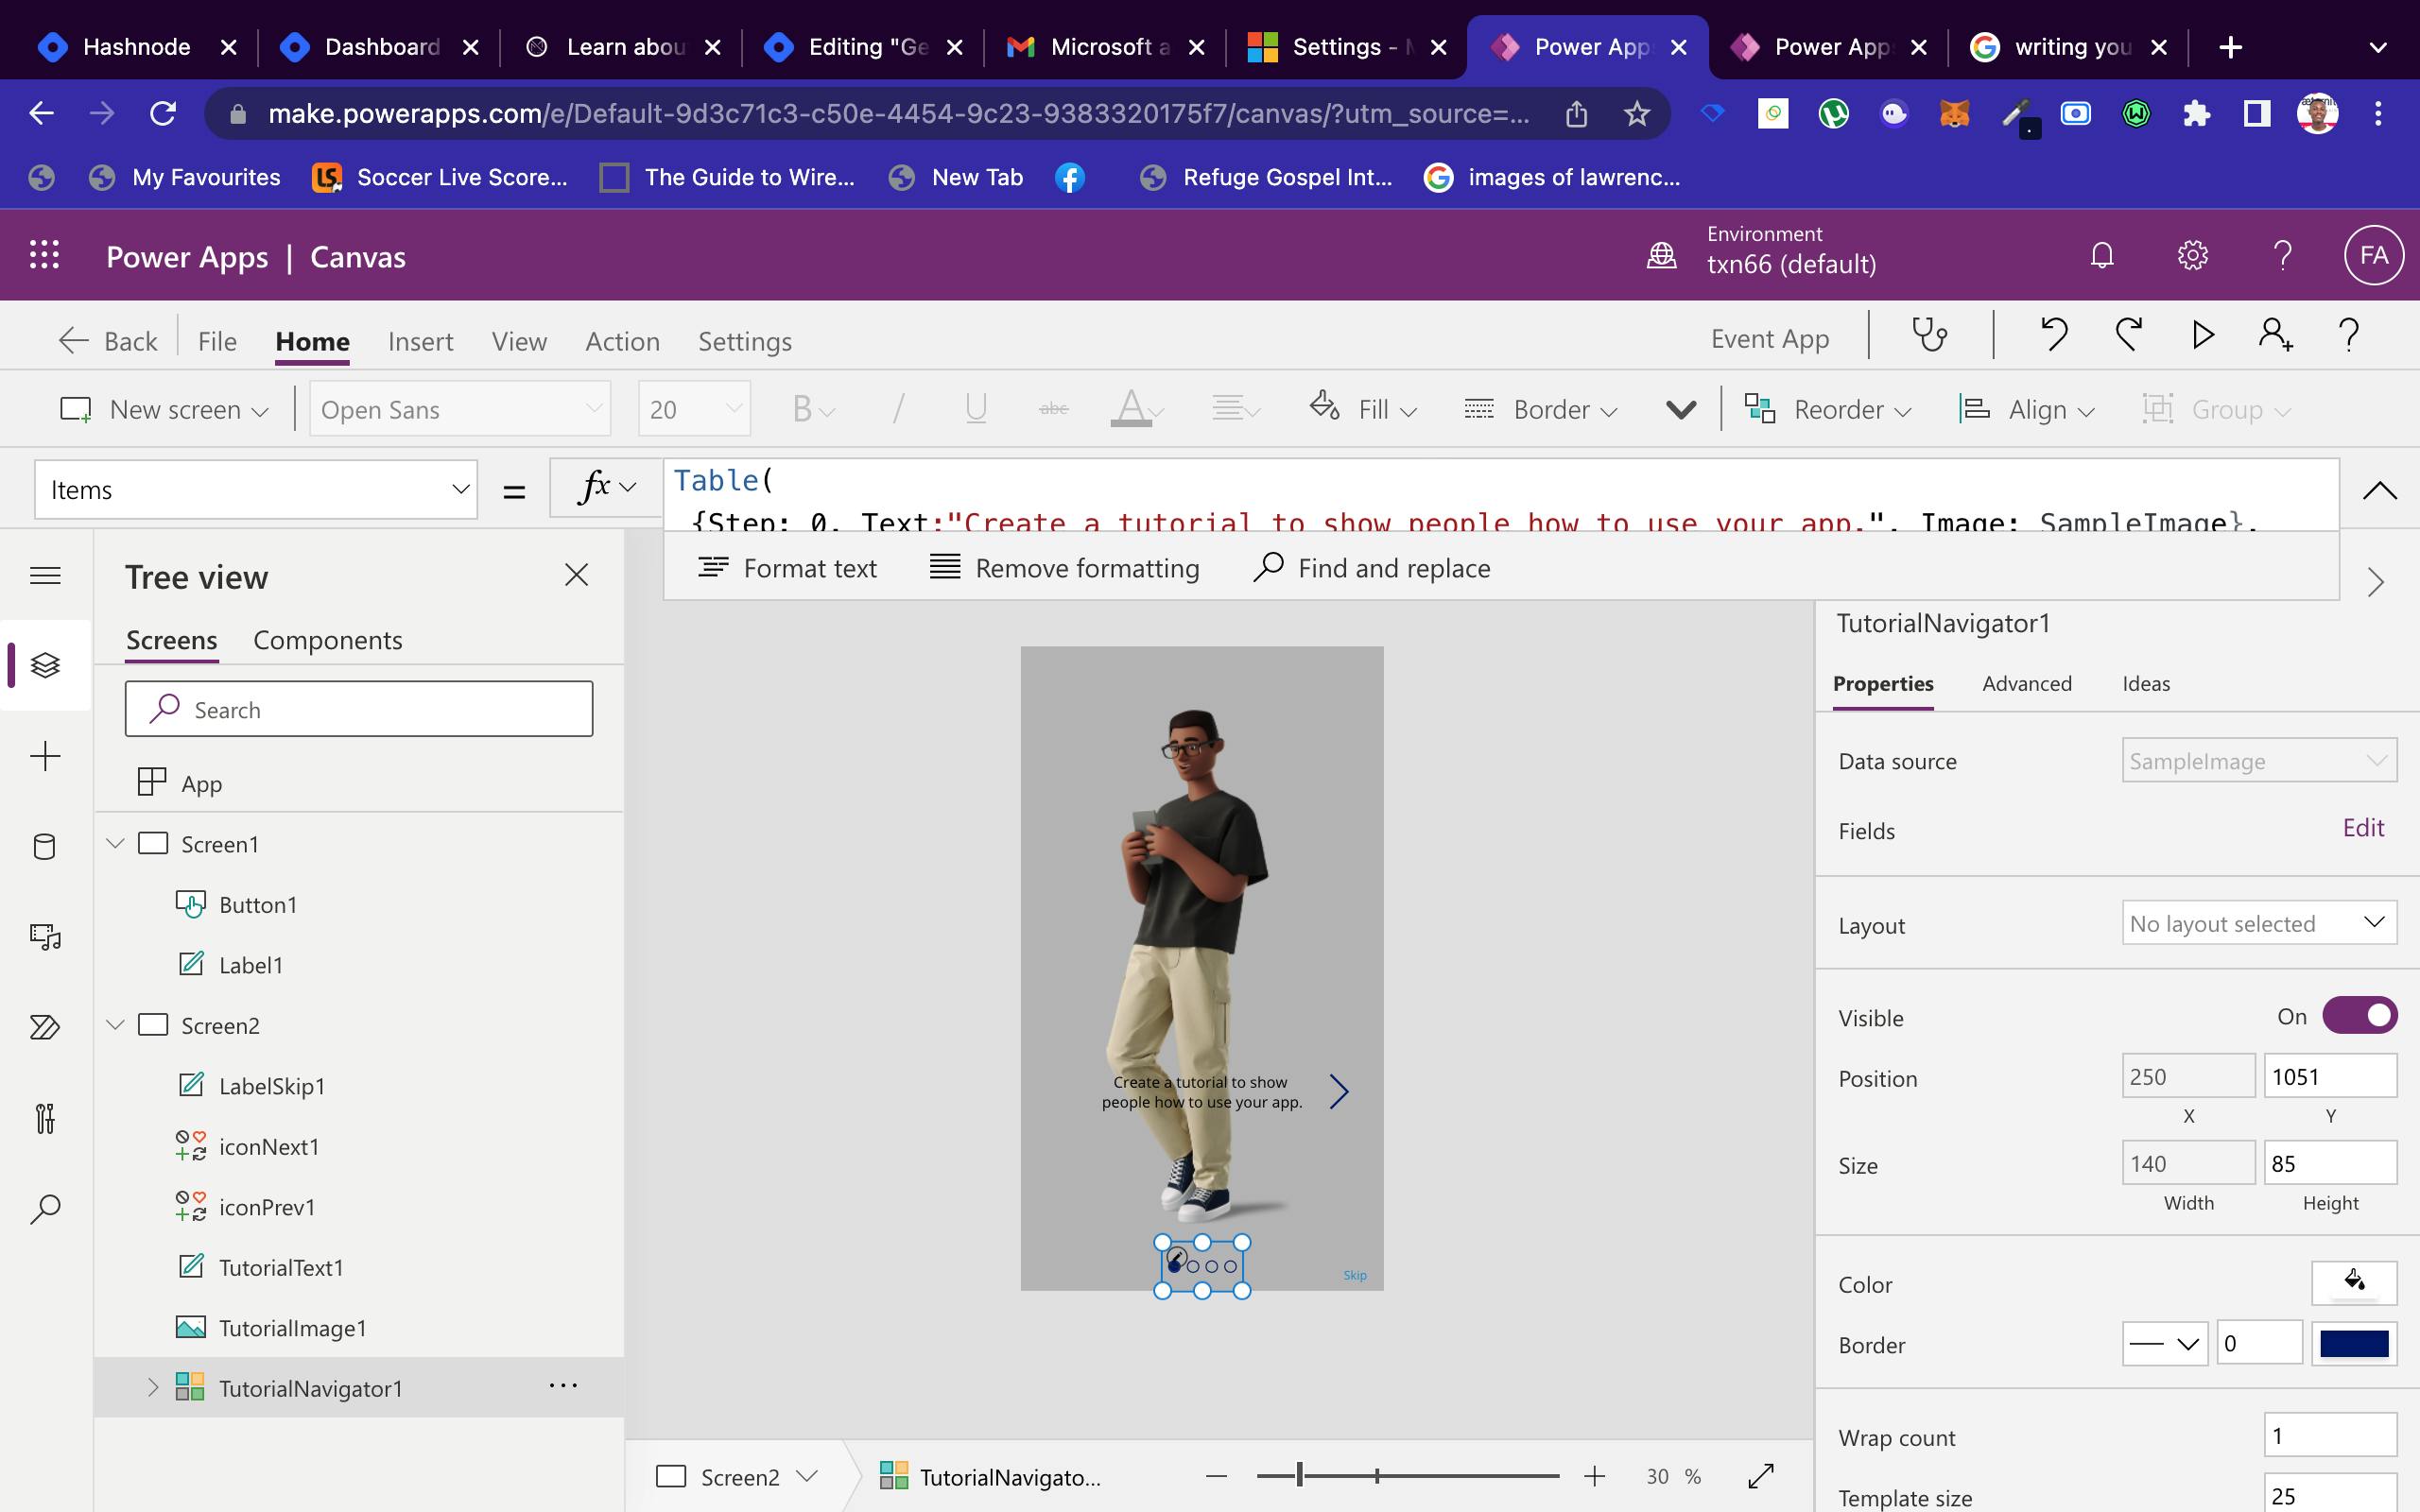
Now let us edit the text for Step:0 to Step:3. Just copy and paste the code we have below to replace the default text.
Table(
 {Step: 0, Text:"Welcome"},
 {Step: 1, Text:"Add an Event"},
 {Step: 2, Text:"Save the event and view on next screen"},
 {Step: 3, Text:"Edit or Delete an already exisiting event"}

)
Now you can go ahead to format the text using the font properties we have on the right side of the screen, just like I have done here.
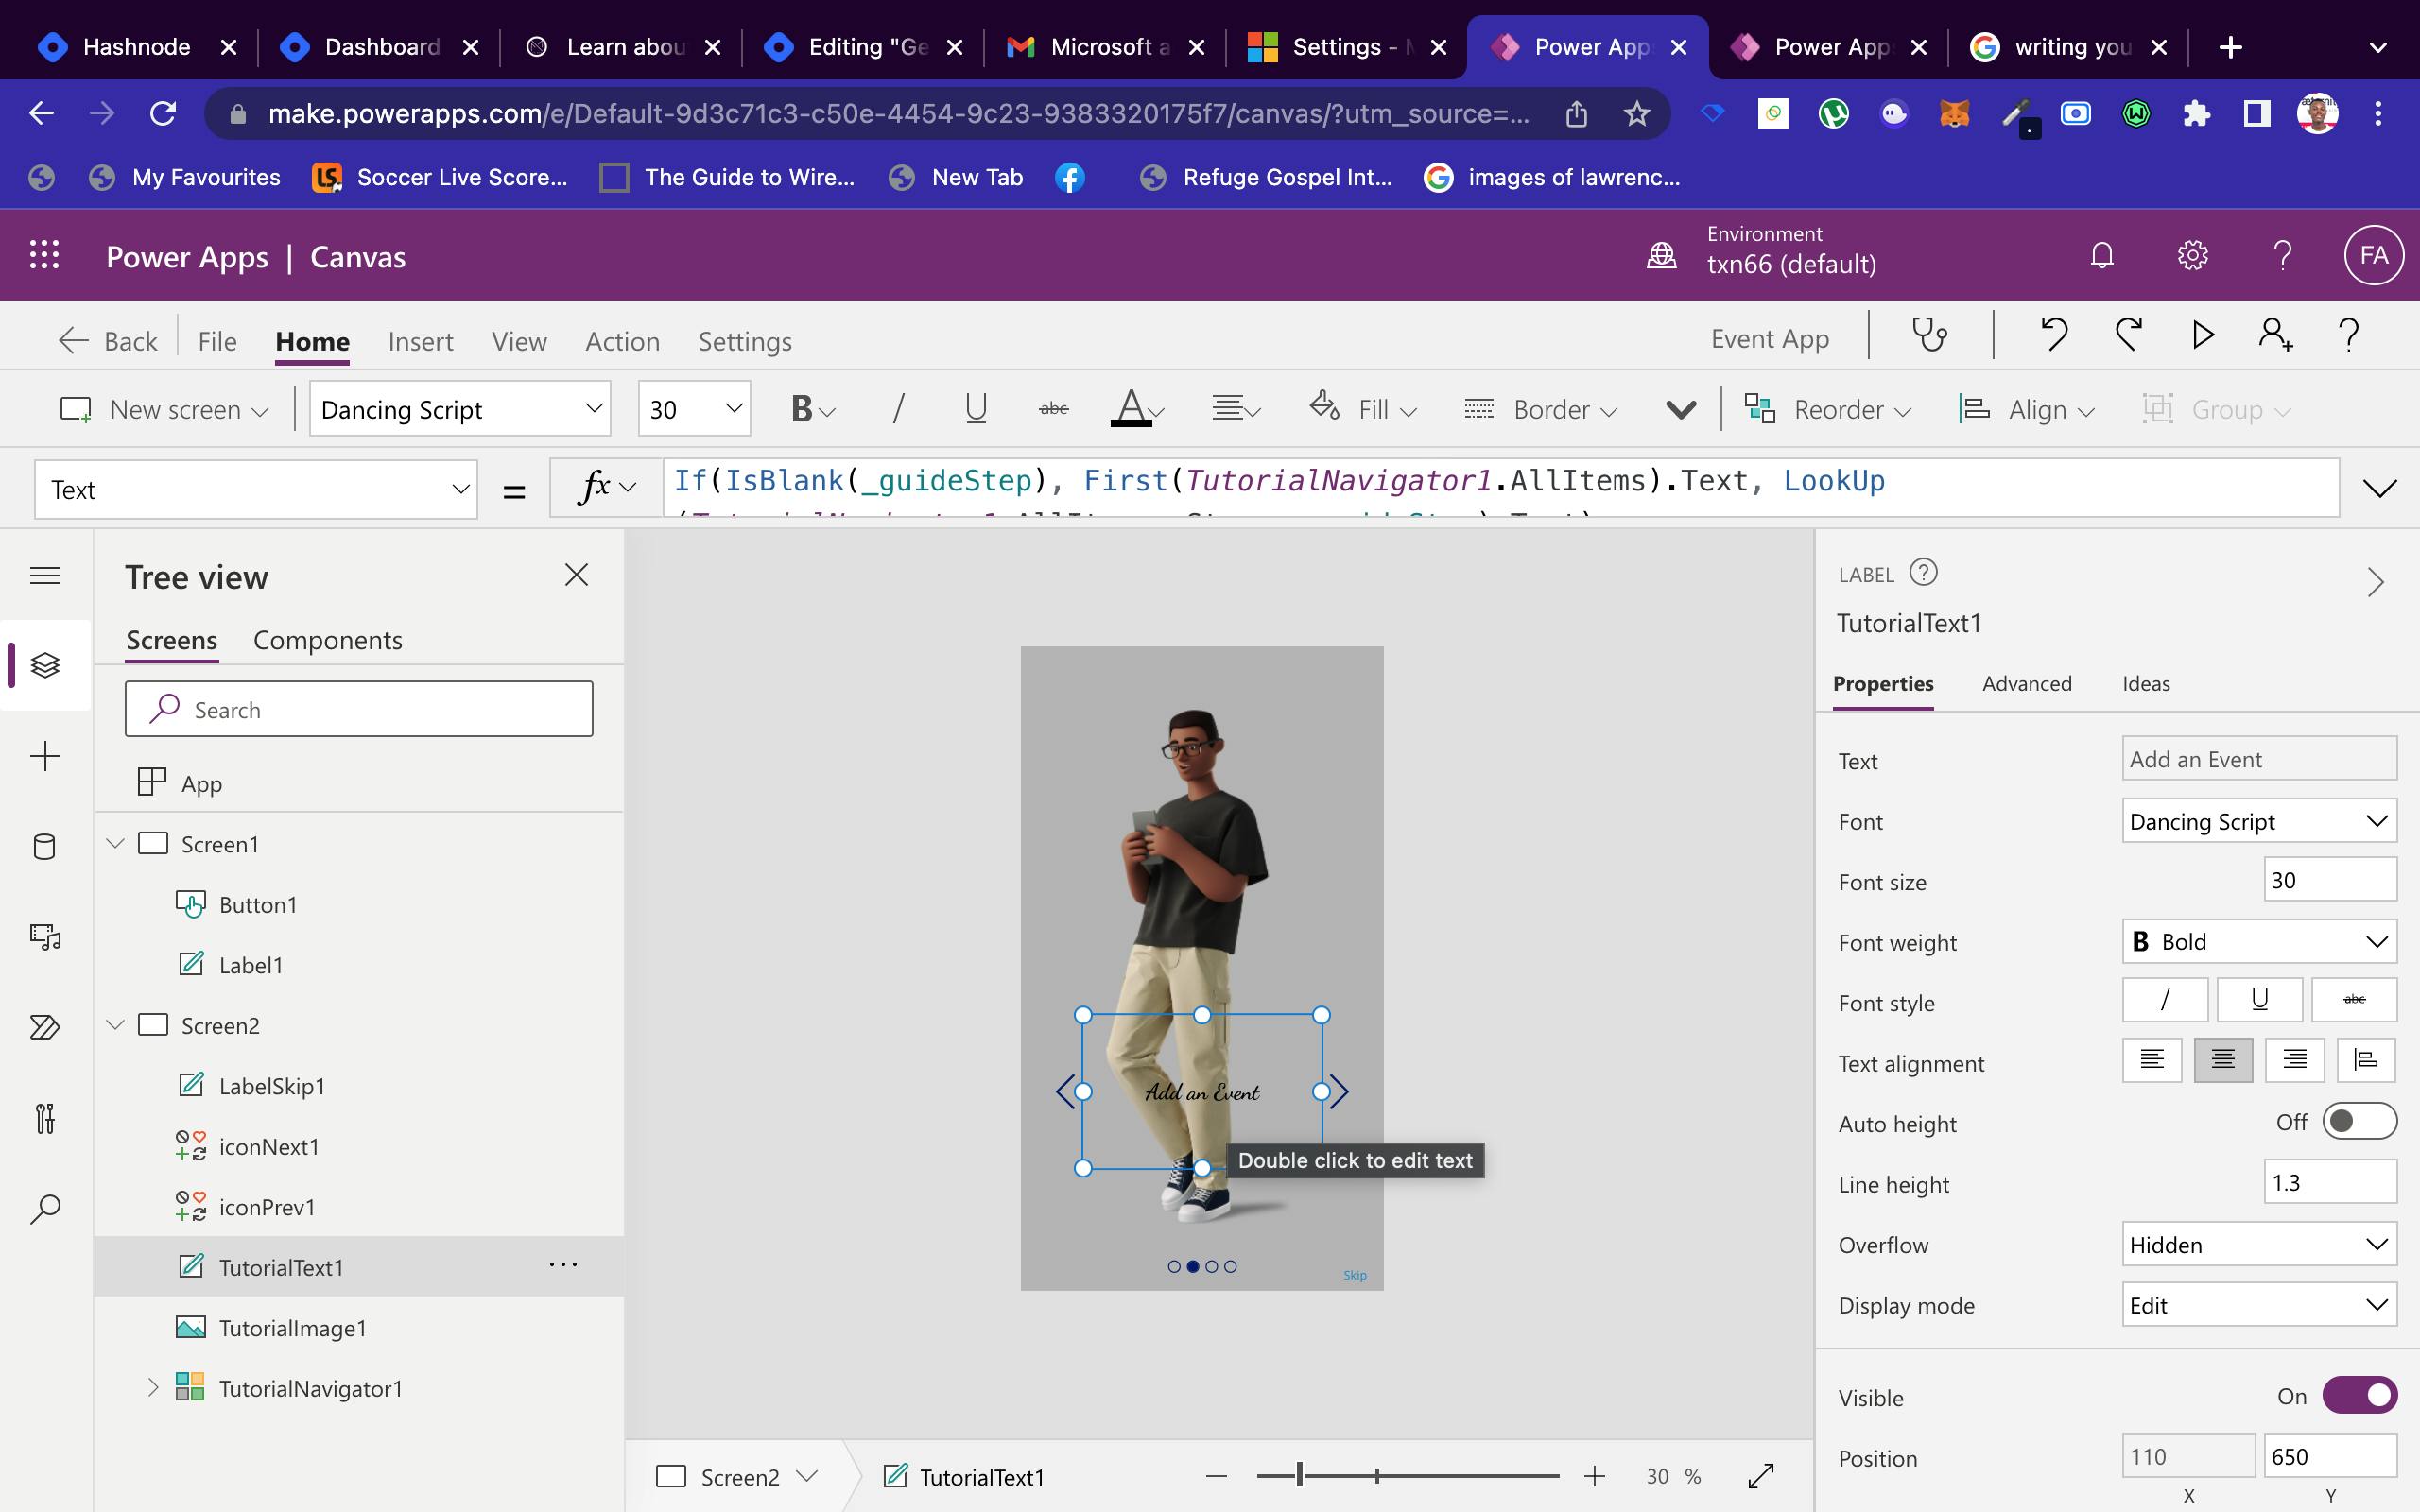
Now click the Skip text button, adjust the font size and color, and then on the right side of the screen, click on the advanced, and then under the action, under the onSelect paste the code below:
Navigate(Screen3, ScreenTransition.Fade)
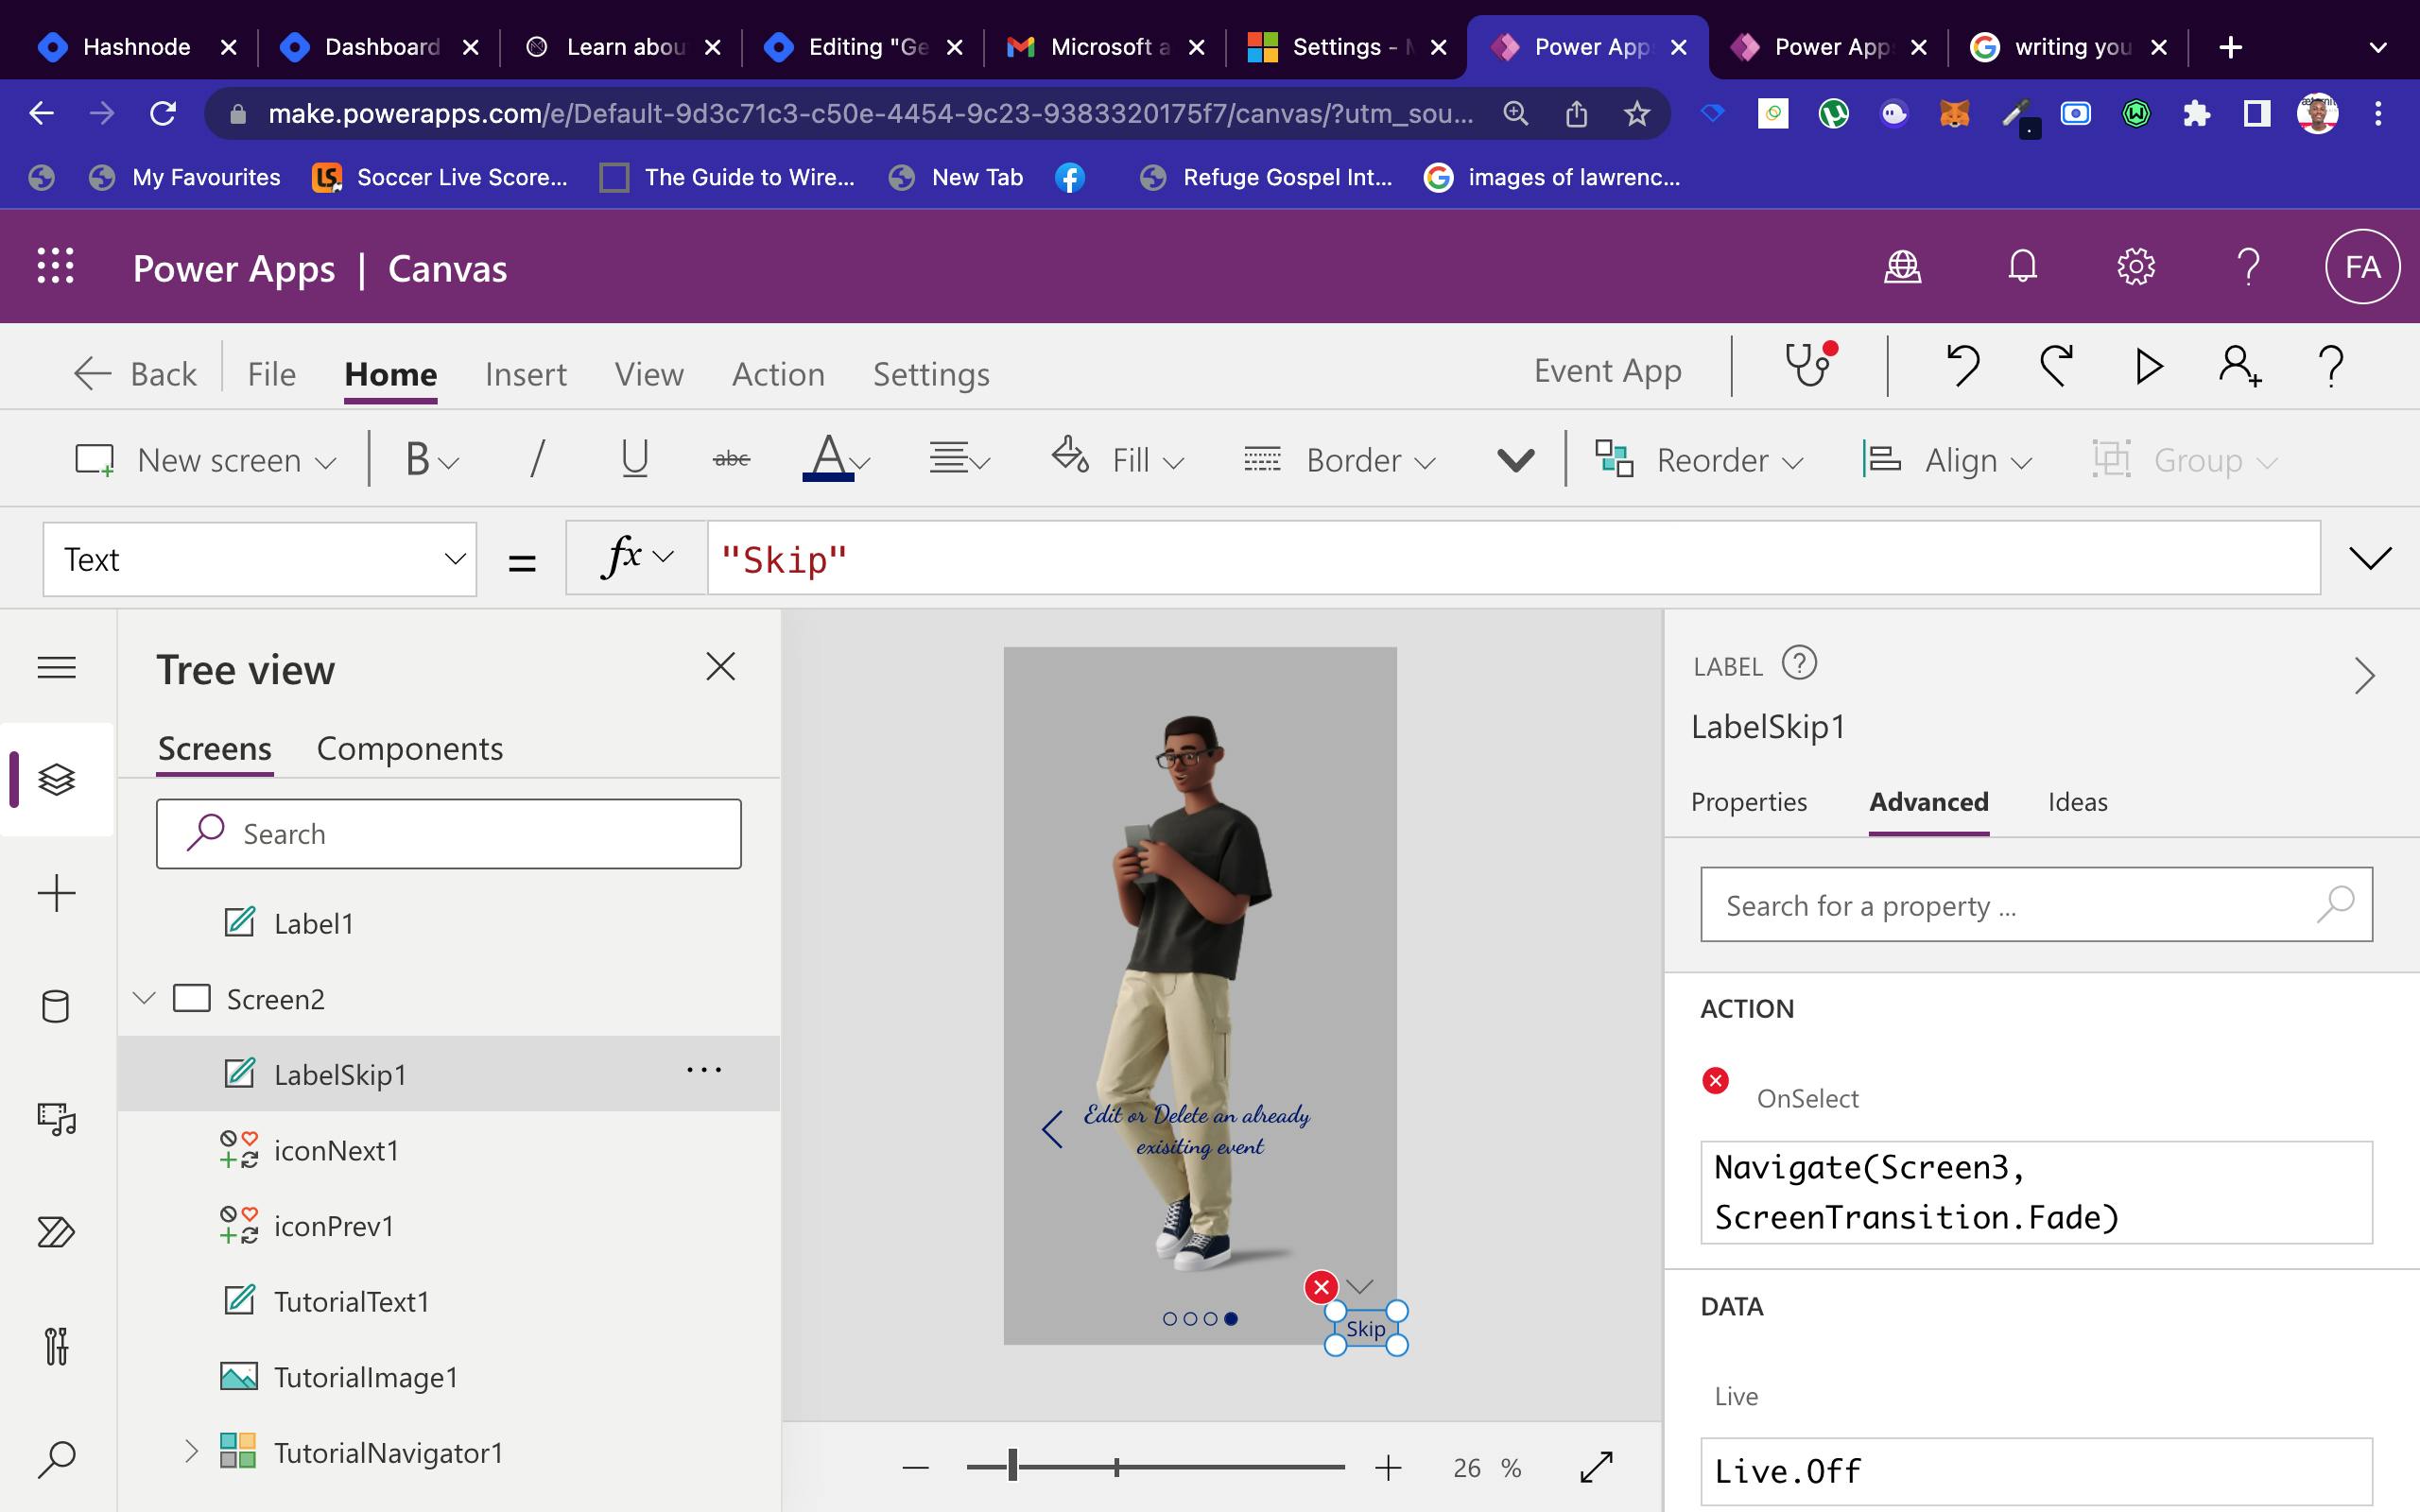
Note: This will bring up some form of error and this is because in our formula we introduced Screen3, which we don't have yet in our app. Let us quickly dive into adding Screen3 to remove this error and proceed with our app. As we did earlier while creating our Screen2 click on the New Screen Button dropdown in the top menu and select the Screen with confirmation text screen option
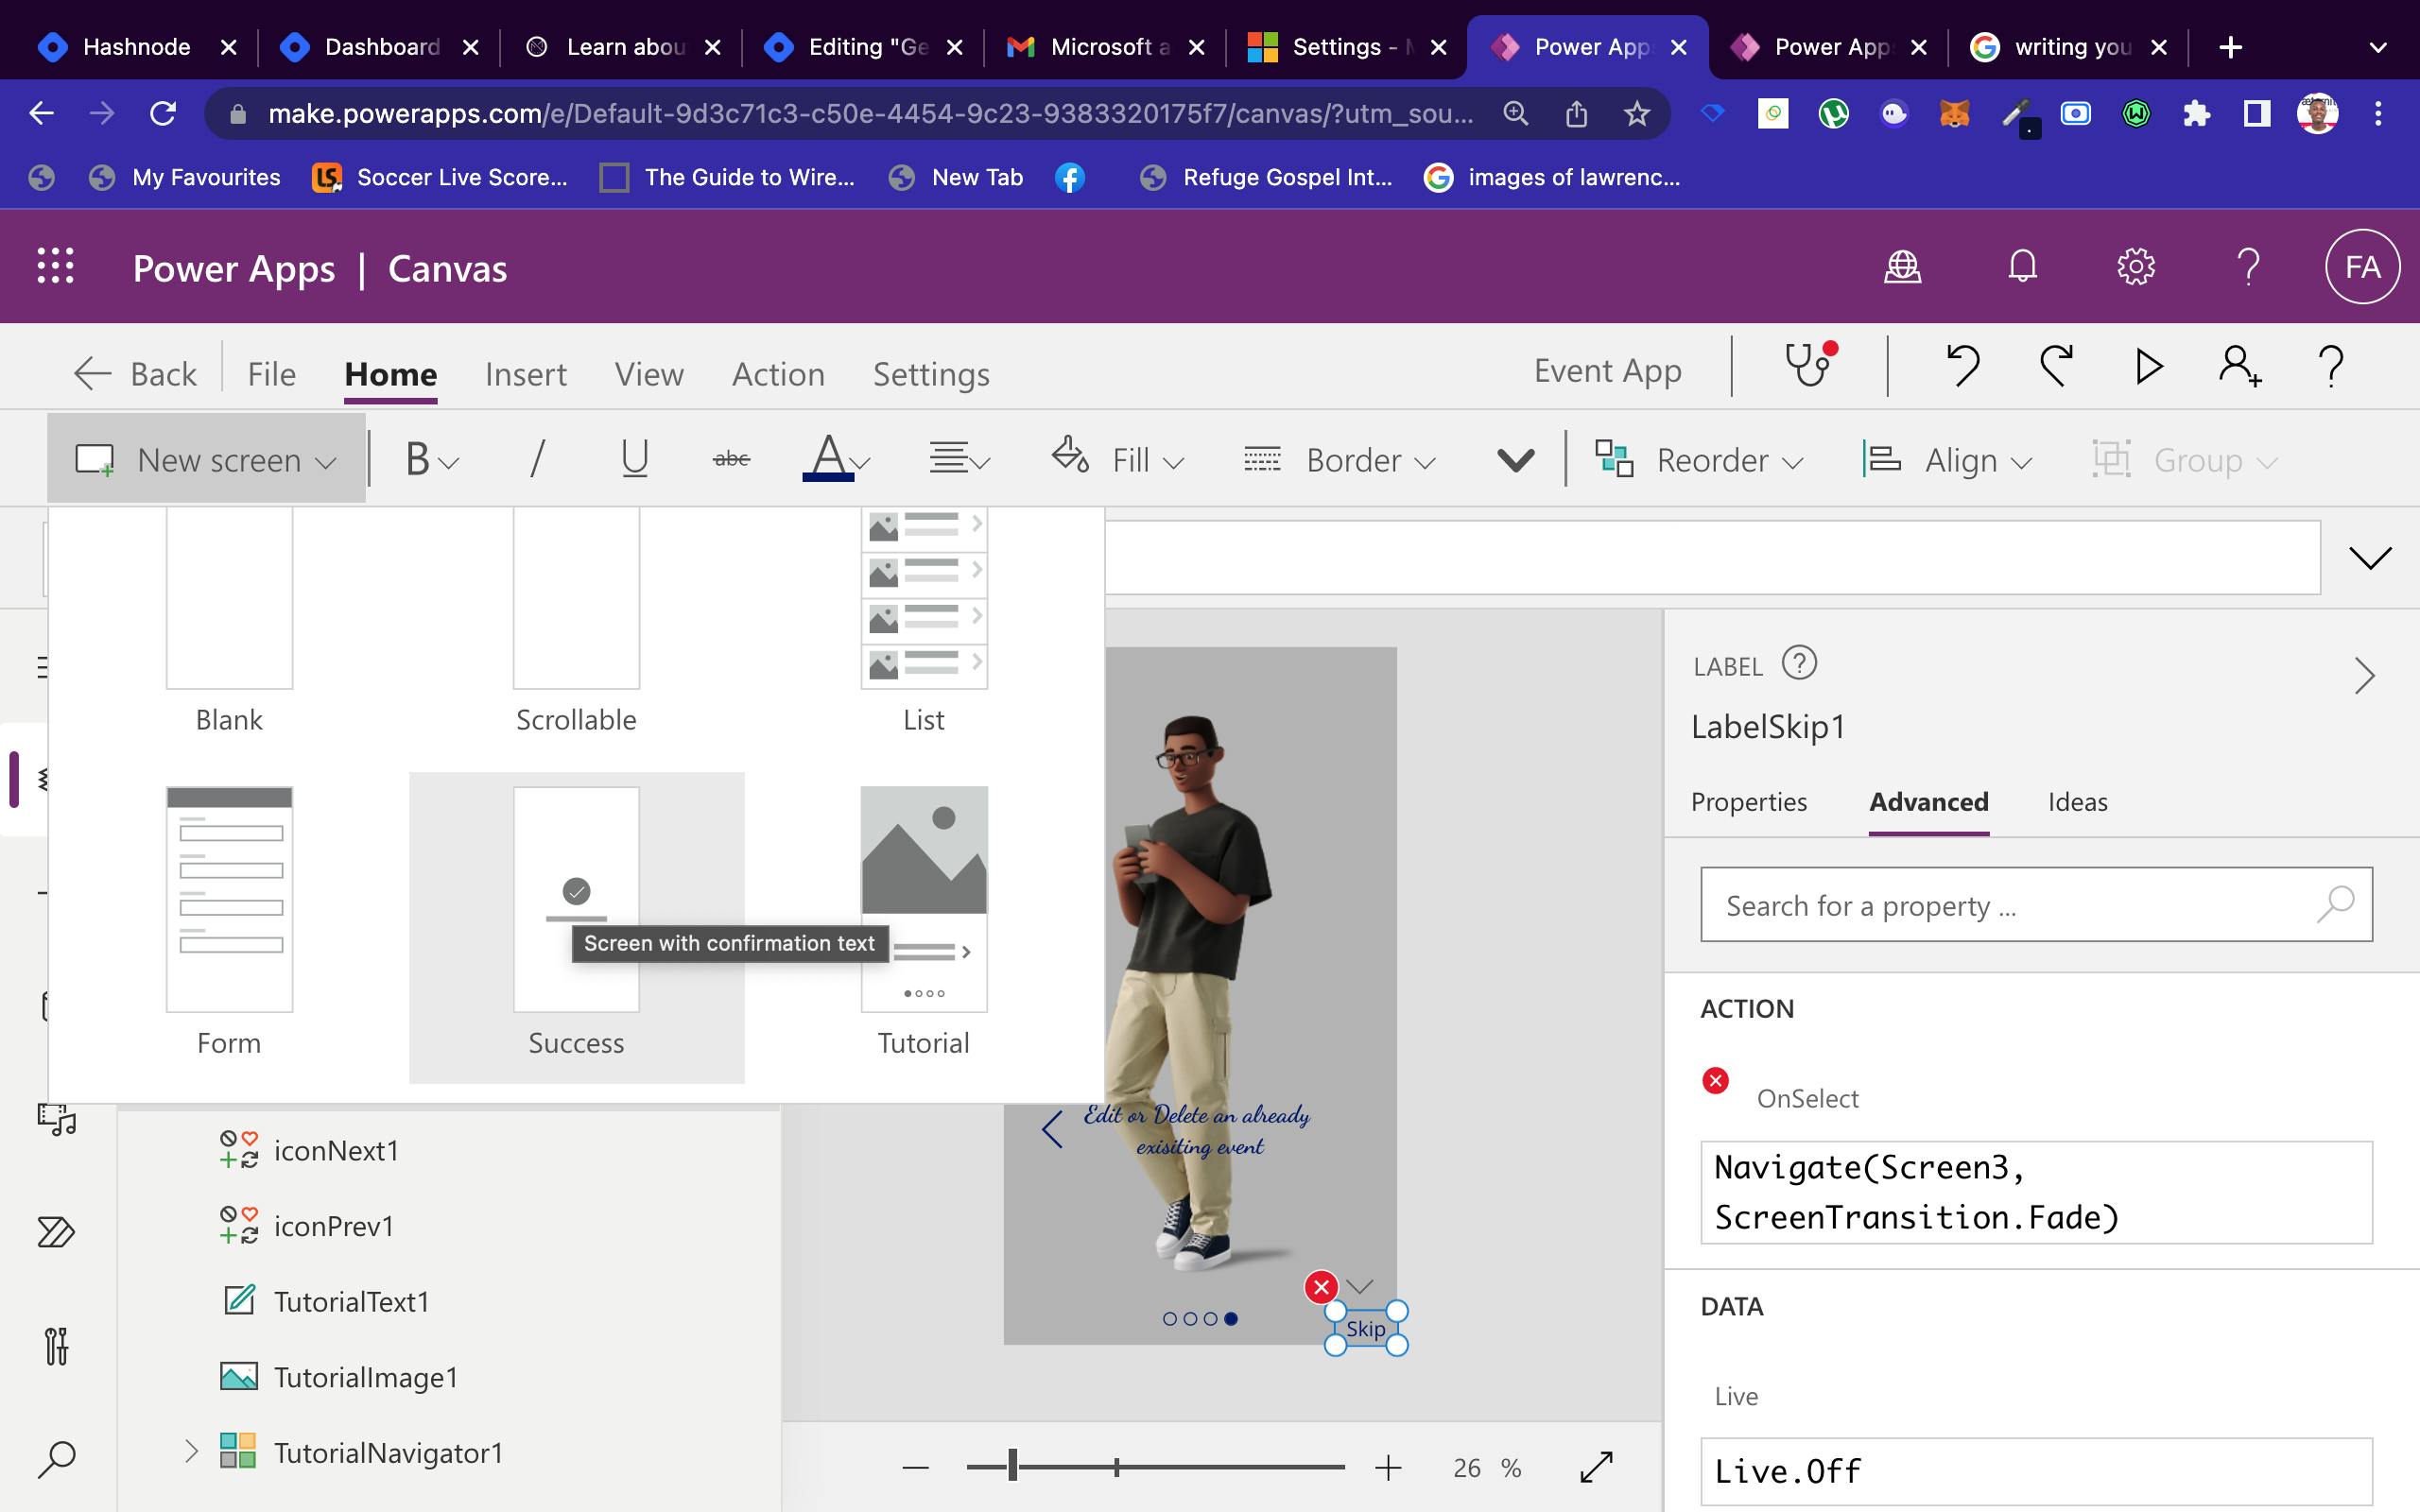
Adding the third screen automatically removes the error faced earlier with the formula added to the skip textButton in Screen2
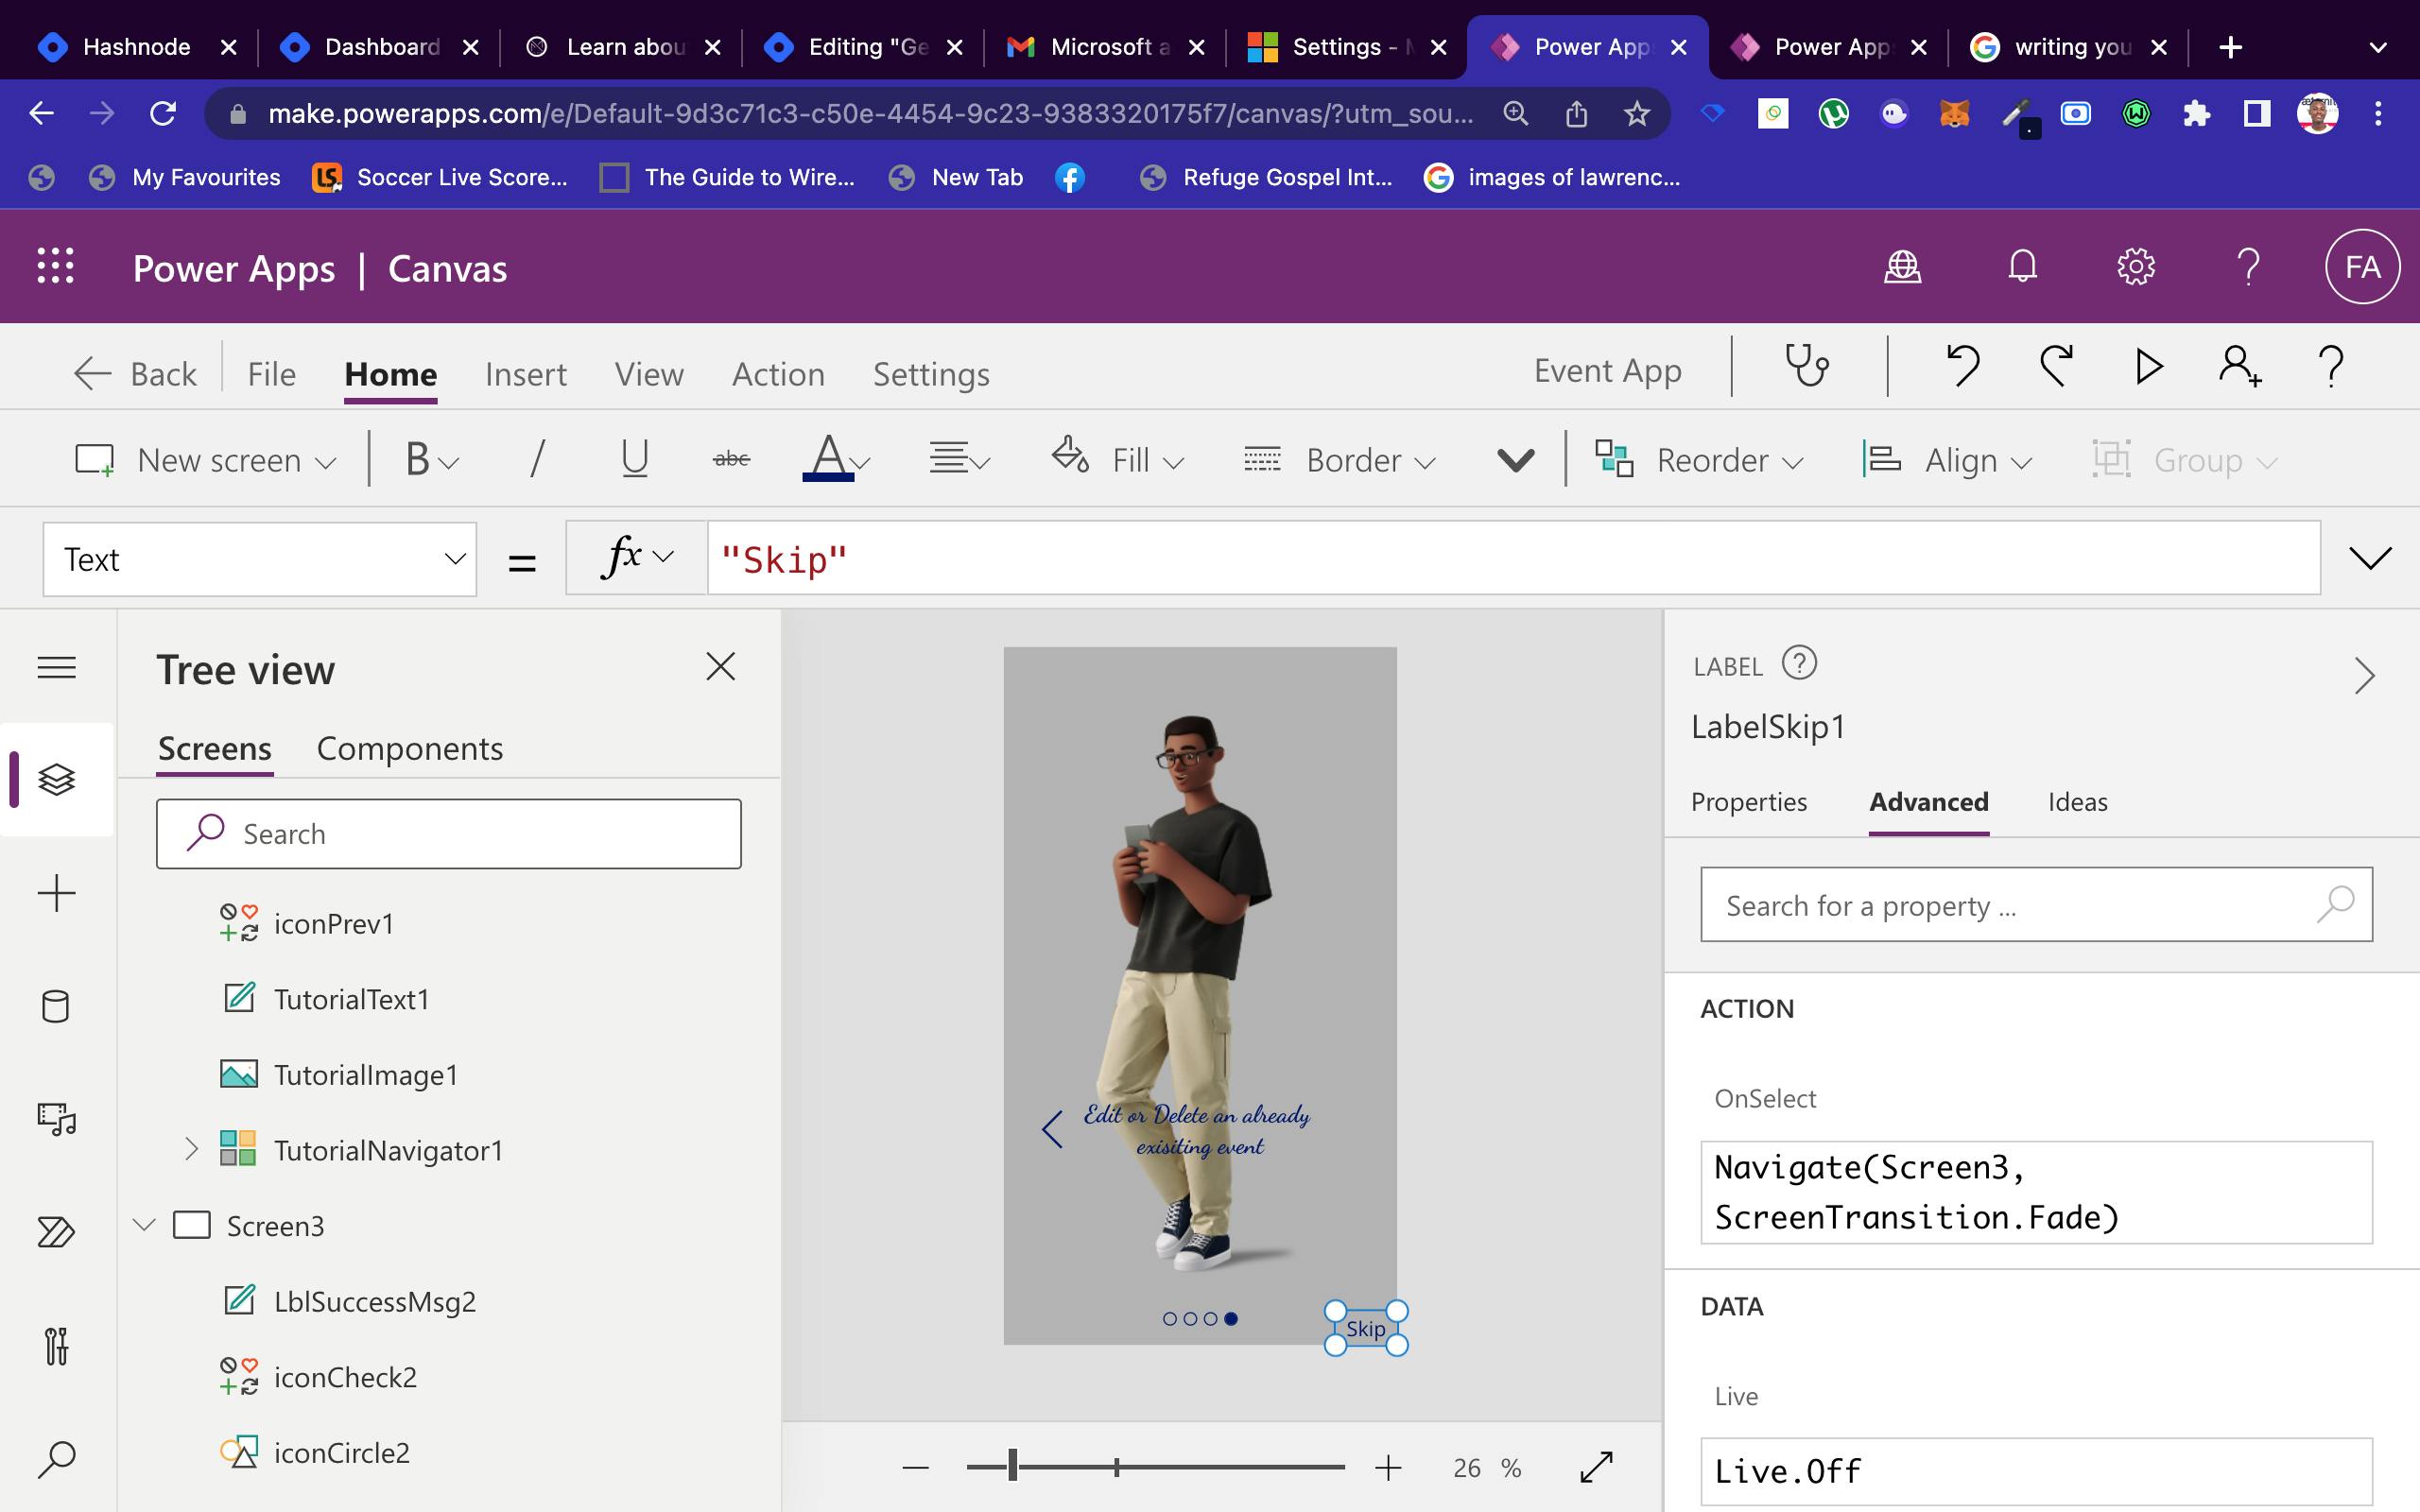
Now let us continue with editing our Screen3, this is what your Screen3 should look like:
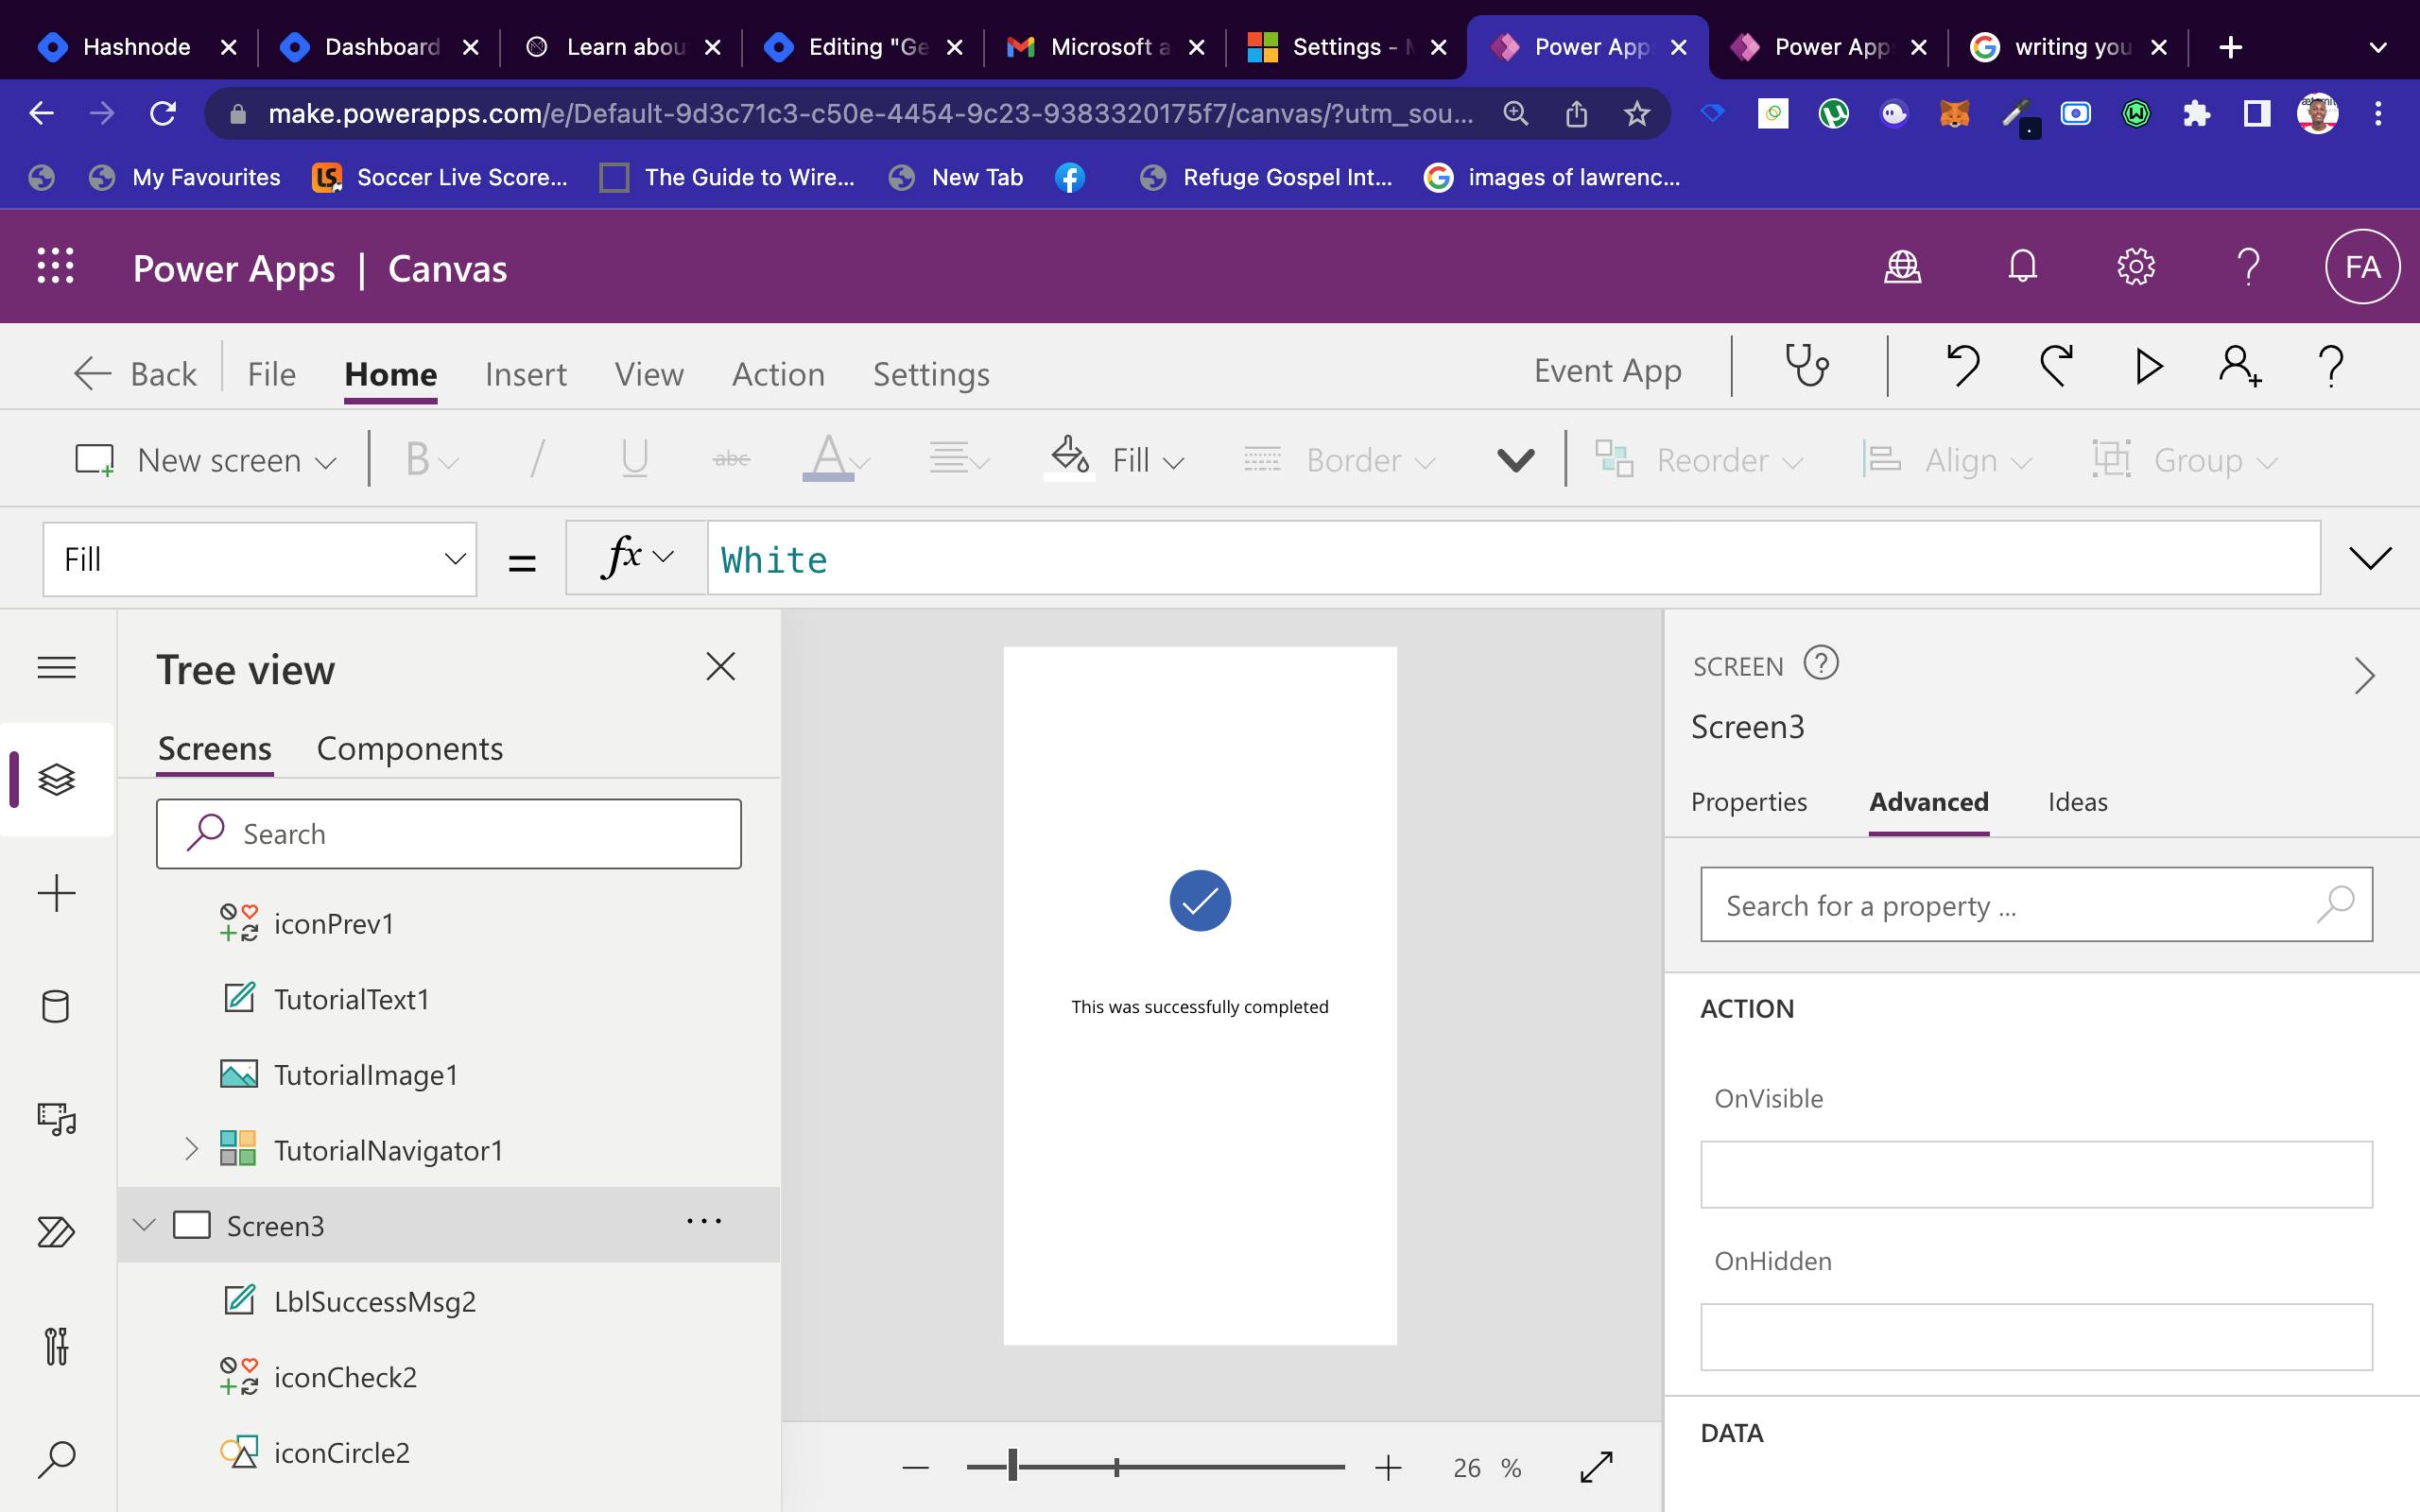
The first thing to do is to add a background image and the fill color, then replace the custom text with this: "Congratulations! You are now ready to use this app" and format the text as you want, just as I have done here.

Finally, for Screen3 we are going to add an icon that onClicked will take us to the next screen. On the insert pane, locate the Icons tool and search for "next arrow", then click on the search result to add the icon to Screen3.
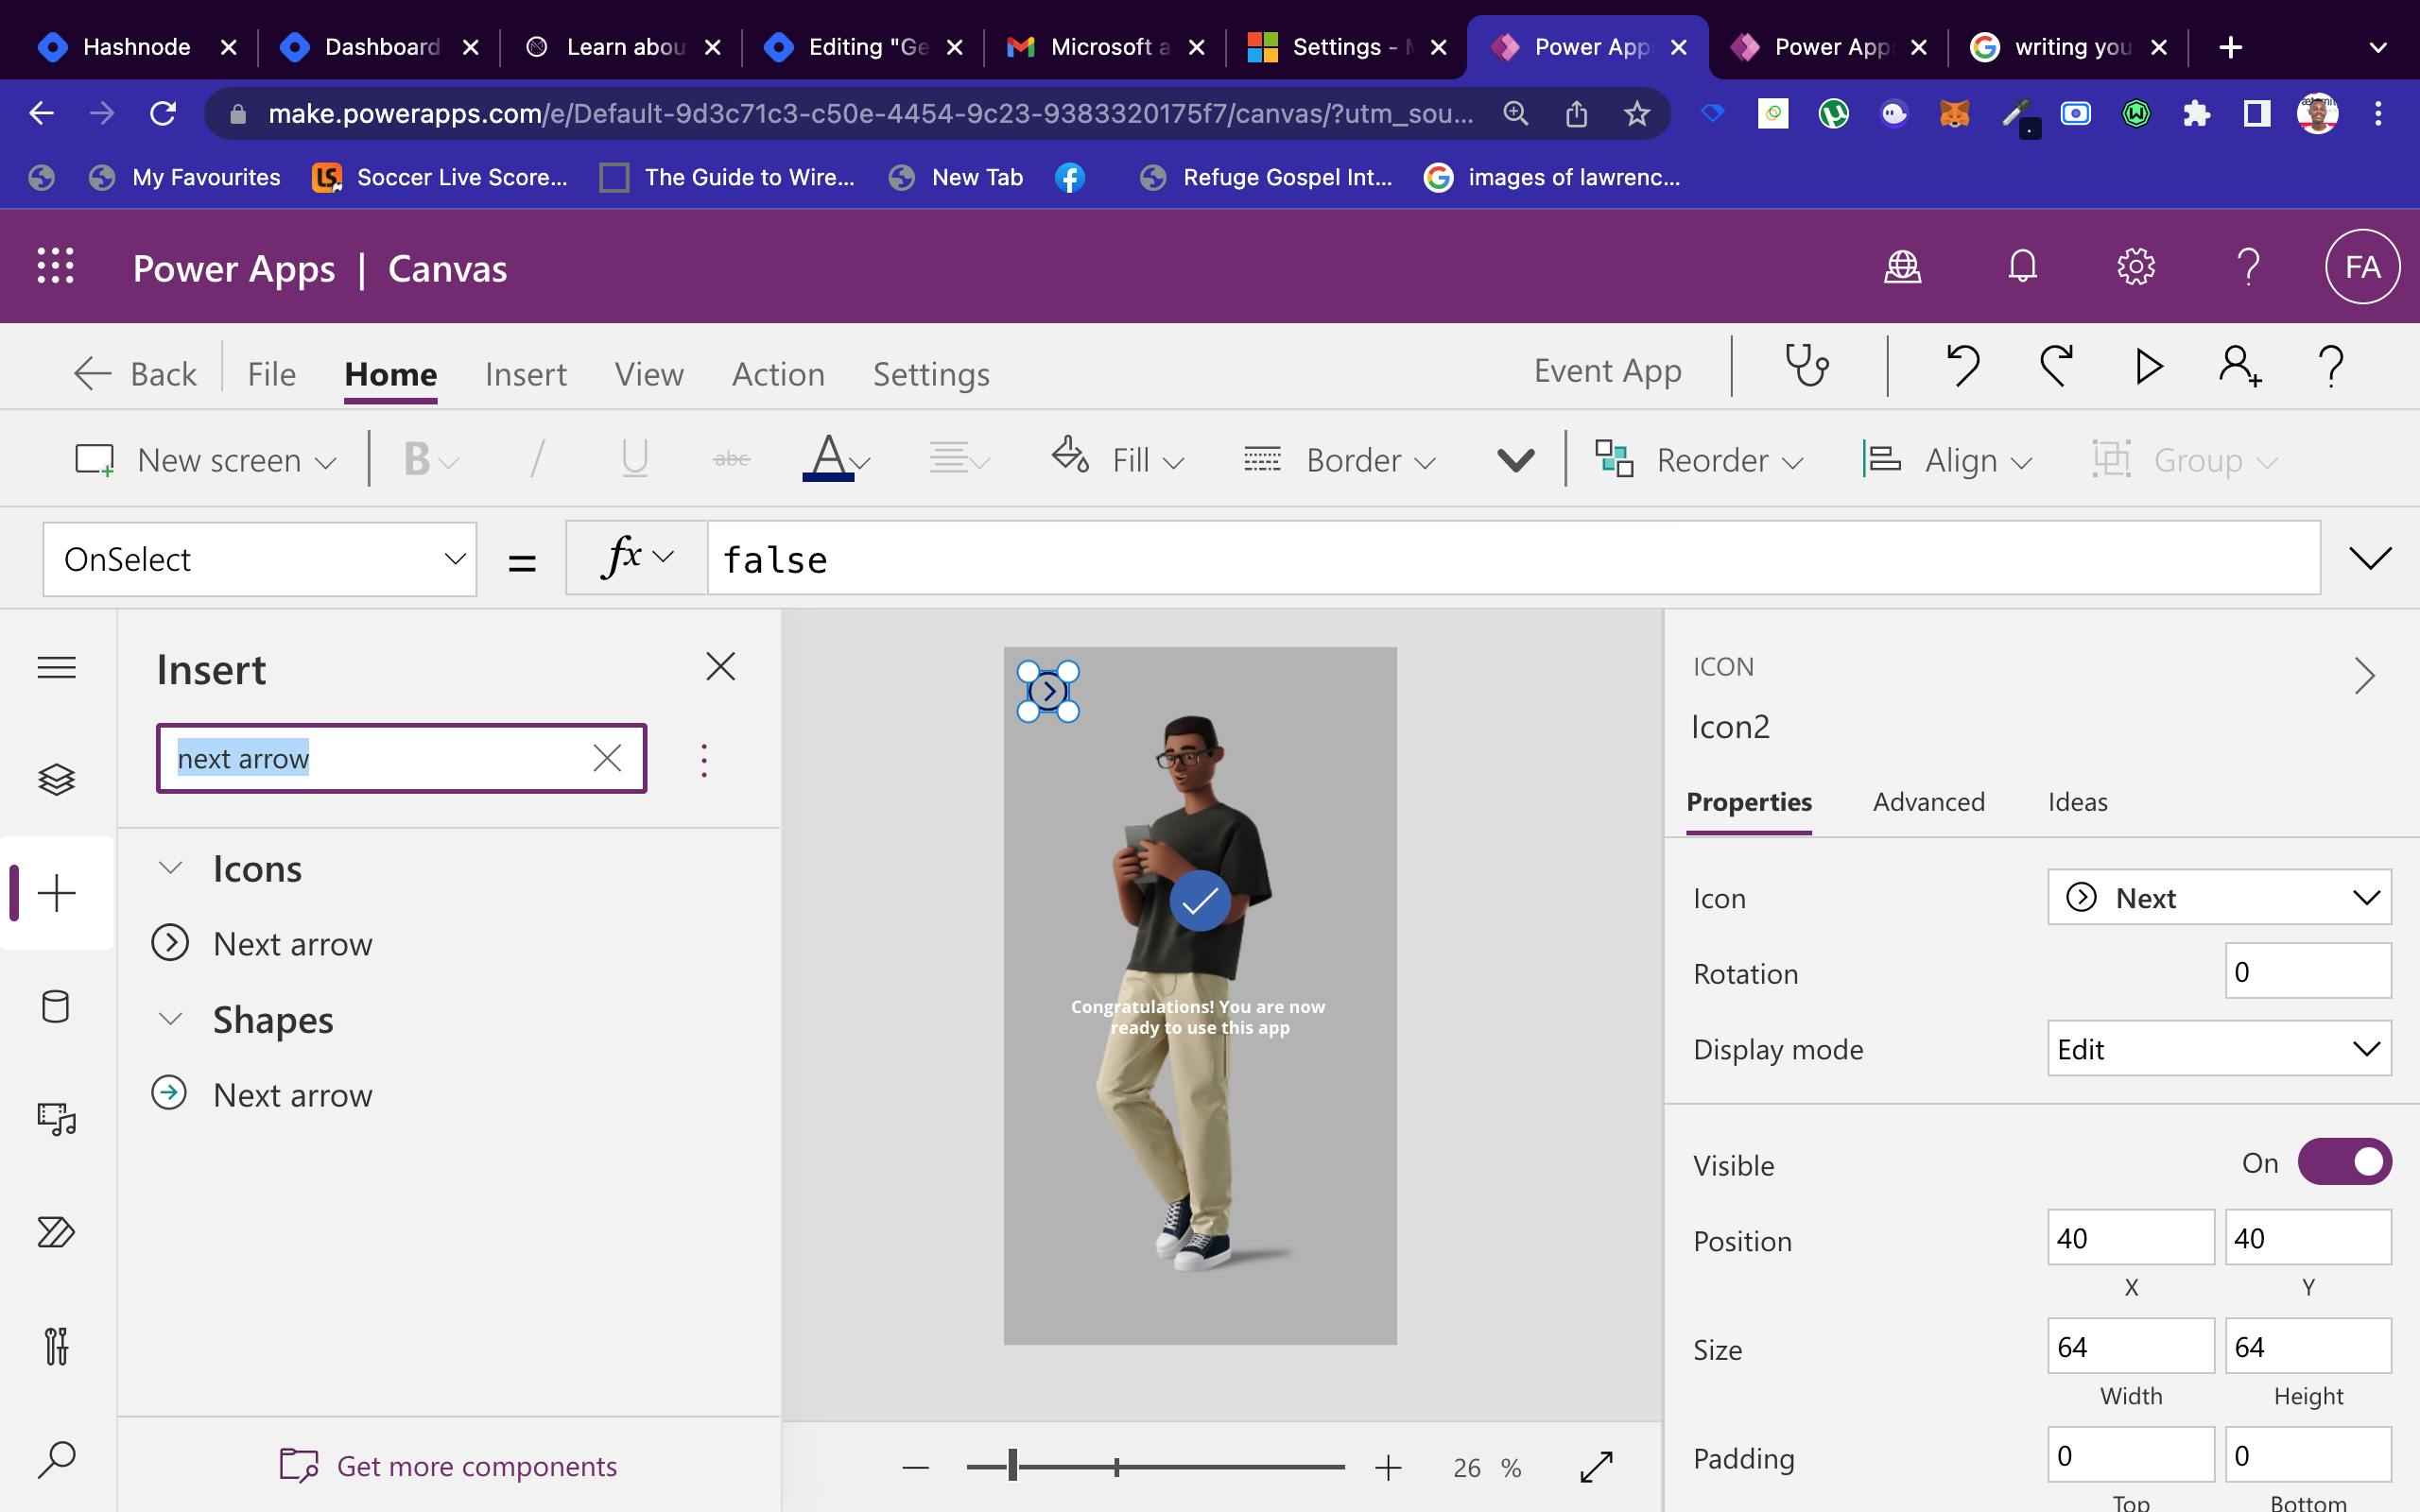
Drag down the icon added to be immediately under the text added earlier. Also, let us add an action for the icon to perform when clicked. Just like we added an action for the skip textButton in Screen2, we are going to be doing the same thing here. Copy and past the code below:
Navigate(Screen4, ScreenTransition.Fade)

The code above is simply to Navigate to Screen 4 in our app with a fade transition, its quite straightforward.
Now we are facing the same issue faced earlier and we will resolve it by adding a new Screen to our app.
Moving forward now to add a New screen to our app. Click on the New Screen Button dropdown in the top menu and select the List screen. This is what your new screen should look like
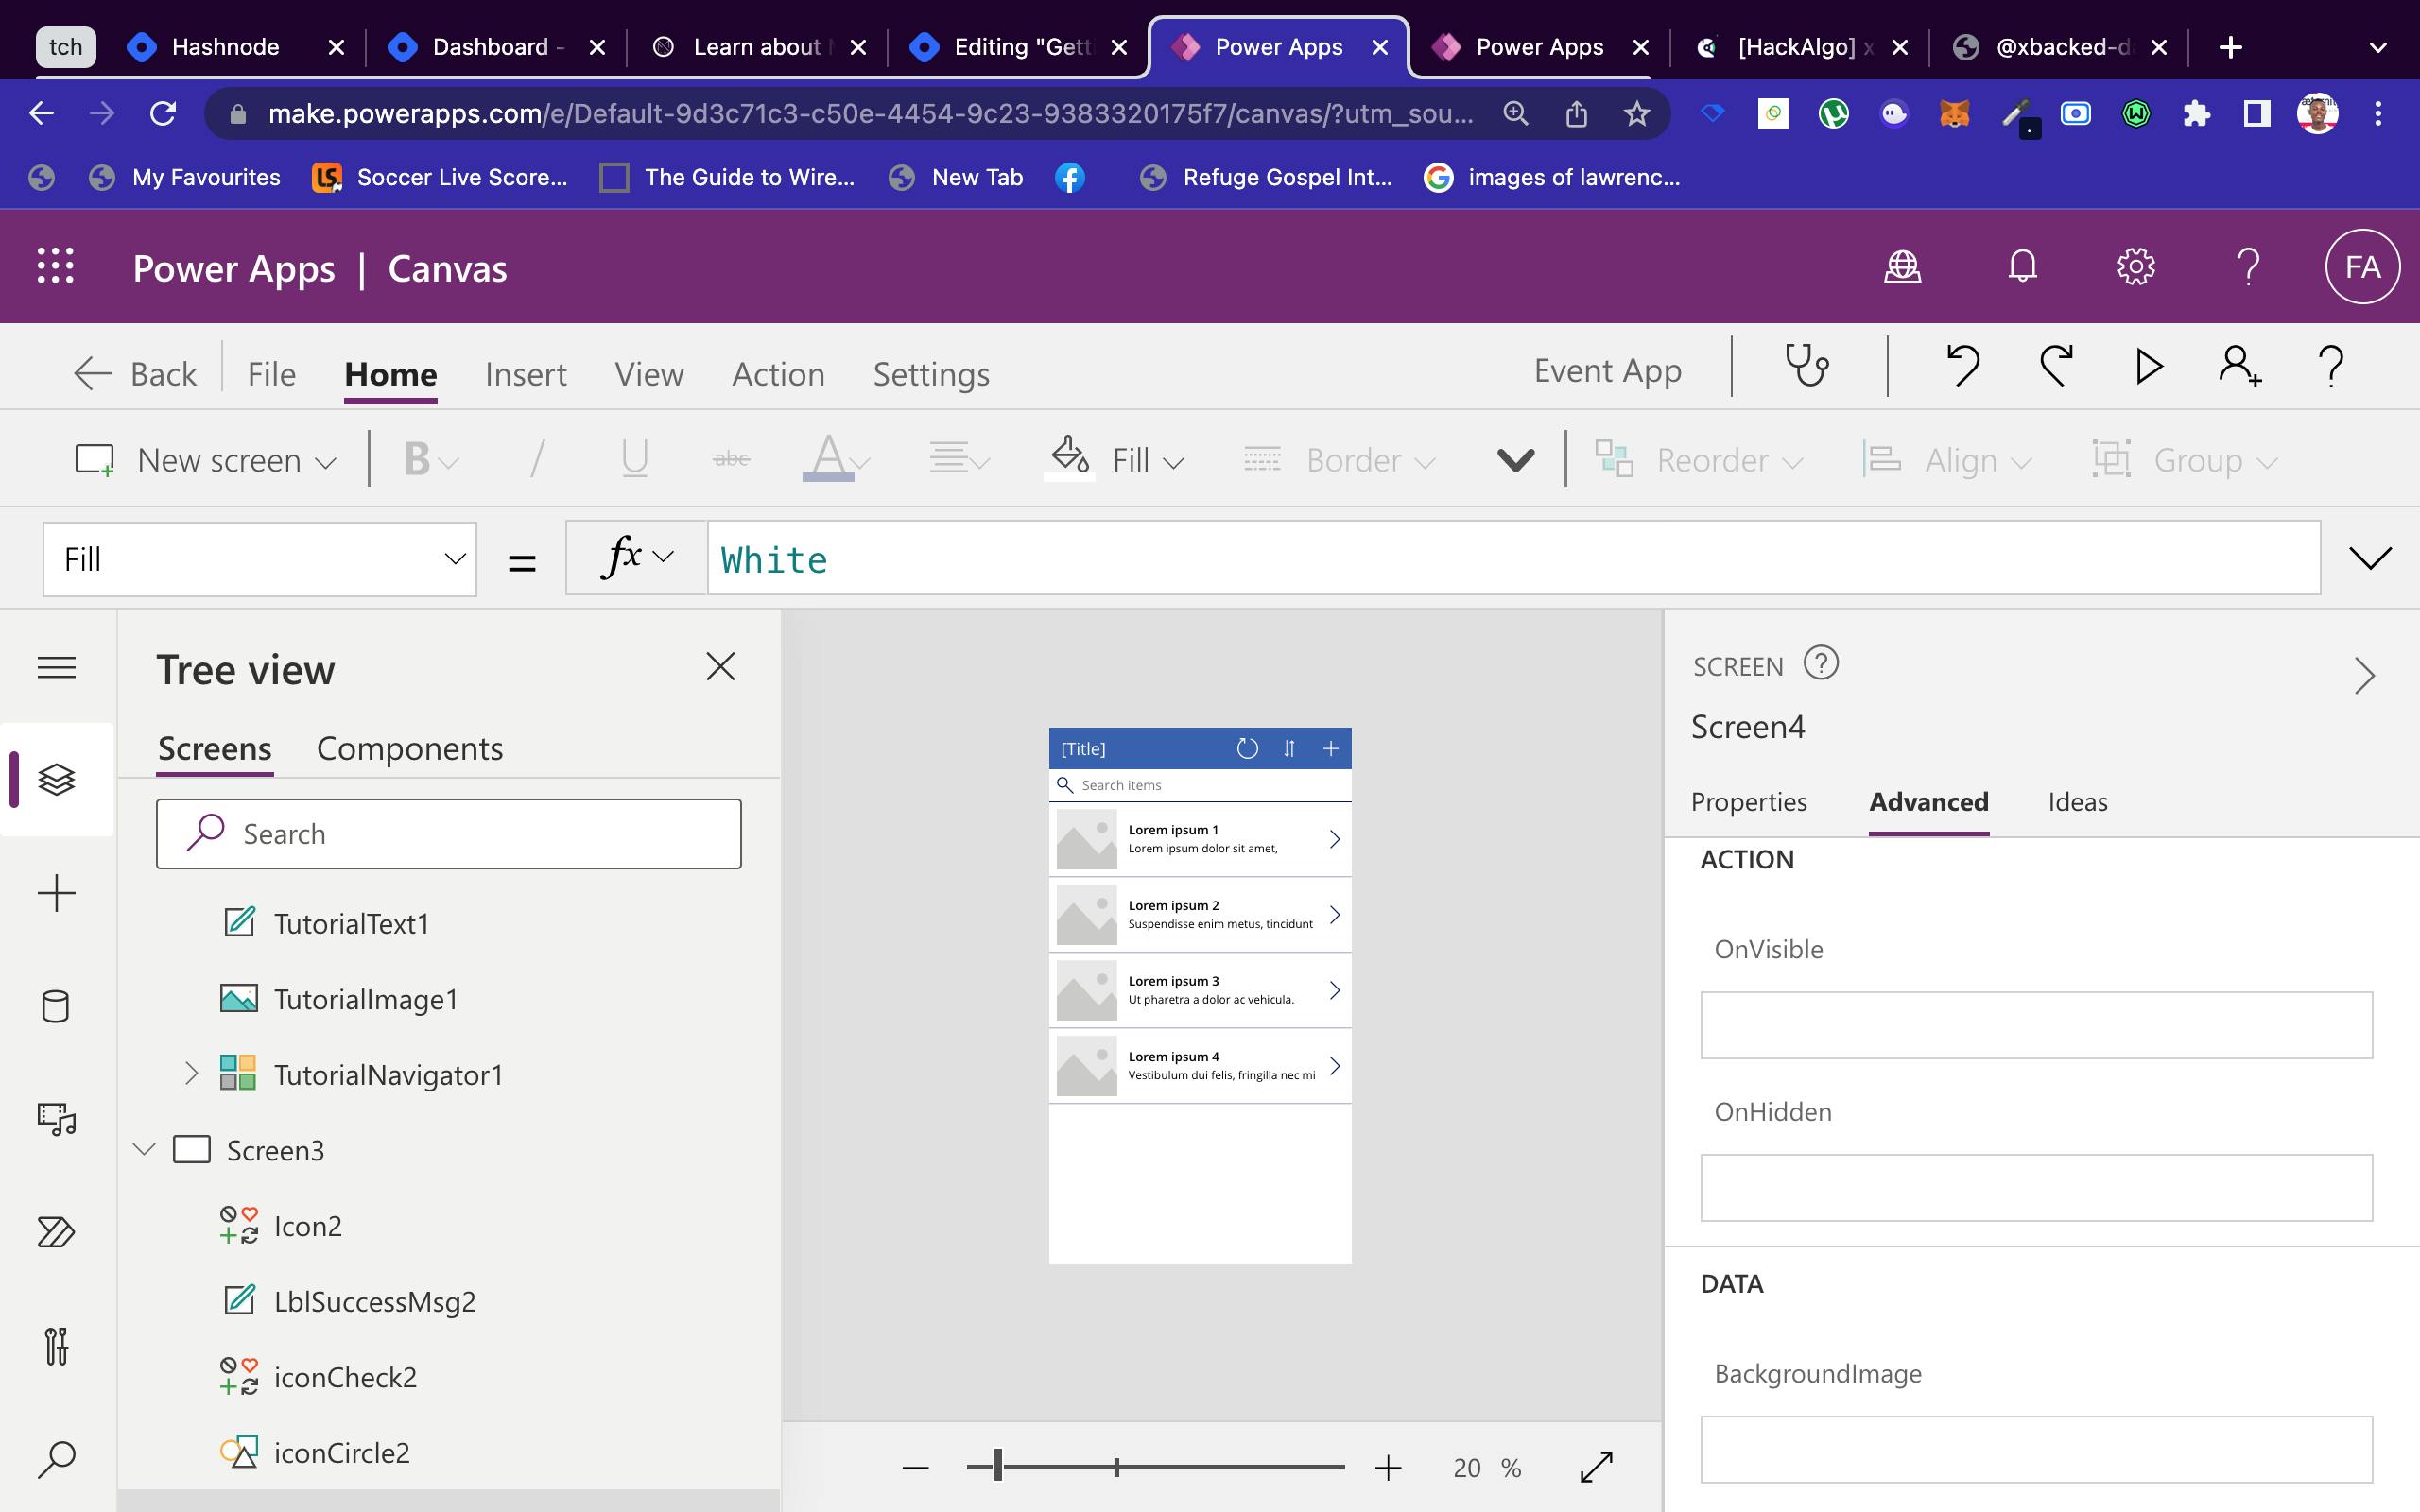
Now we are going to be making use of our Data connectors to connect to a Data Source, if you want to know more about Data Connectors, kindly check out my previous article Understanding Data Connectors with Microsoft Power Apps
Click on the BrowseGallery tool in Screen4 to select a data source
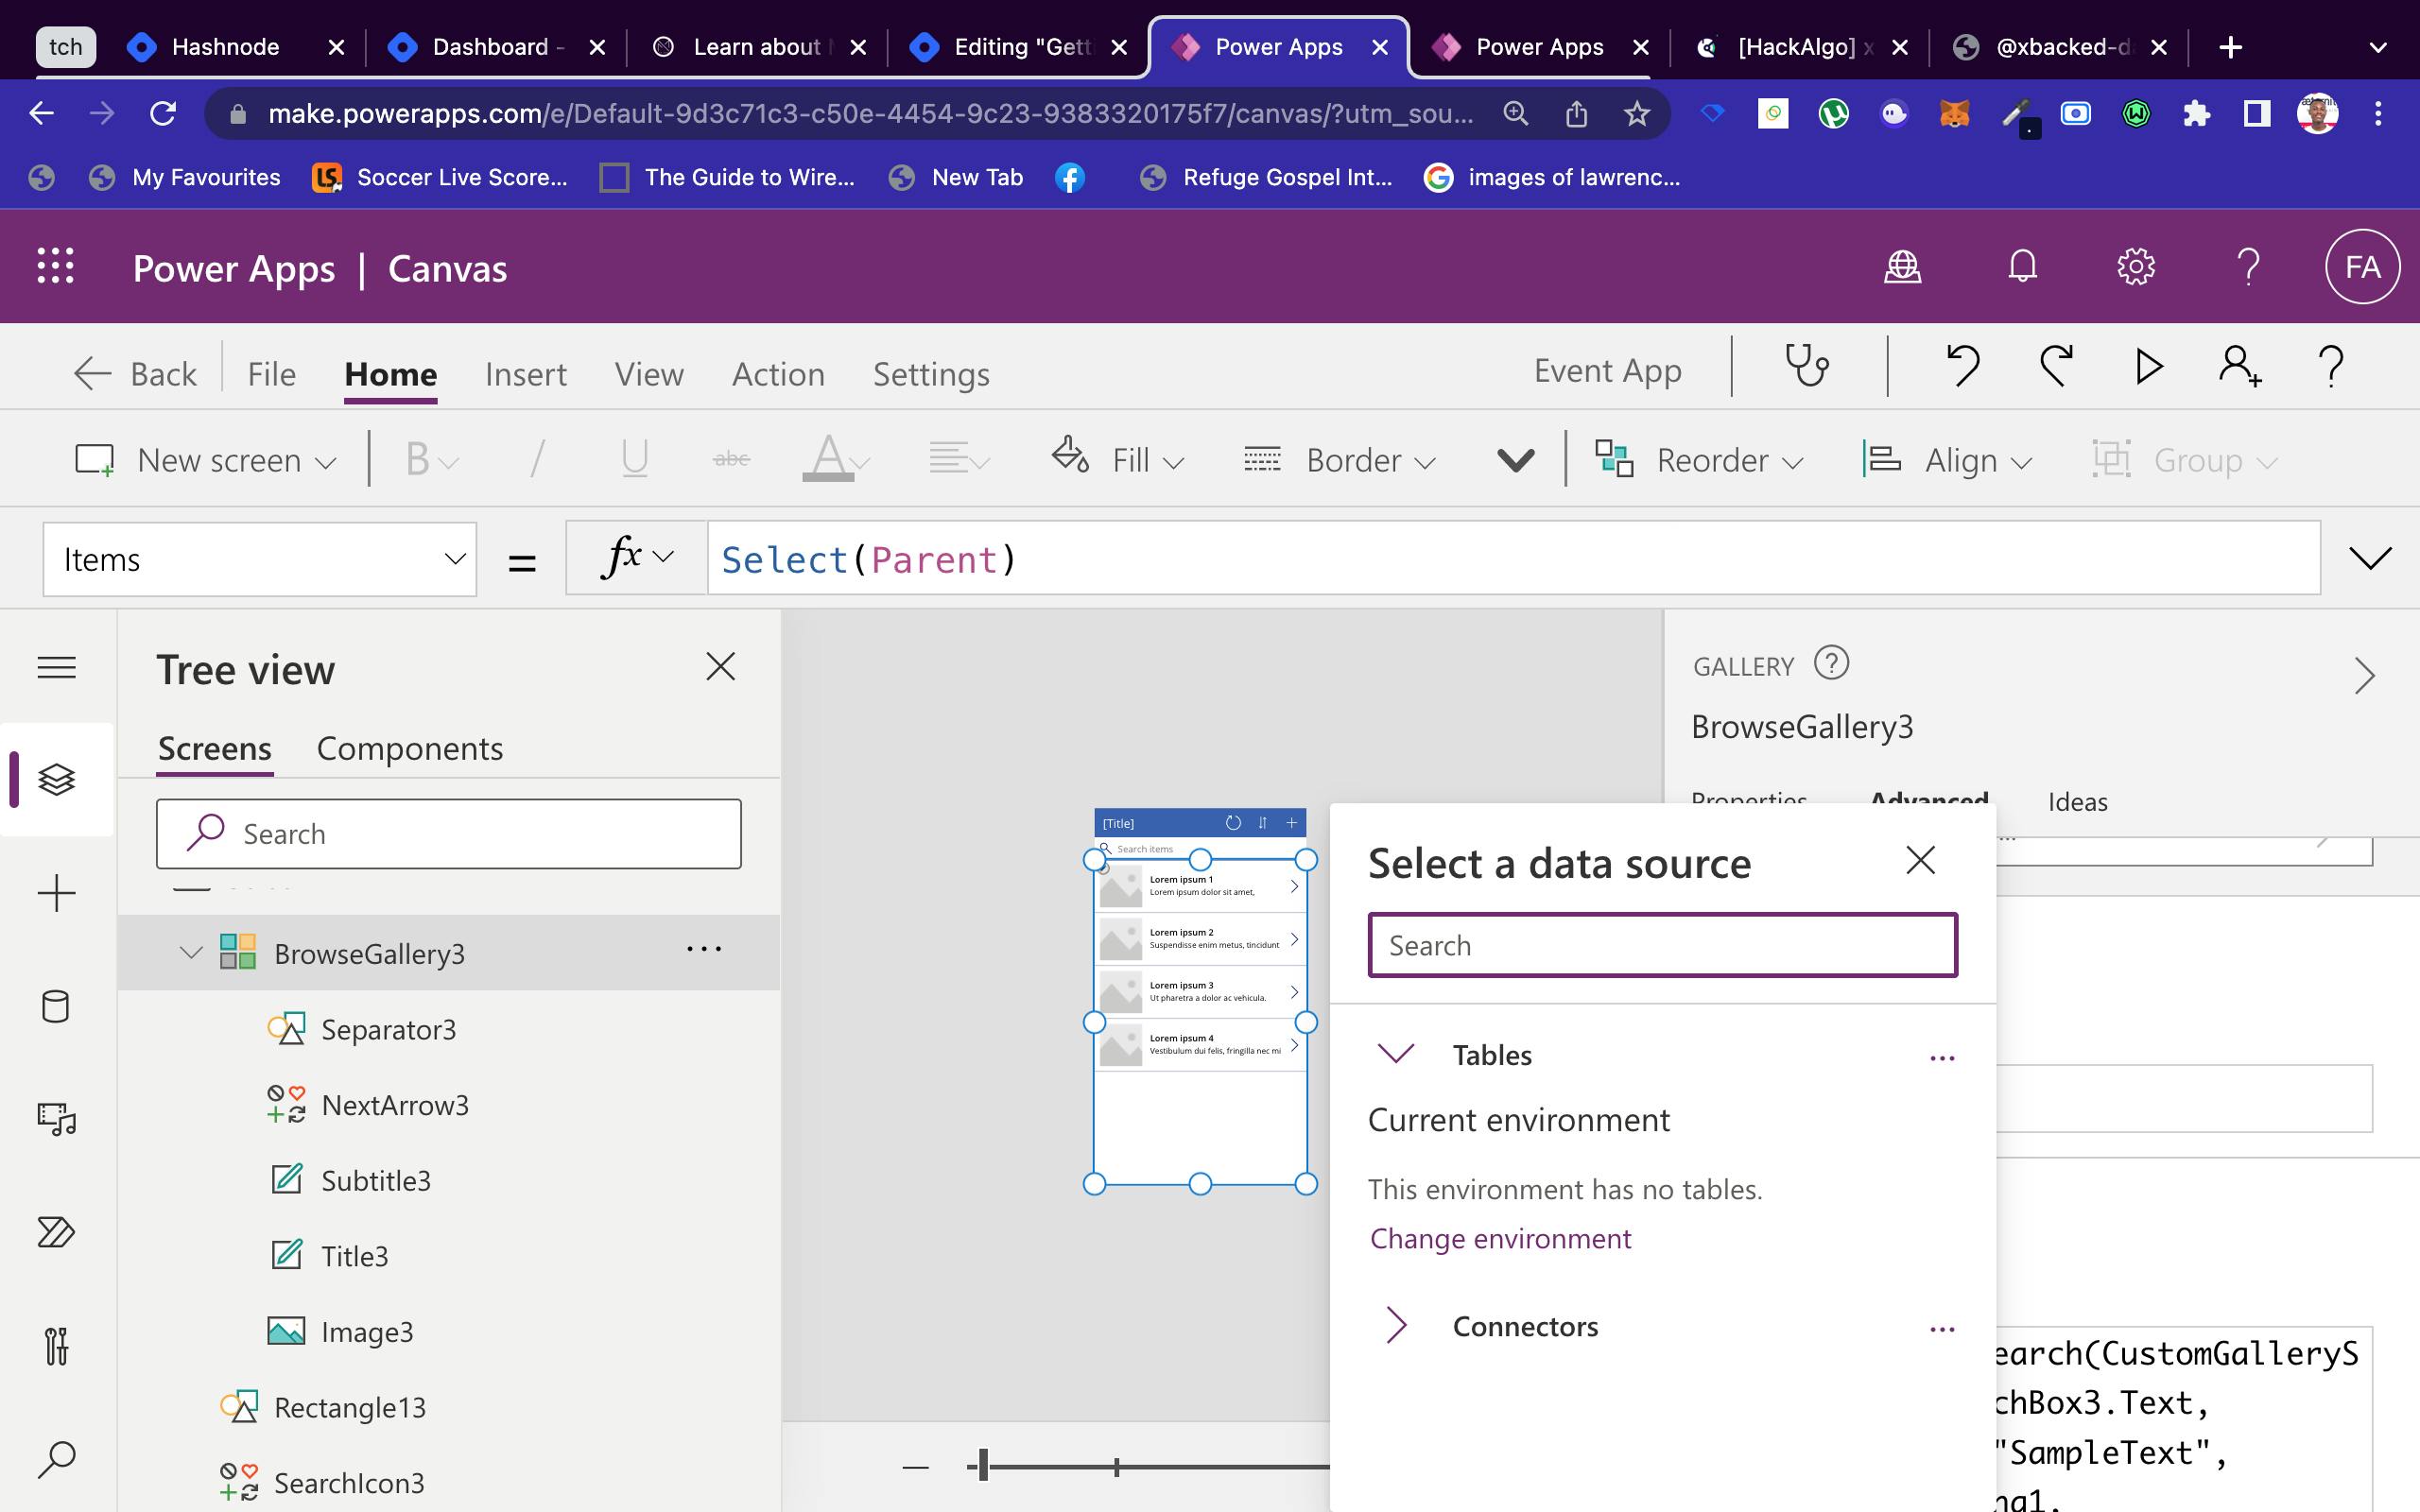
However, right now we have no table or connector in our current environment. (some links in the previous article will explain more on connectors and environments in power apps). We are going to fix that right now:
- Click the back arrow on the top menu back to return to the home screen
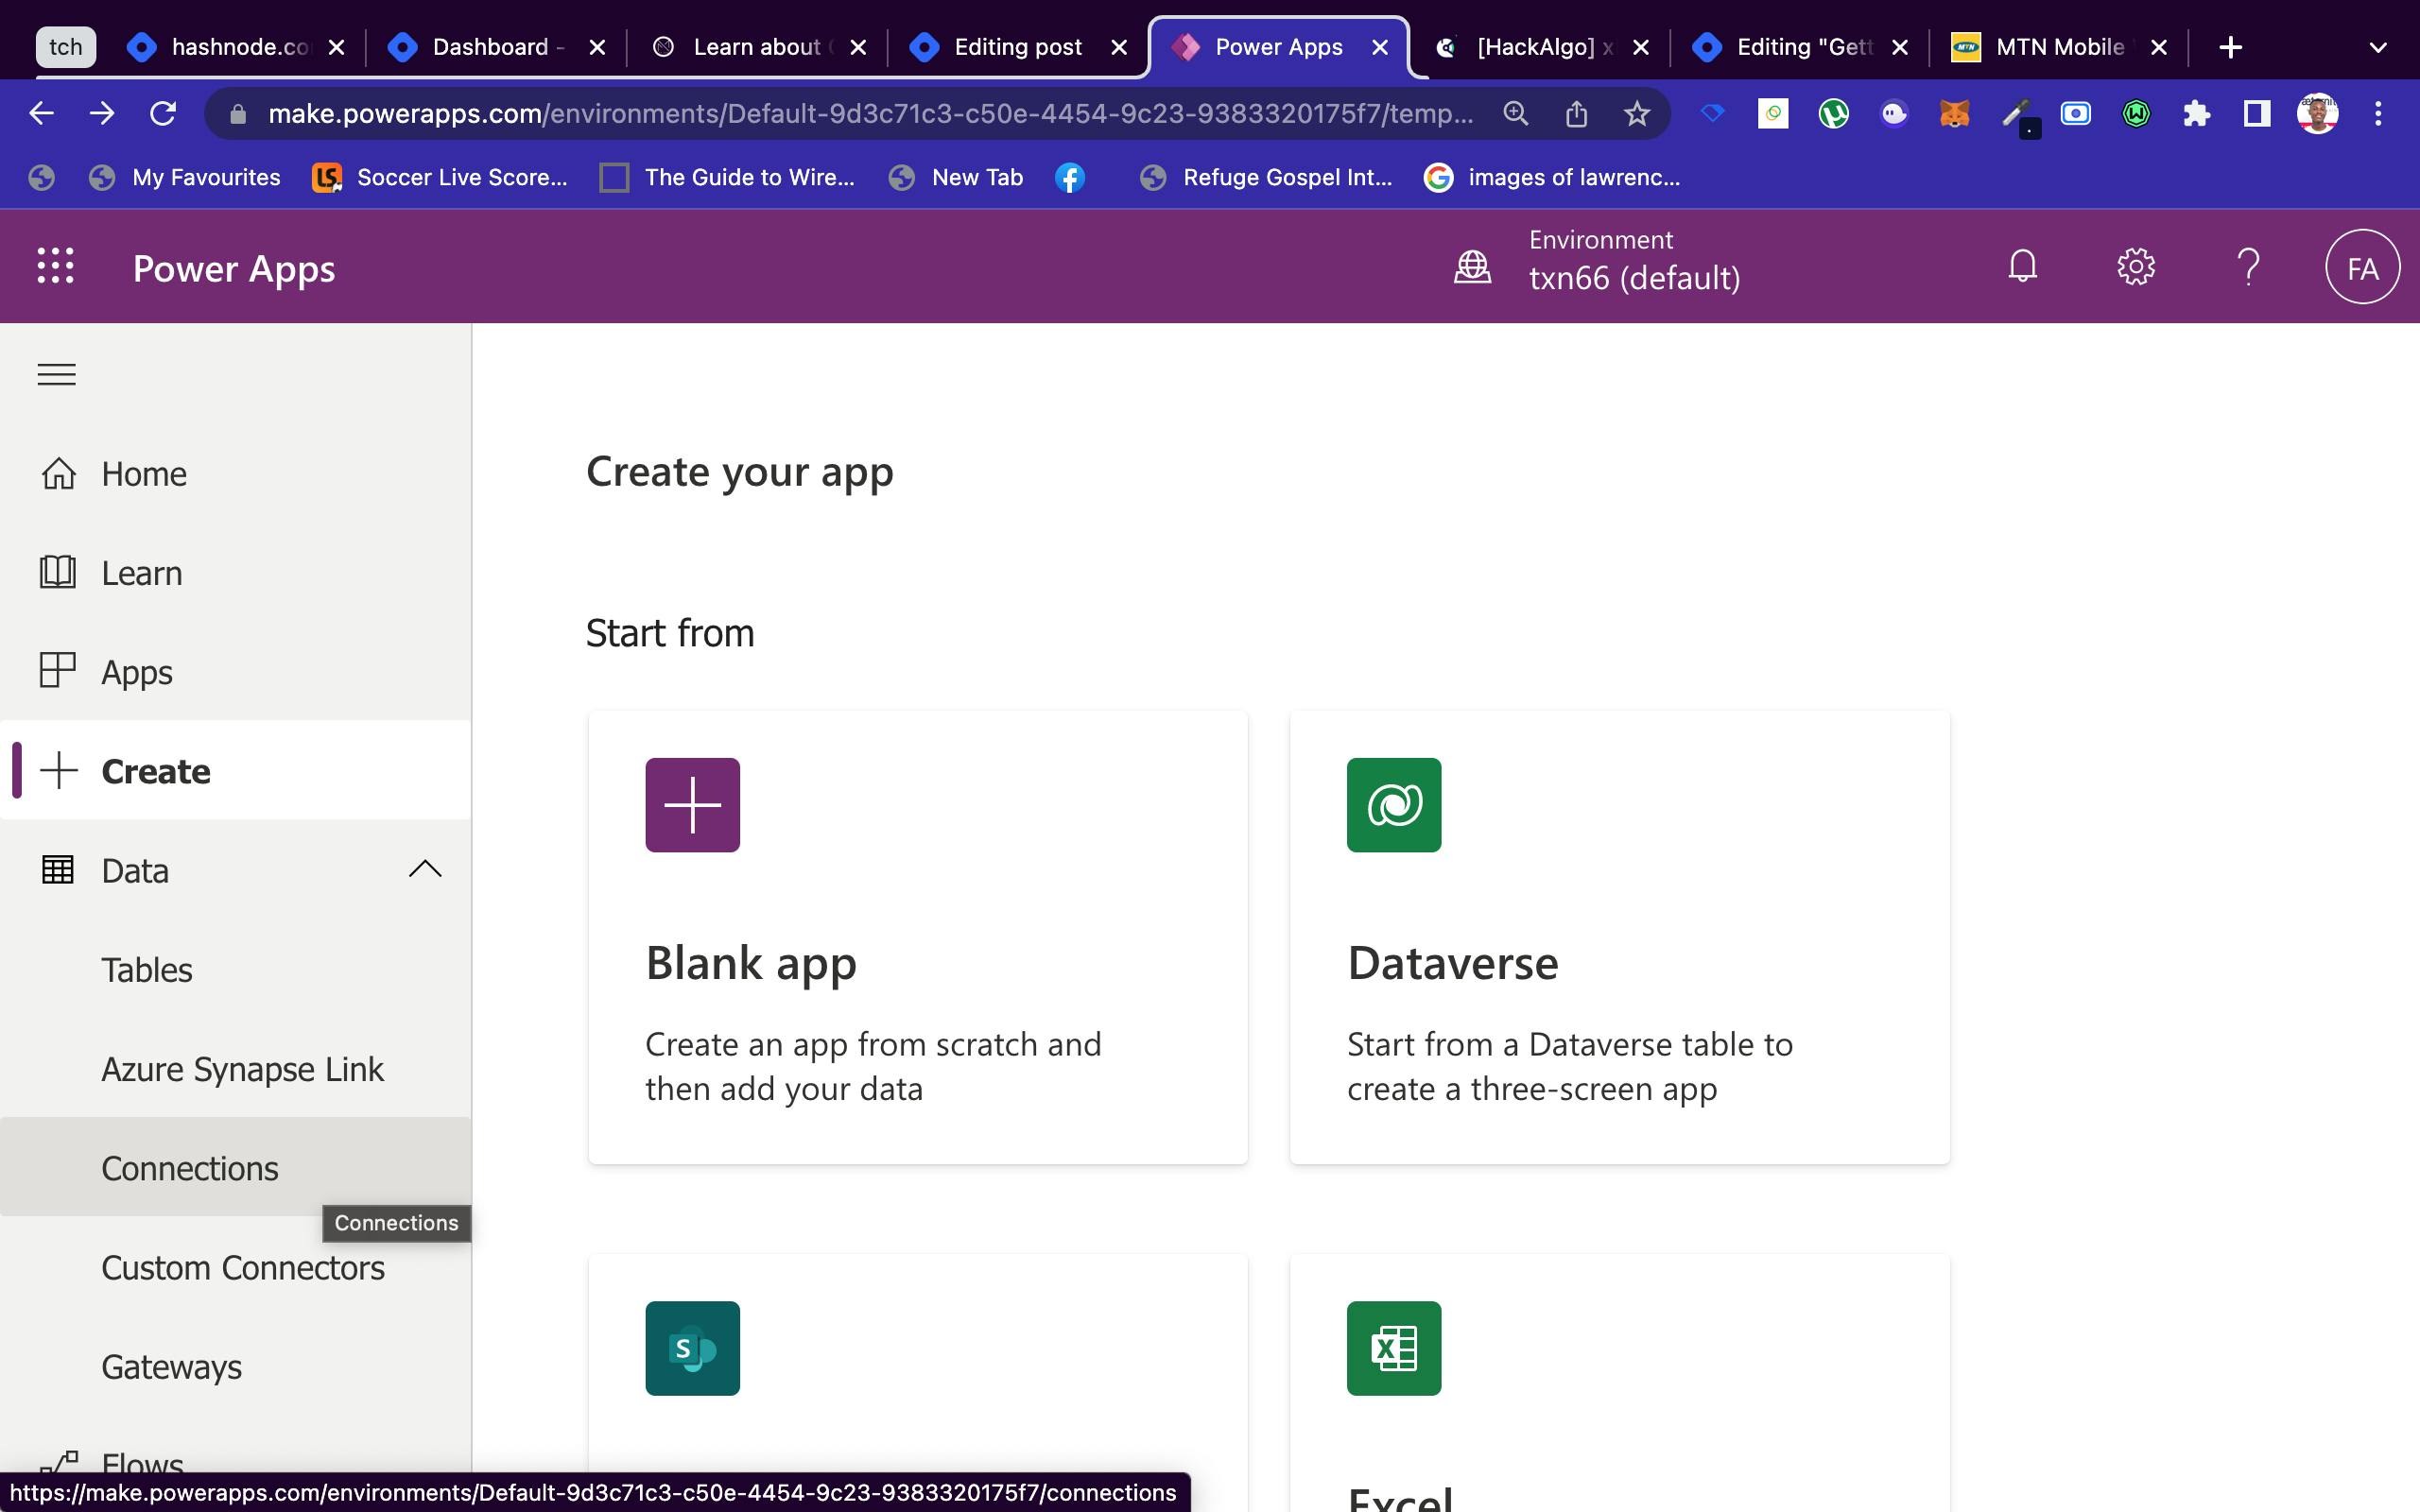
- Click on connections, to add a new connection to the app.
In this app, for my data source, I will be using an already created Google sheet. So I will connect to Google Sheets, by signing into my Gmail and then authorizing Power Apps to have access to my Google Account.
After everything is done, this is what I have:
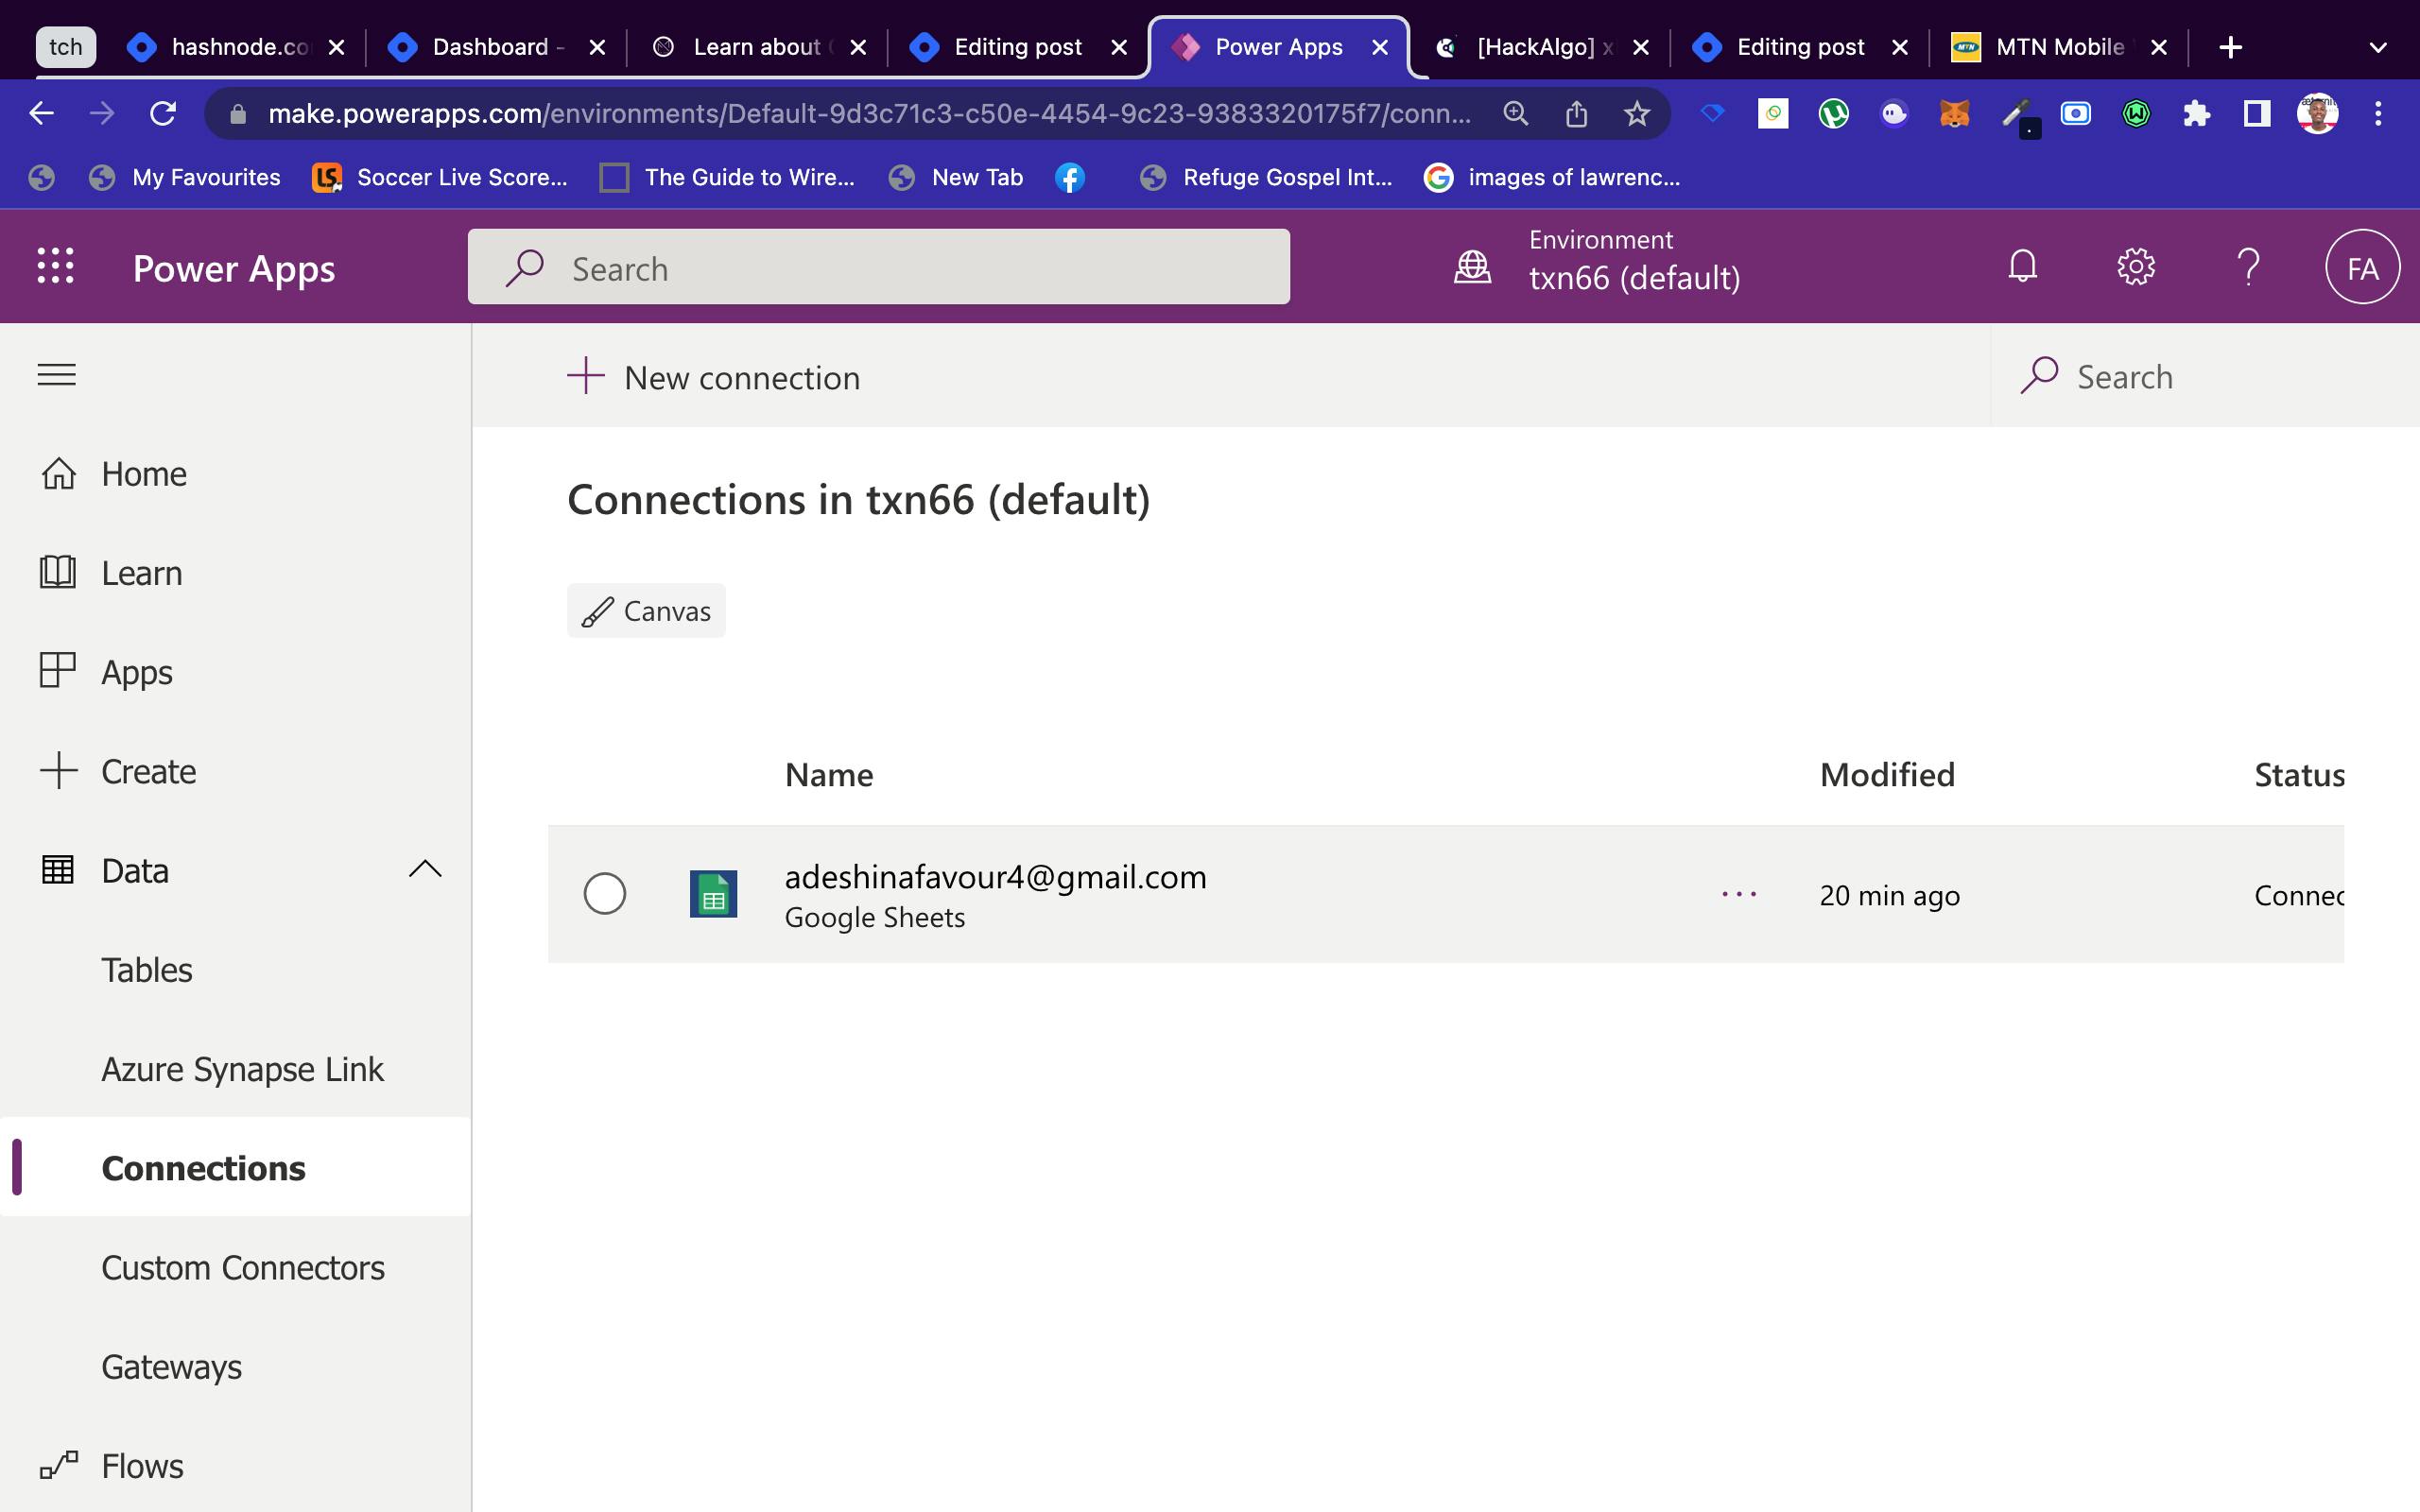
Now let us return back to building our app, by heading back to Screen 4 and connecting to an already existing Google Sheet in our connected Google Account.
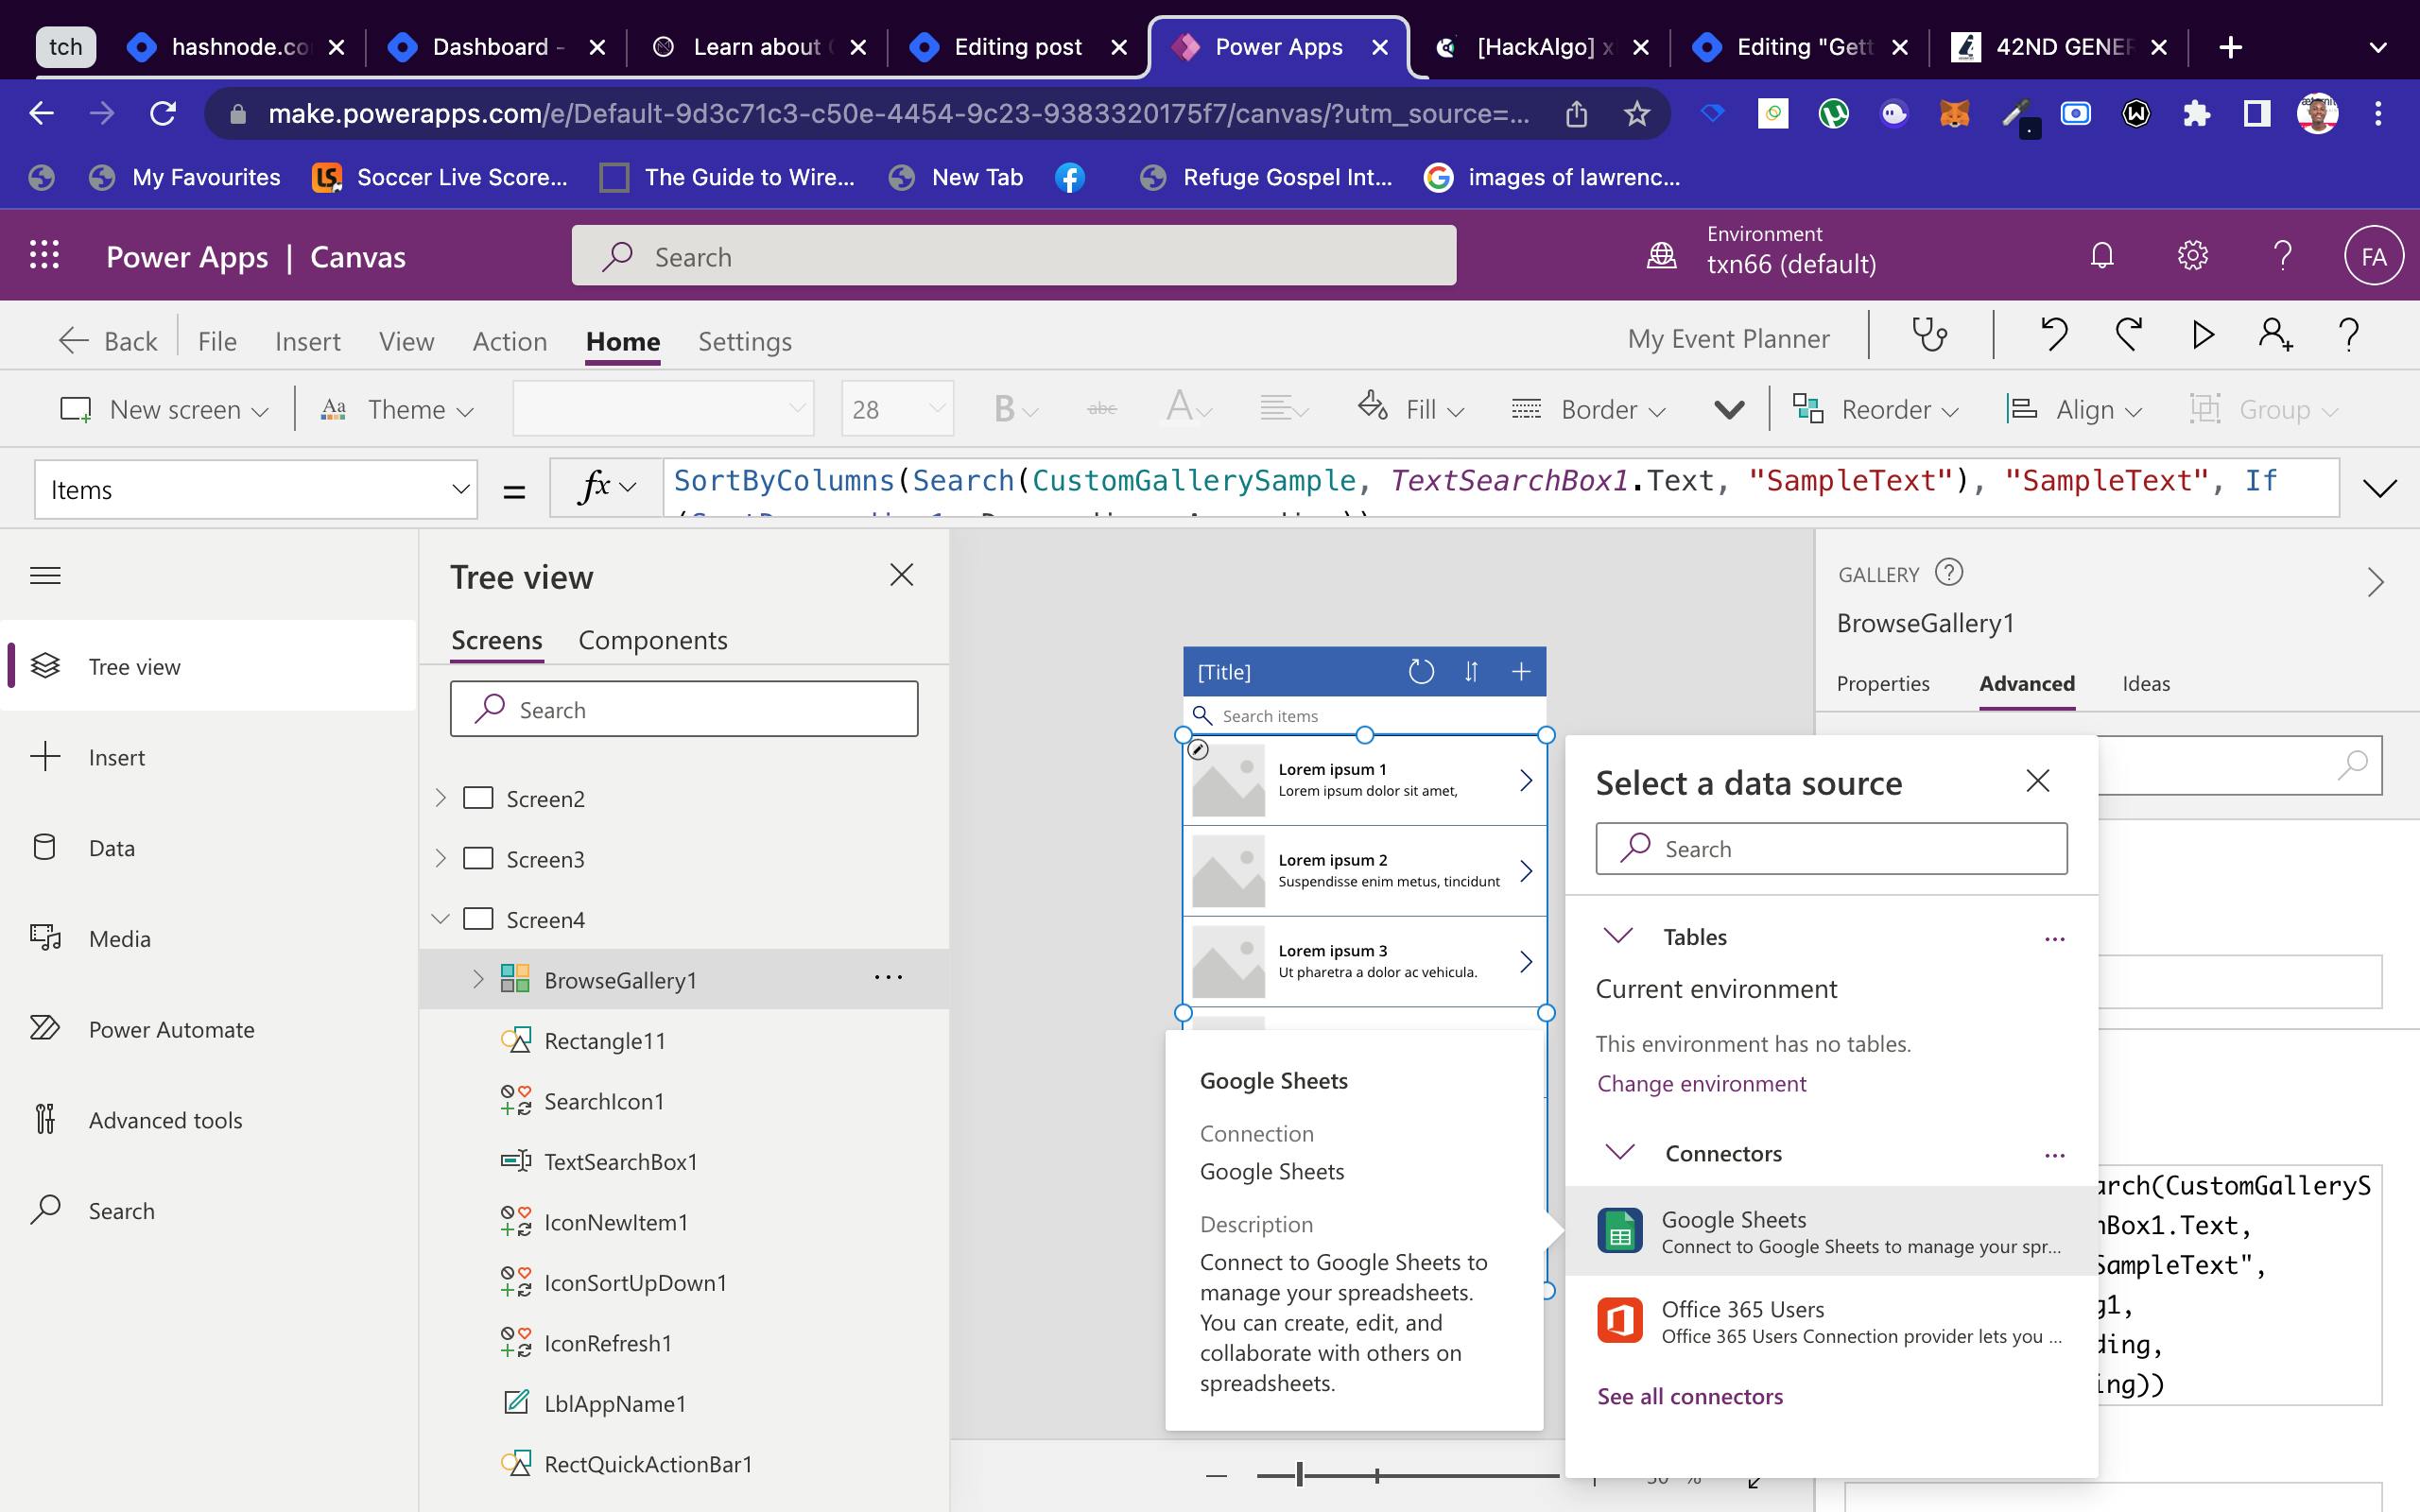
Now after successfully connecting to an existing Google sheet, hence the following data was added to Screen4:
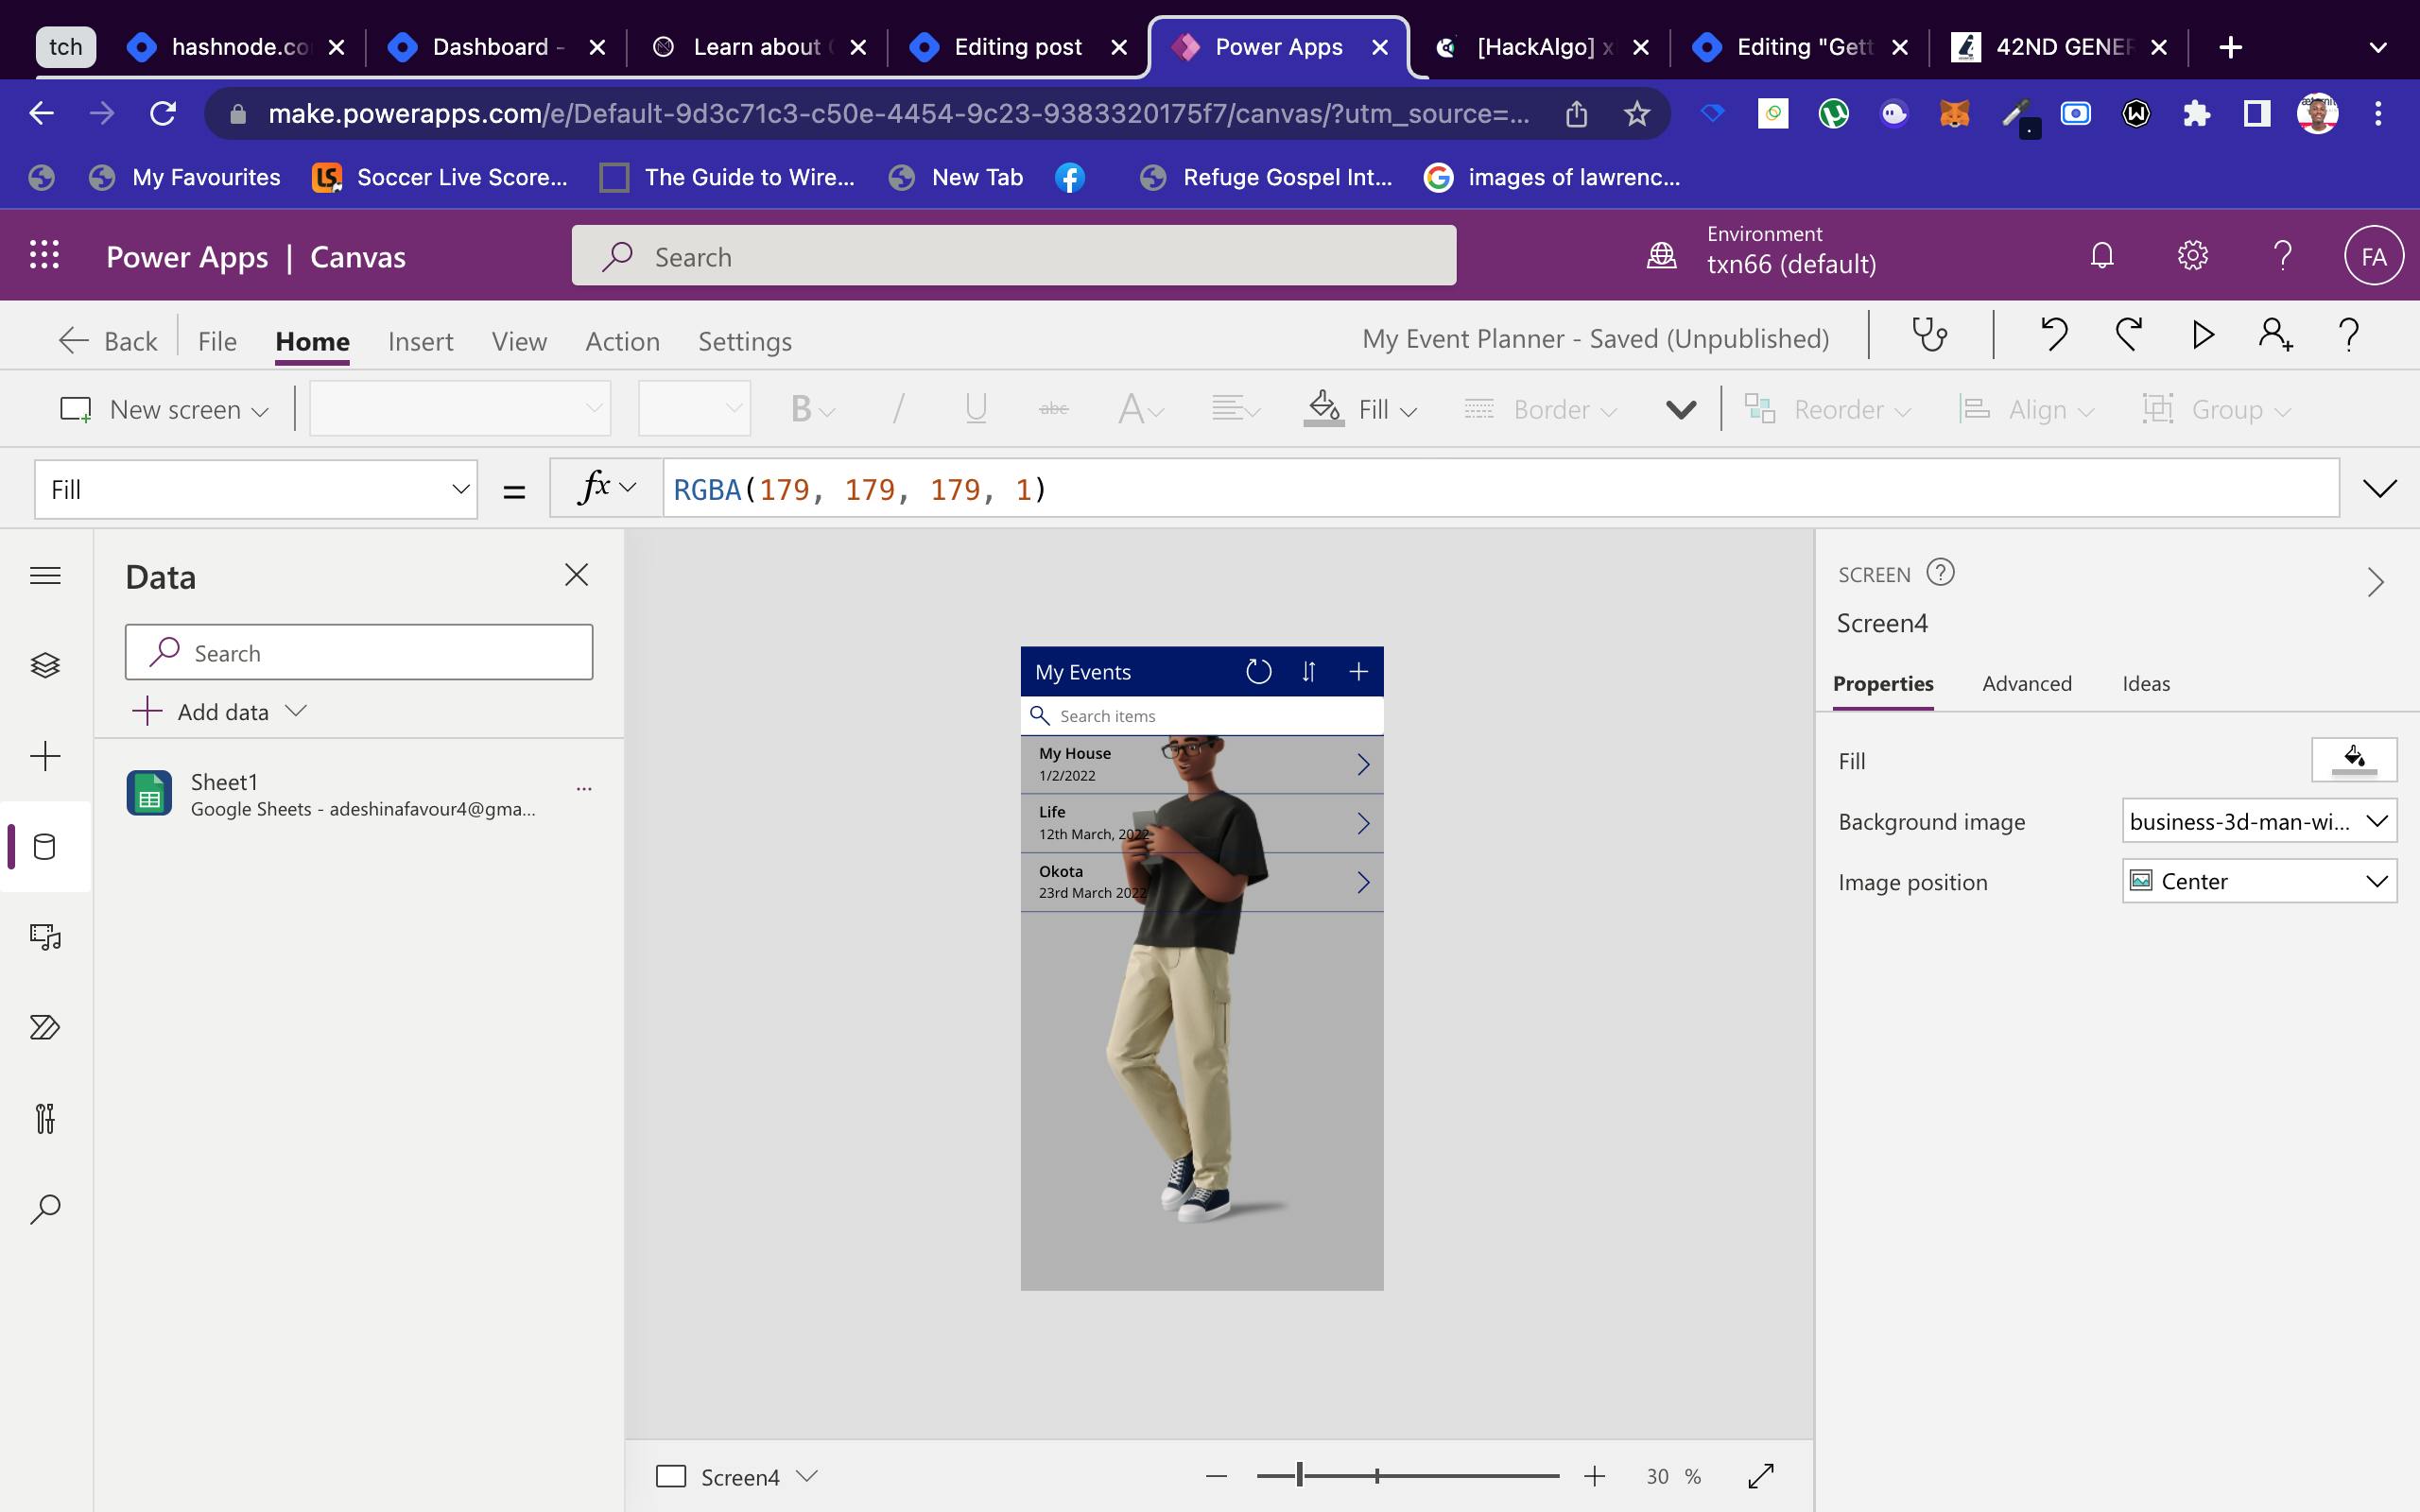
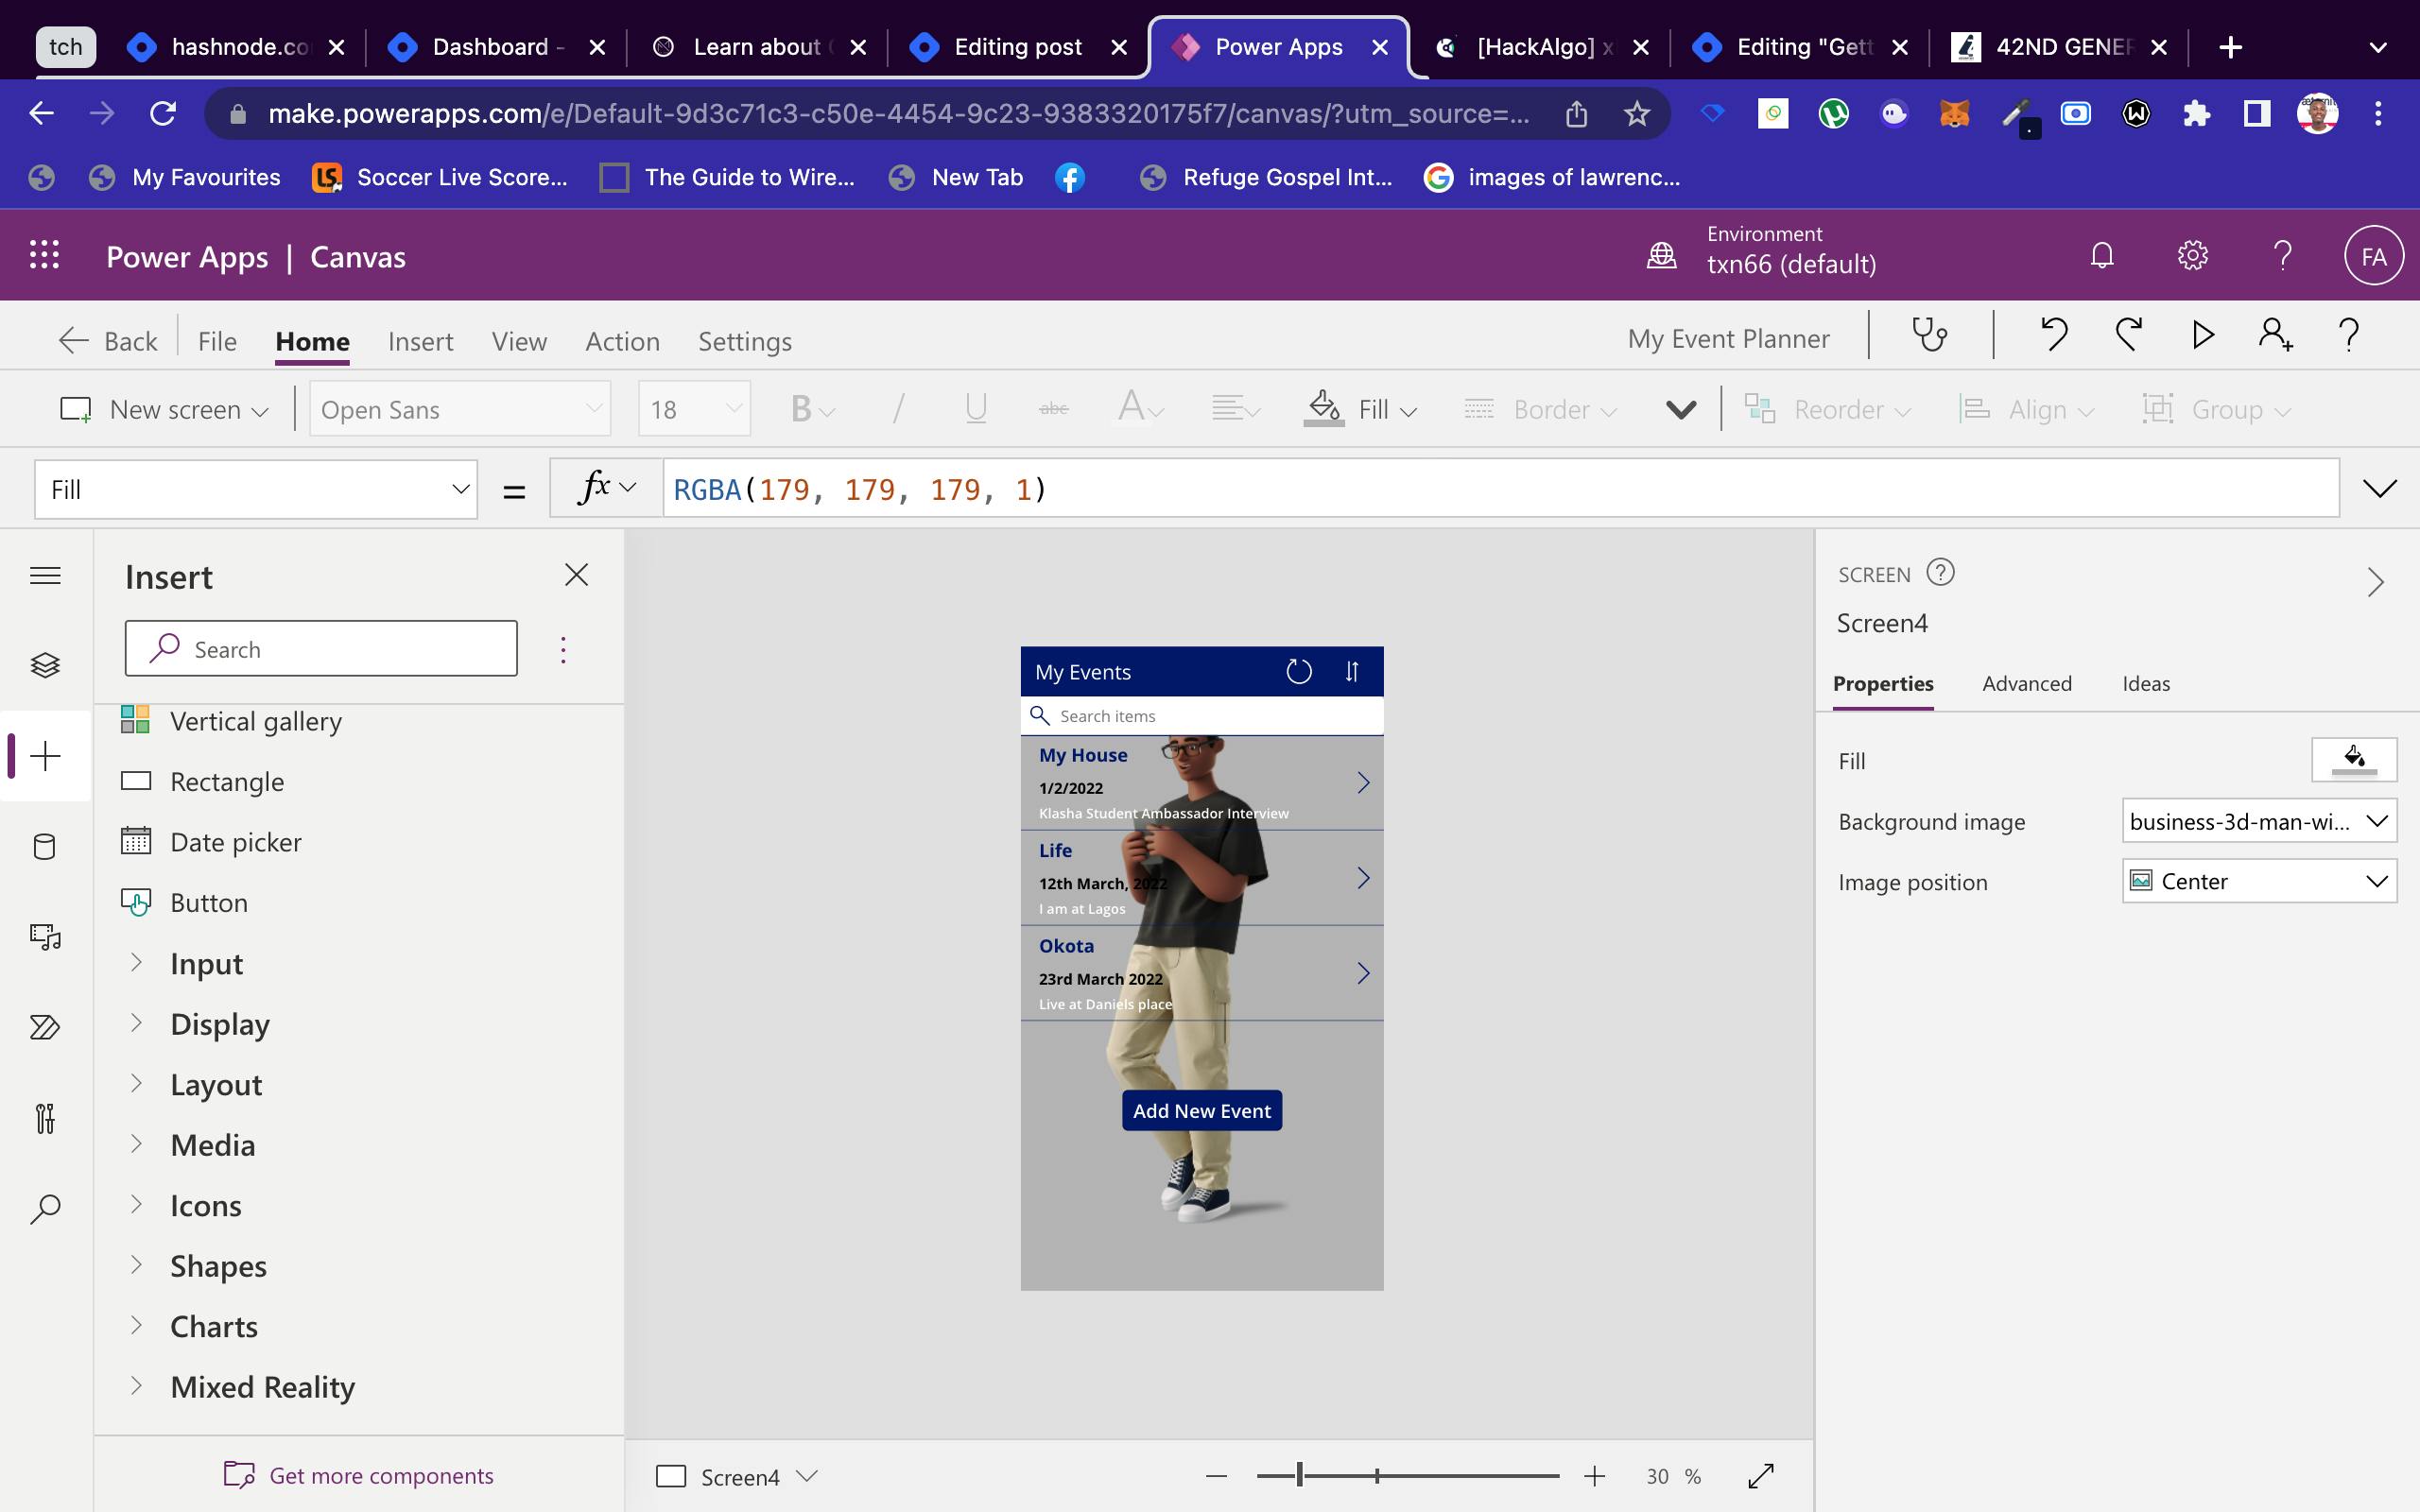
Lastly for Screen4, I will adjust the layout and the font style and also add a Button to Register a New event.
After everything is done, this is the new look for Screen4:
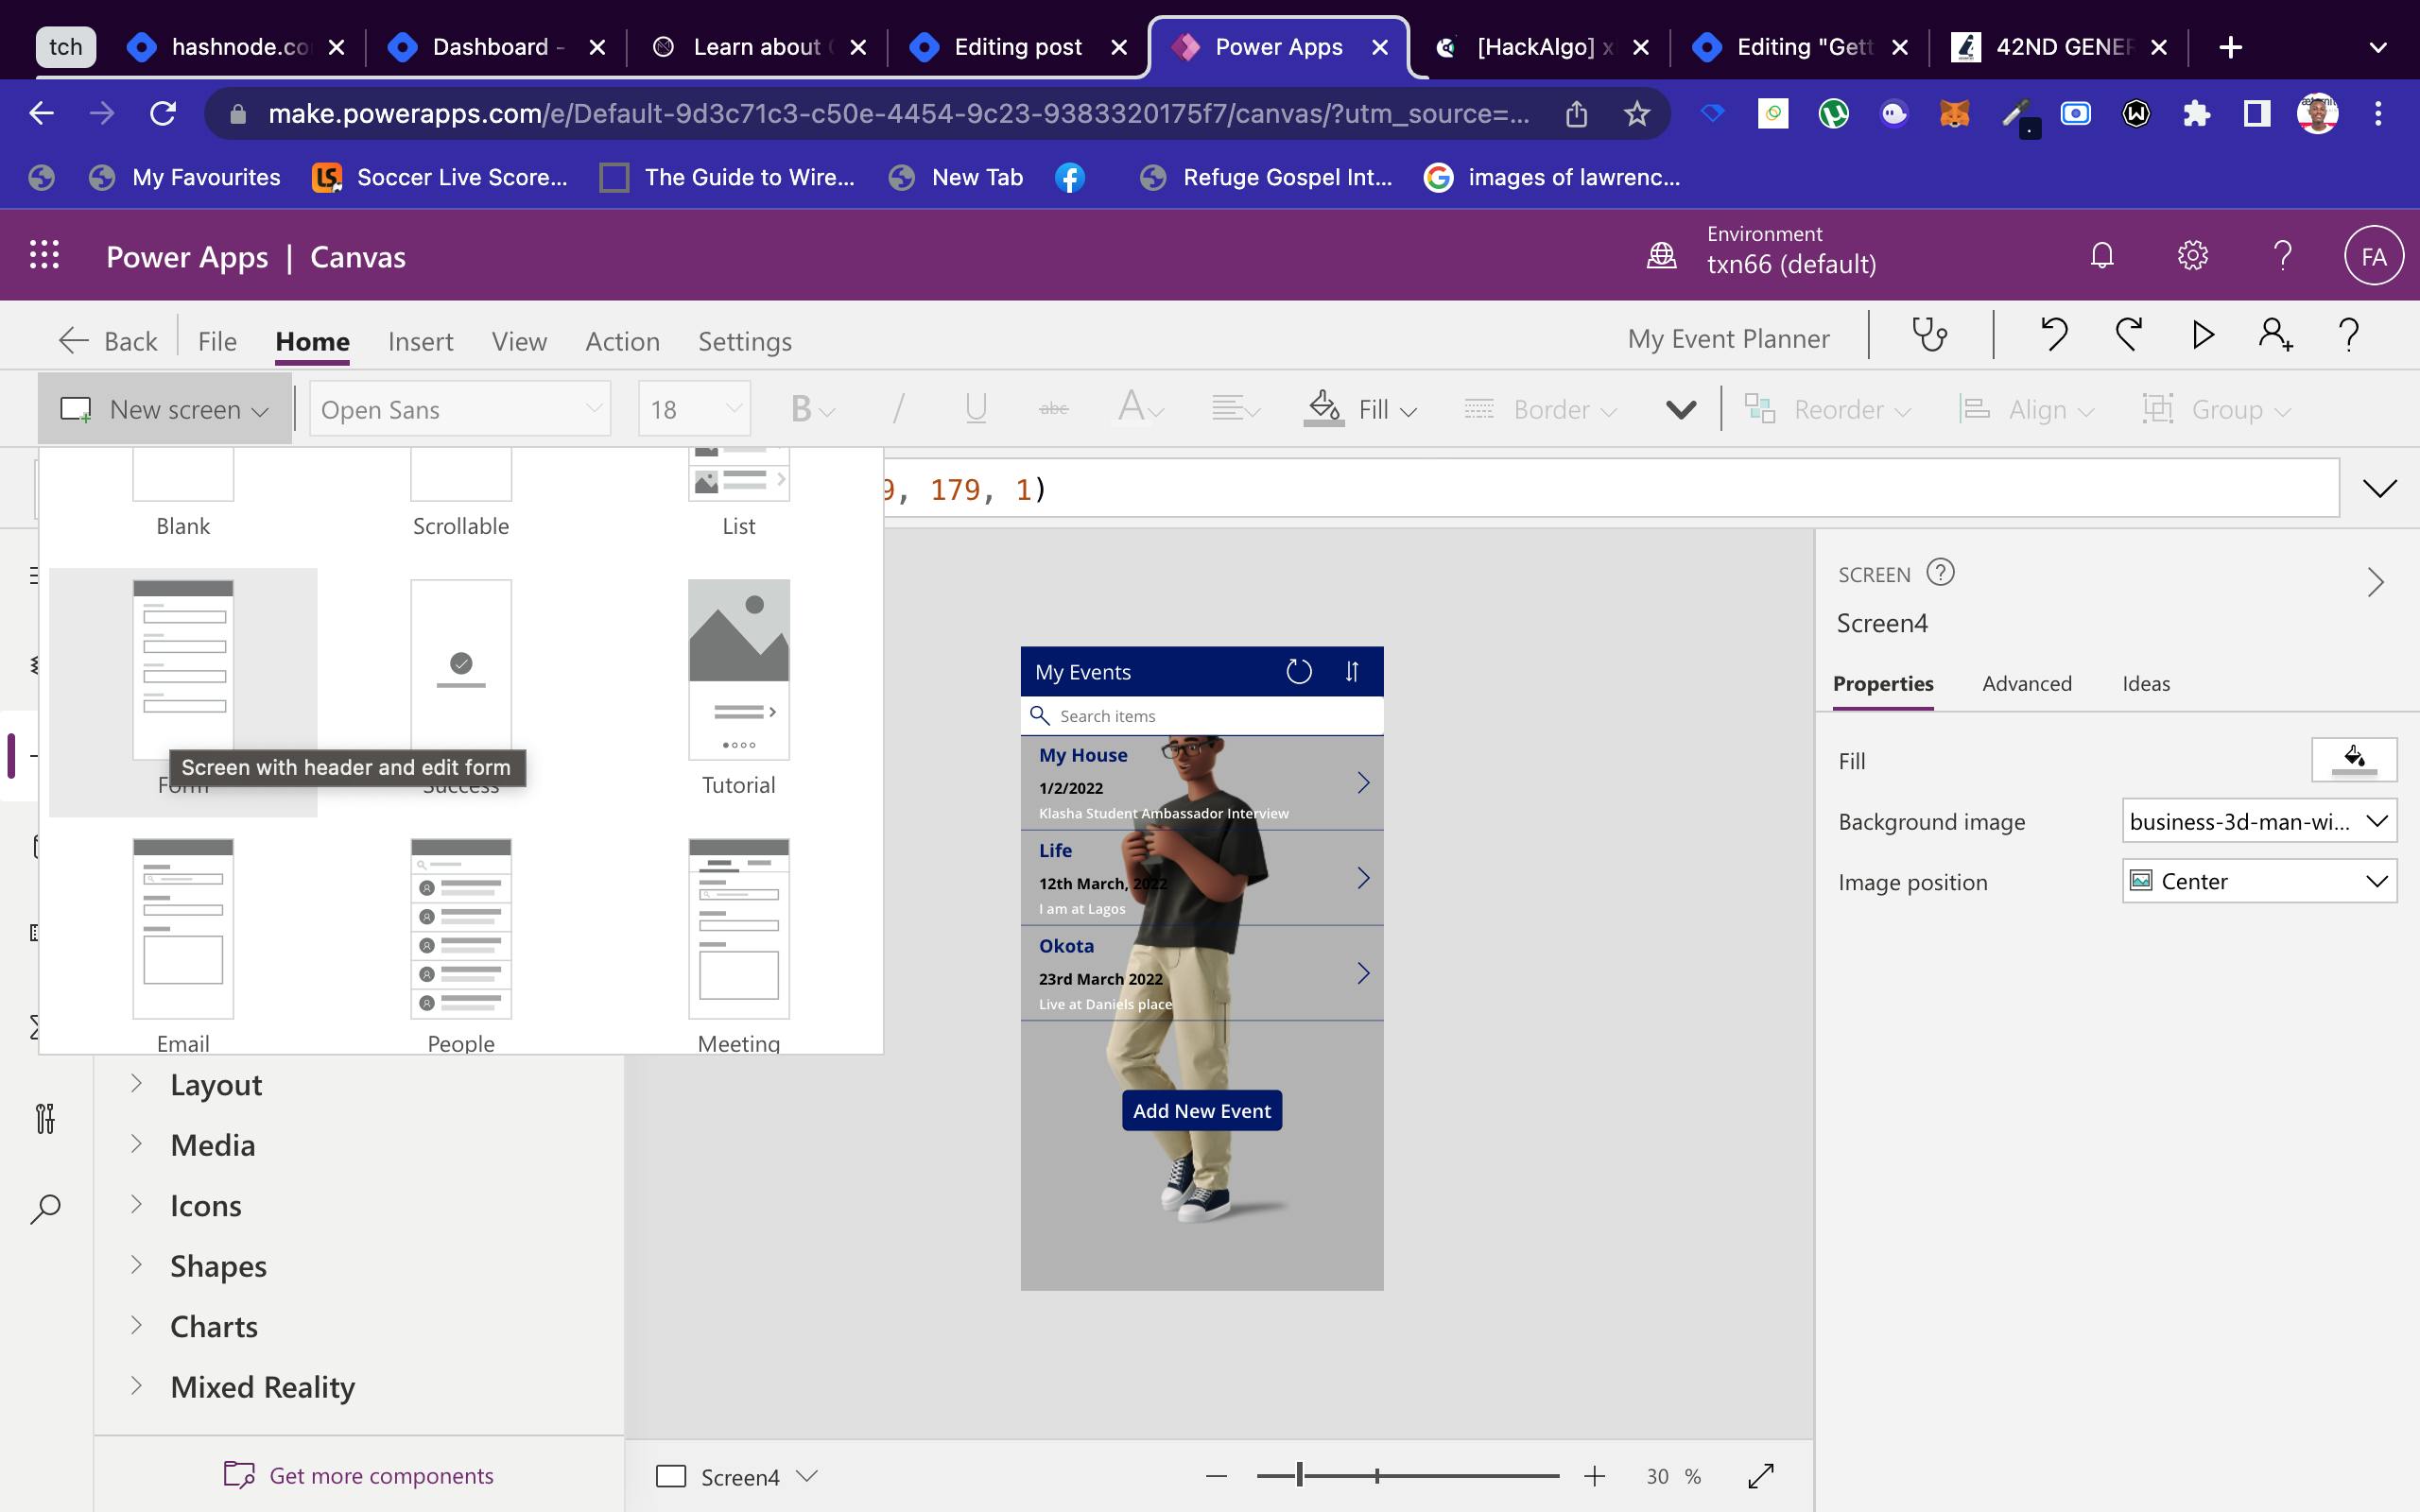
Moving forward we are going to be adding a new screen. So kindly go through the process as done earlier. We are going to be adding a Form Screen as Screen5.
The next action is to Edit the Screen properties, add a Title and connect to a Data Source.
You should be able to do this now, following our previous activities
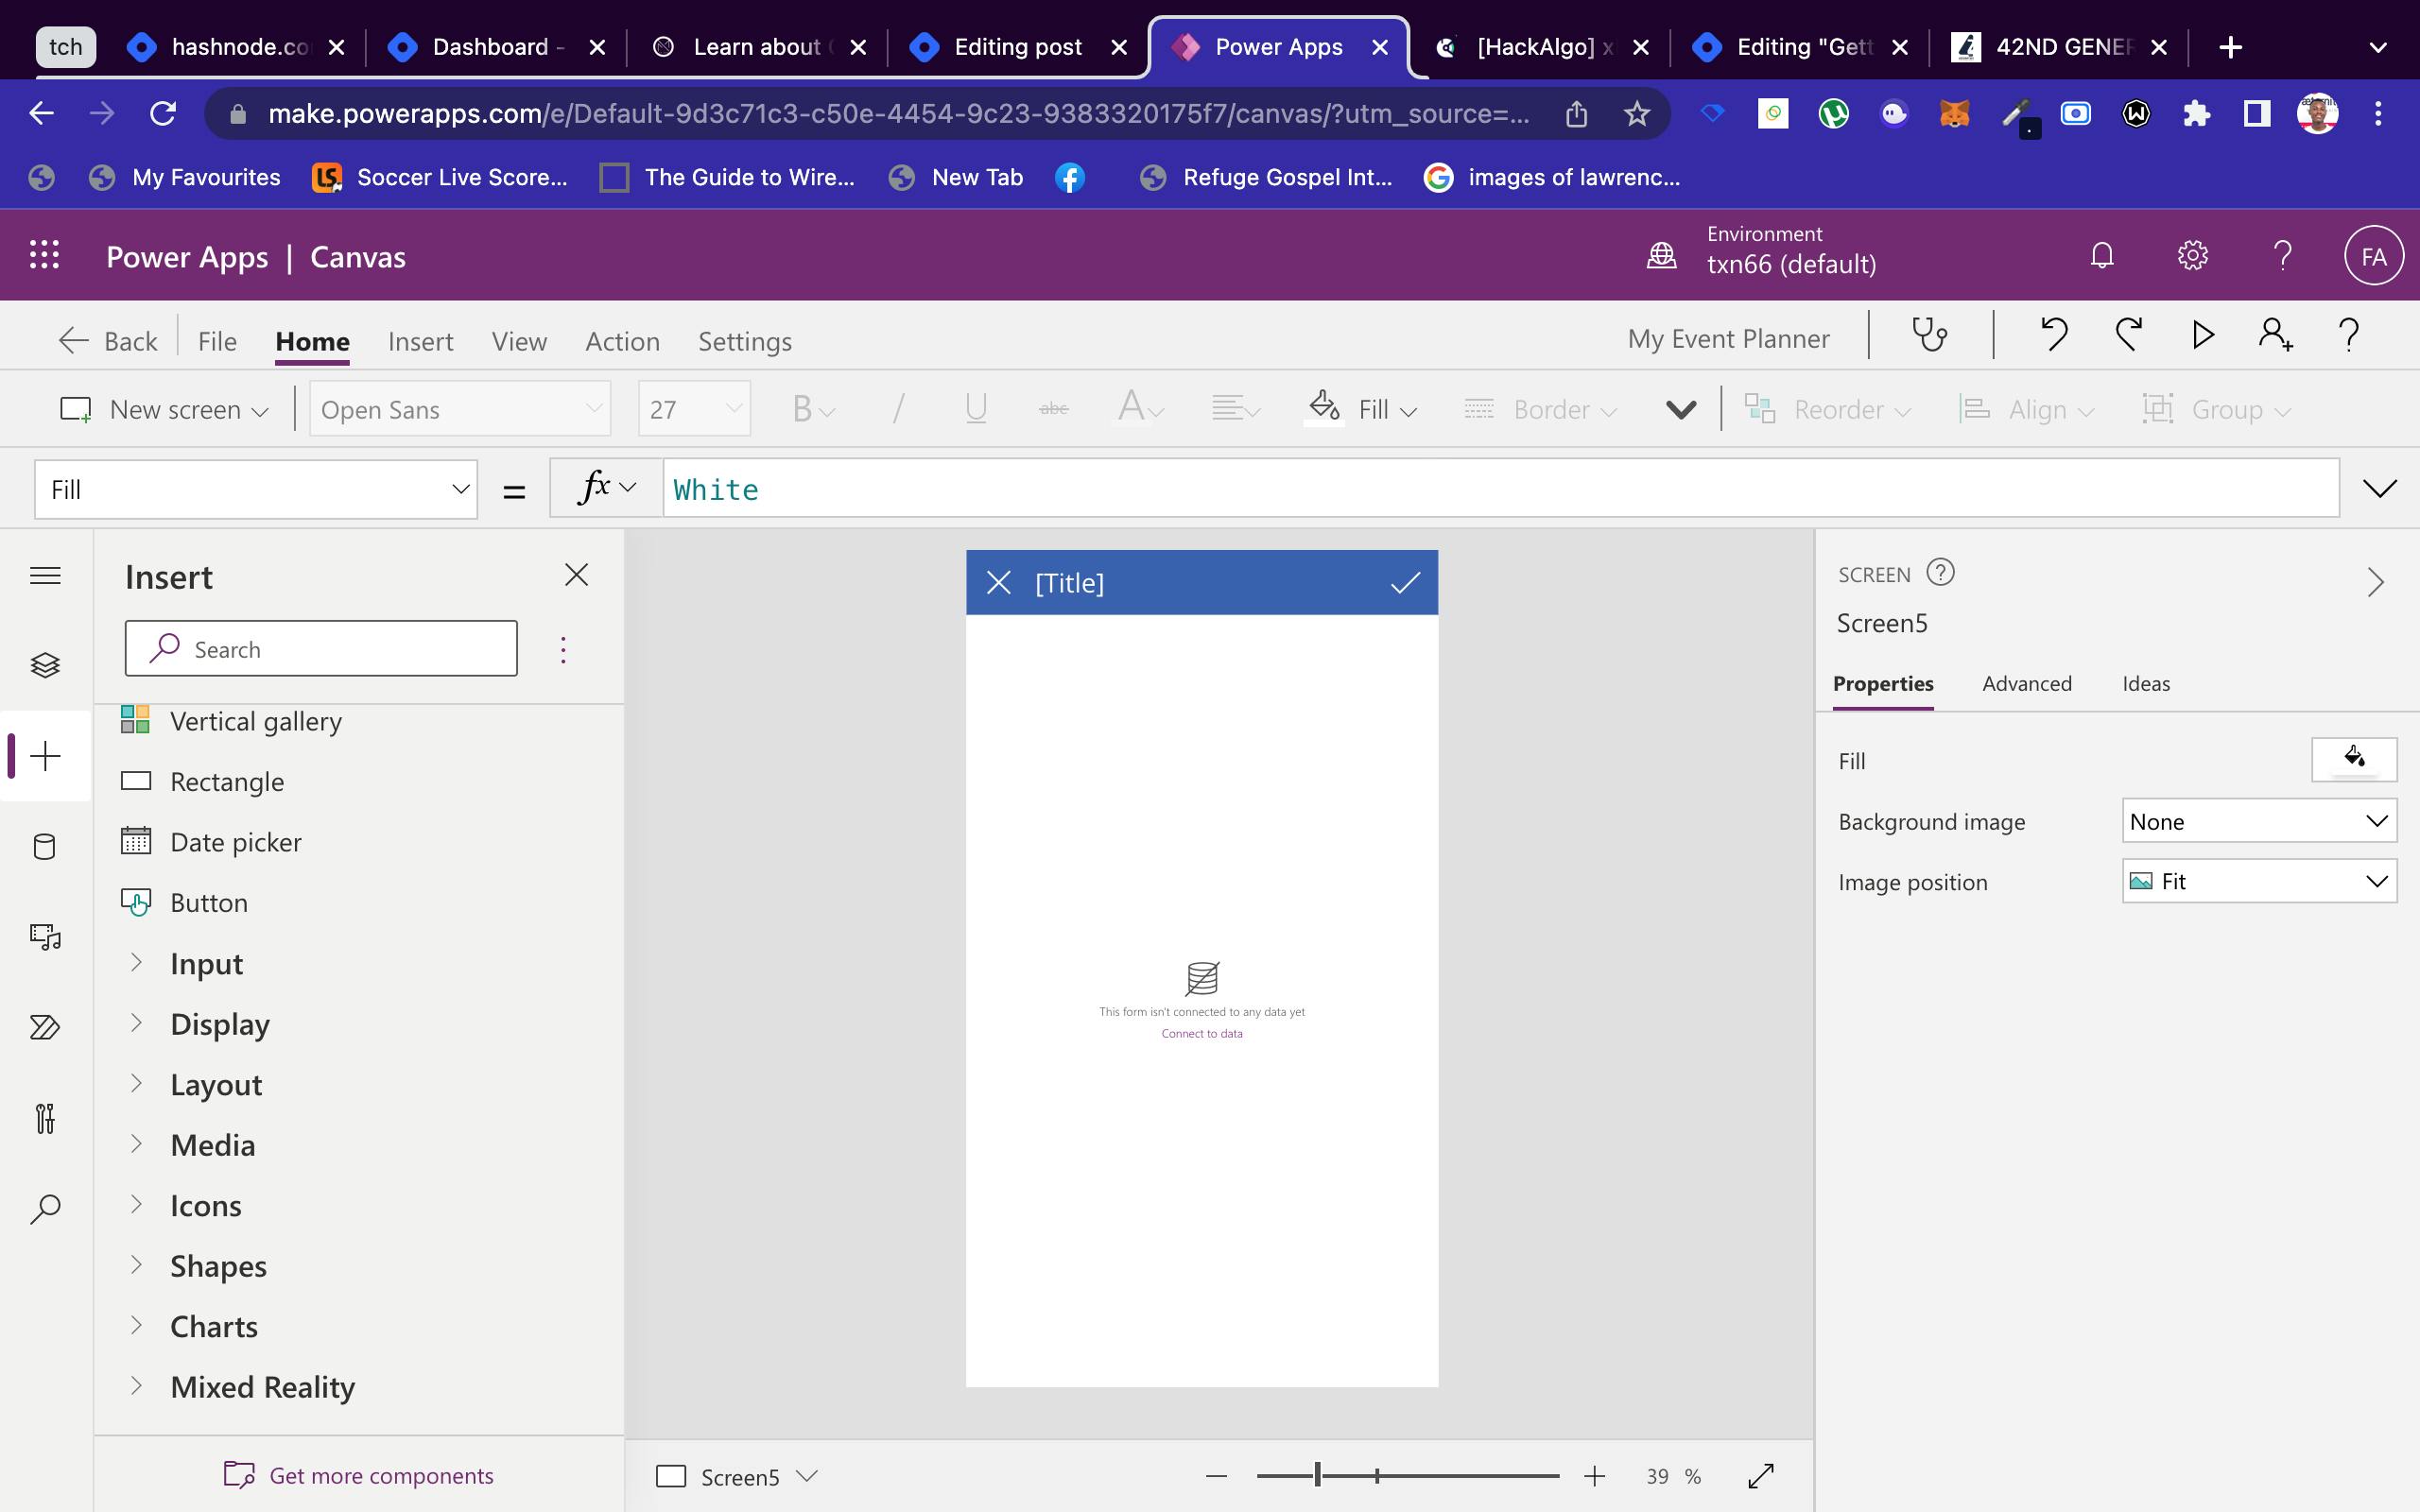
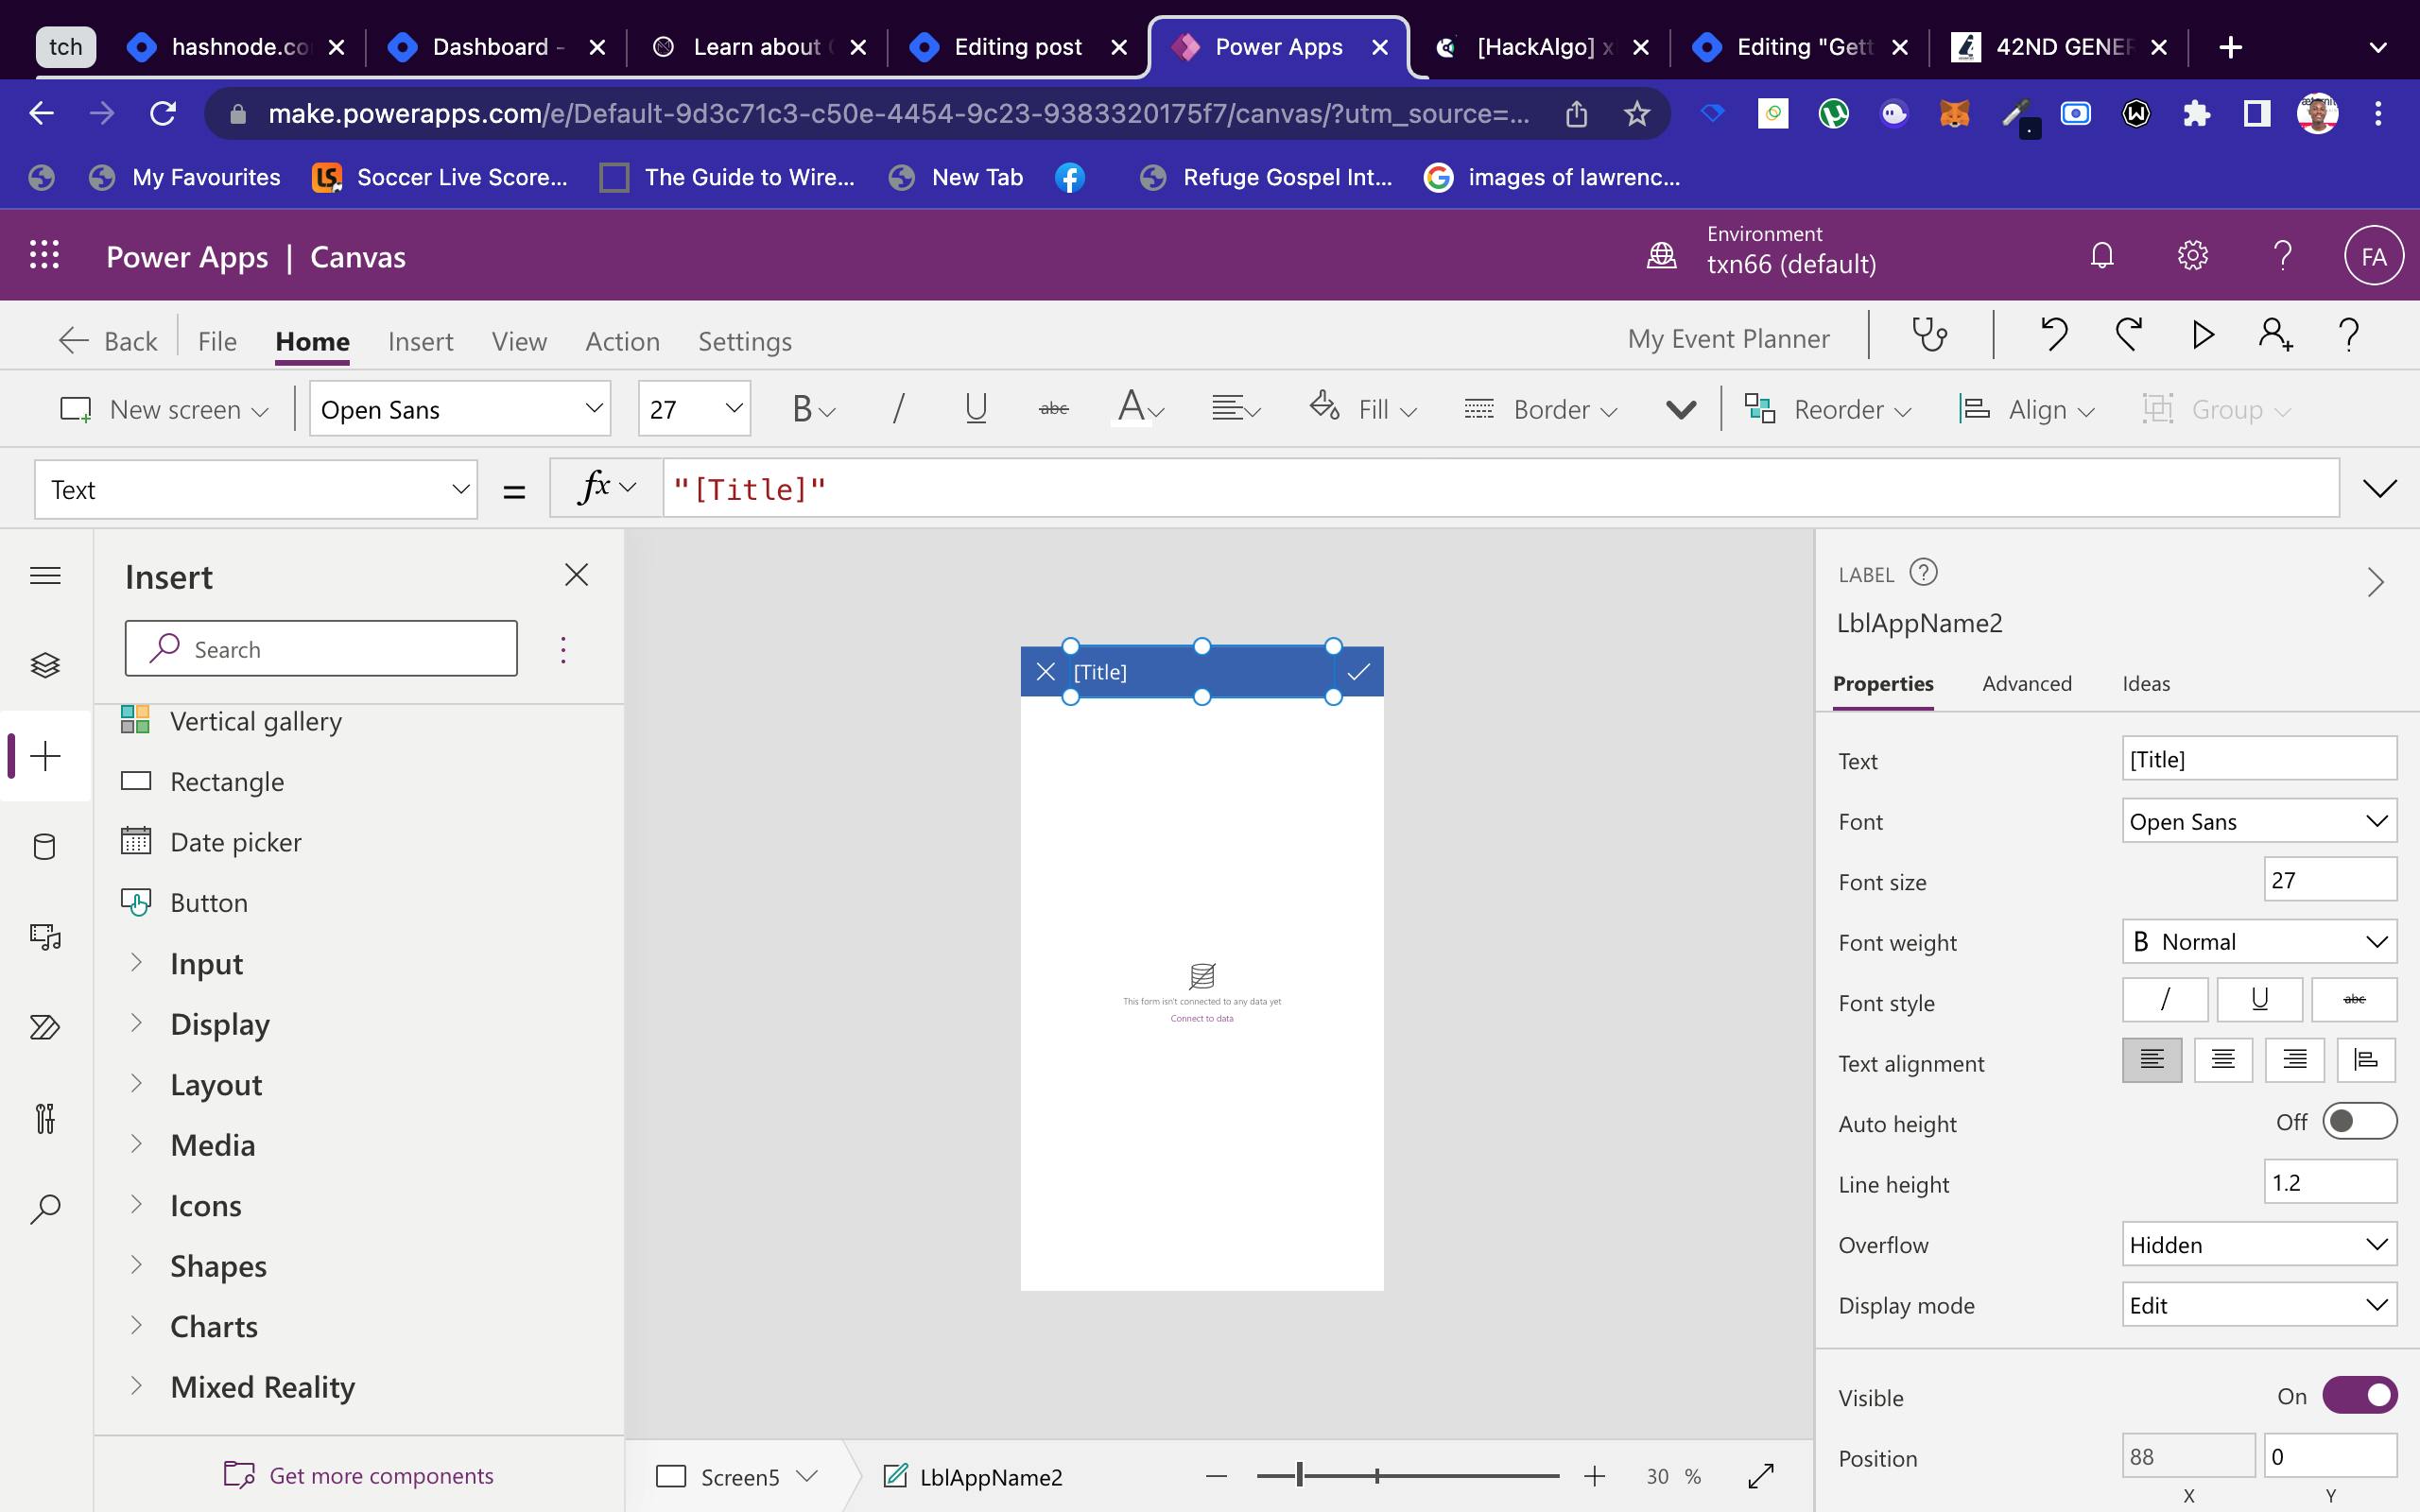
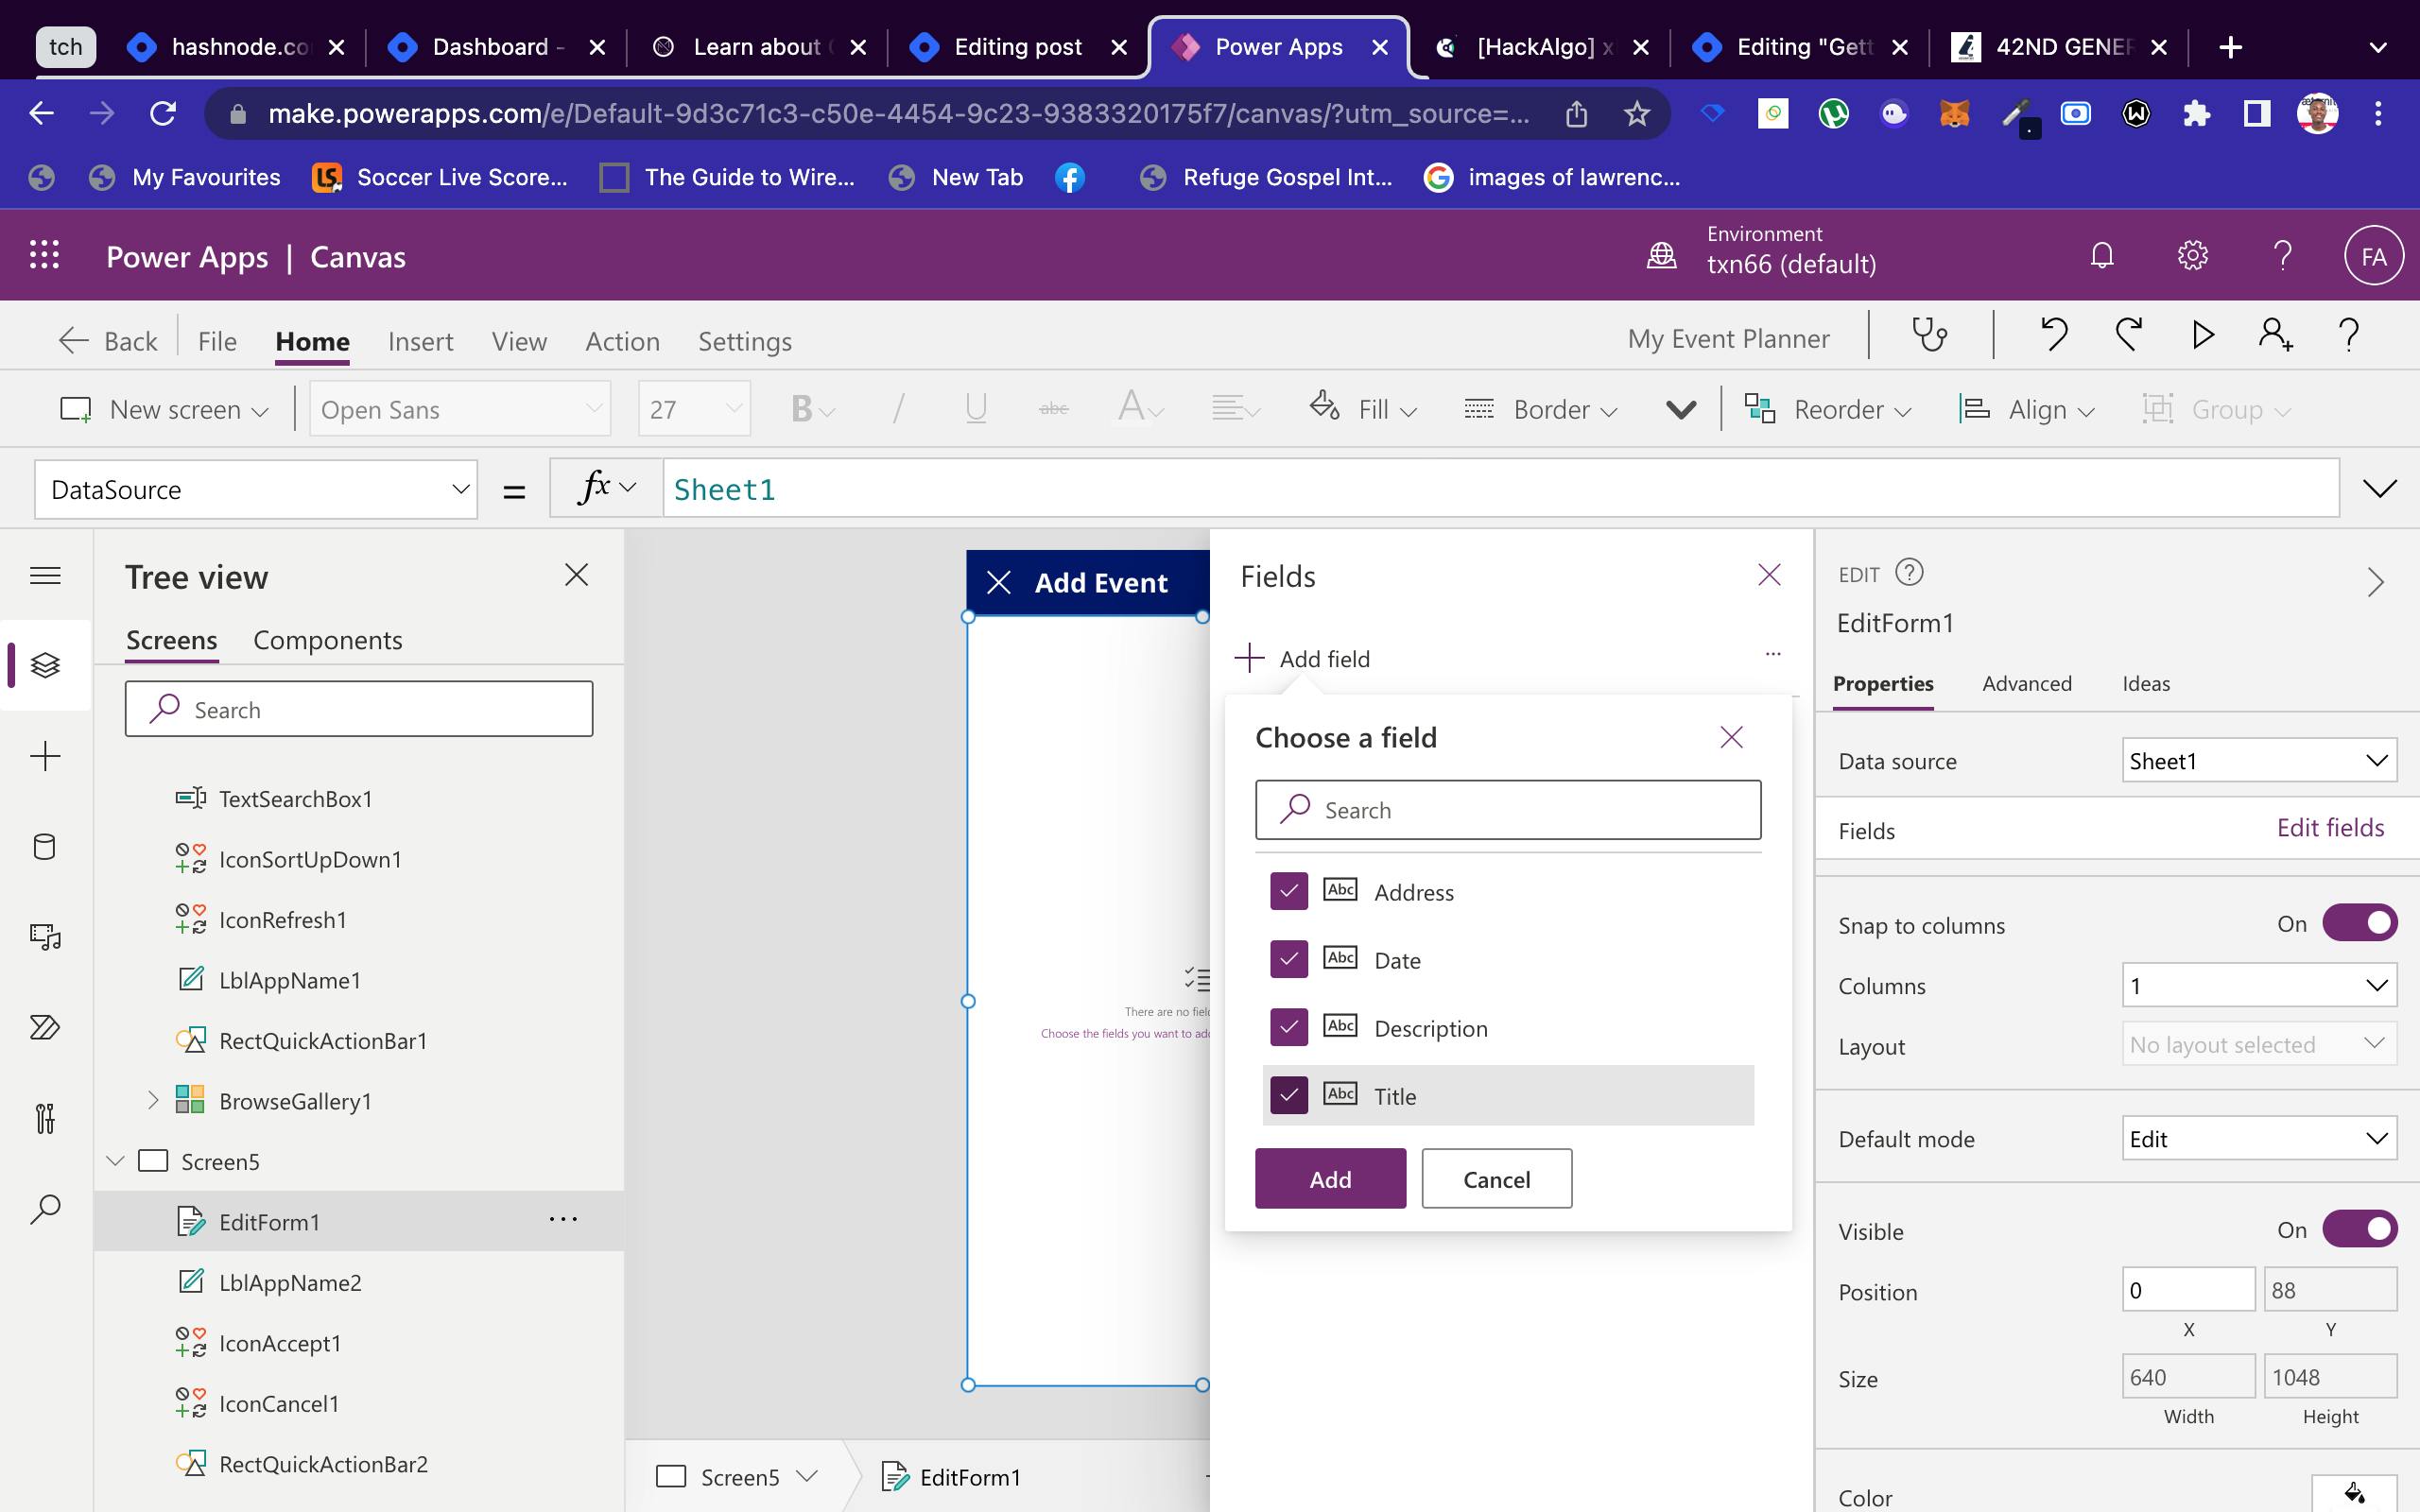
After connecting to your Data Source, the next step is to add fields in the form. But in this case, because we are connected to the data source, Power Apps provides the form as required in our Data Source. So we proceed by ticking the fields, in other to add them to the form.
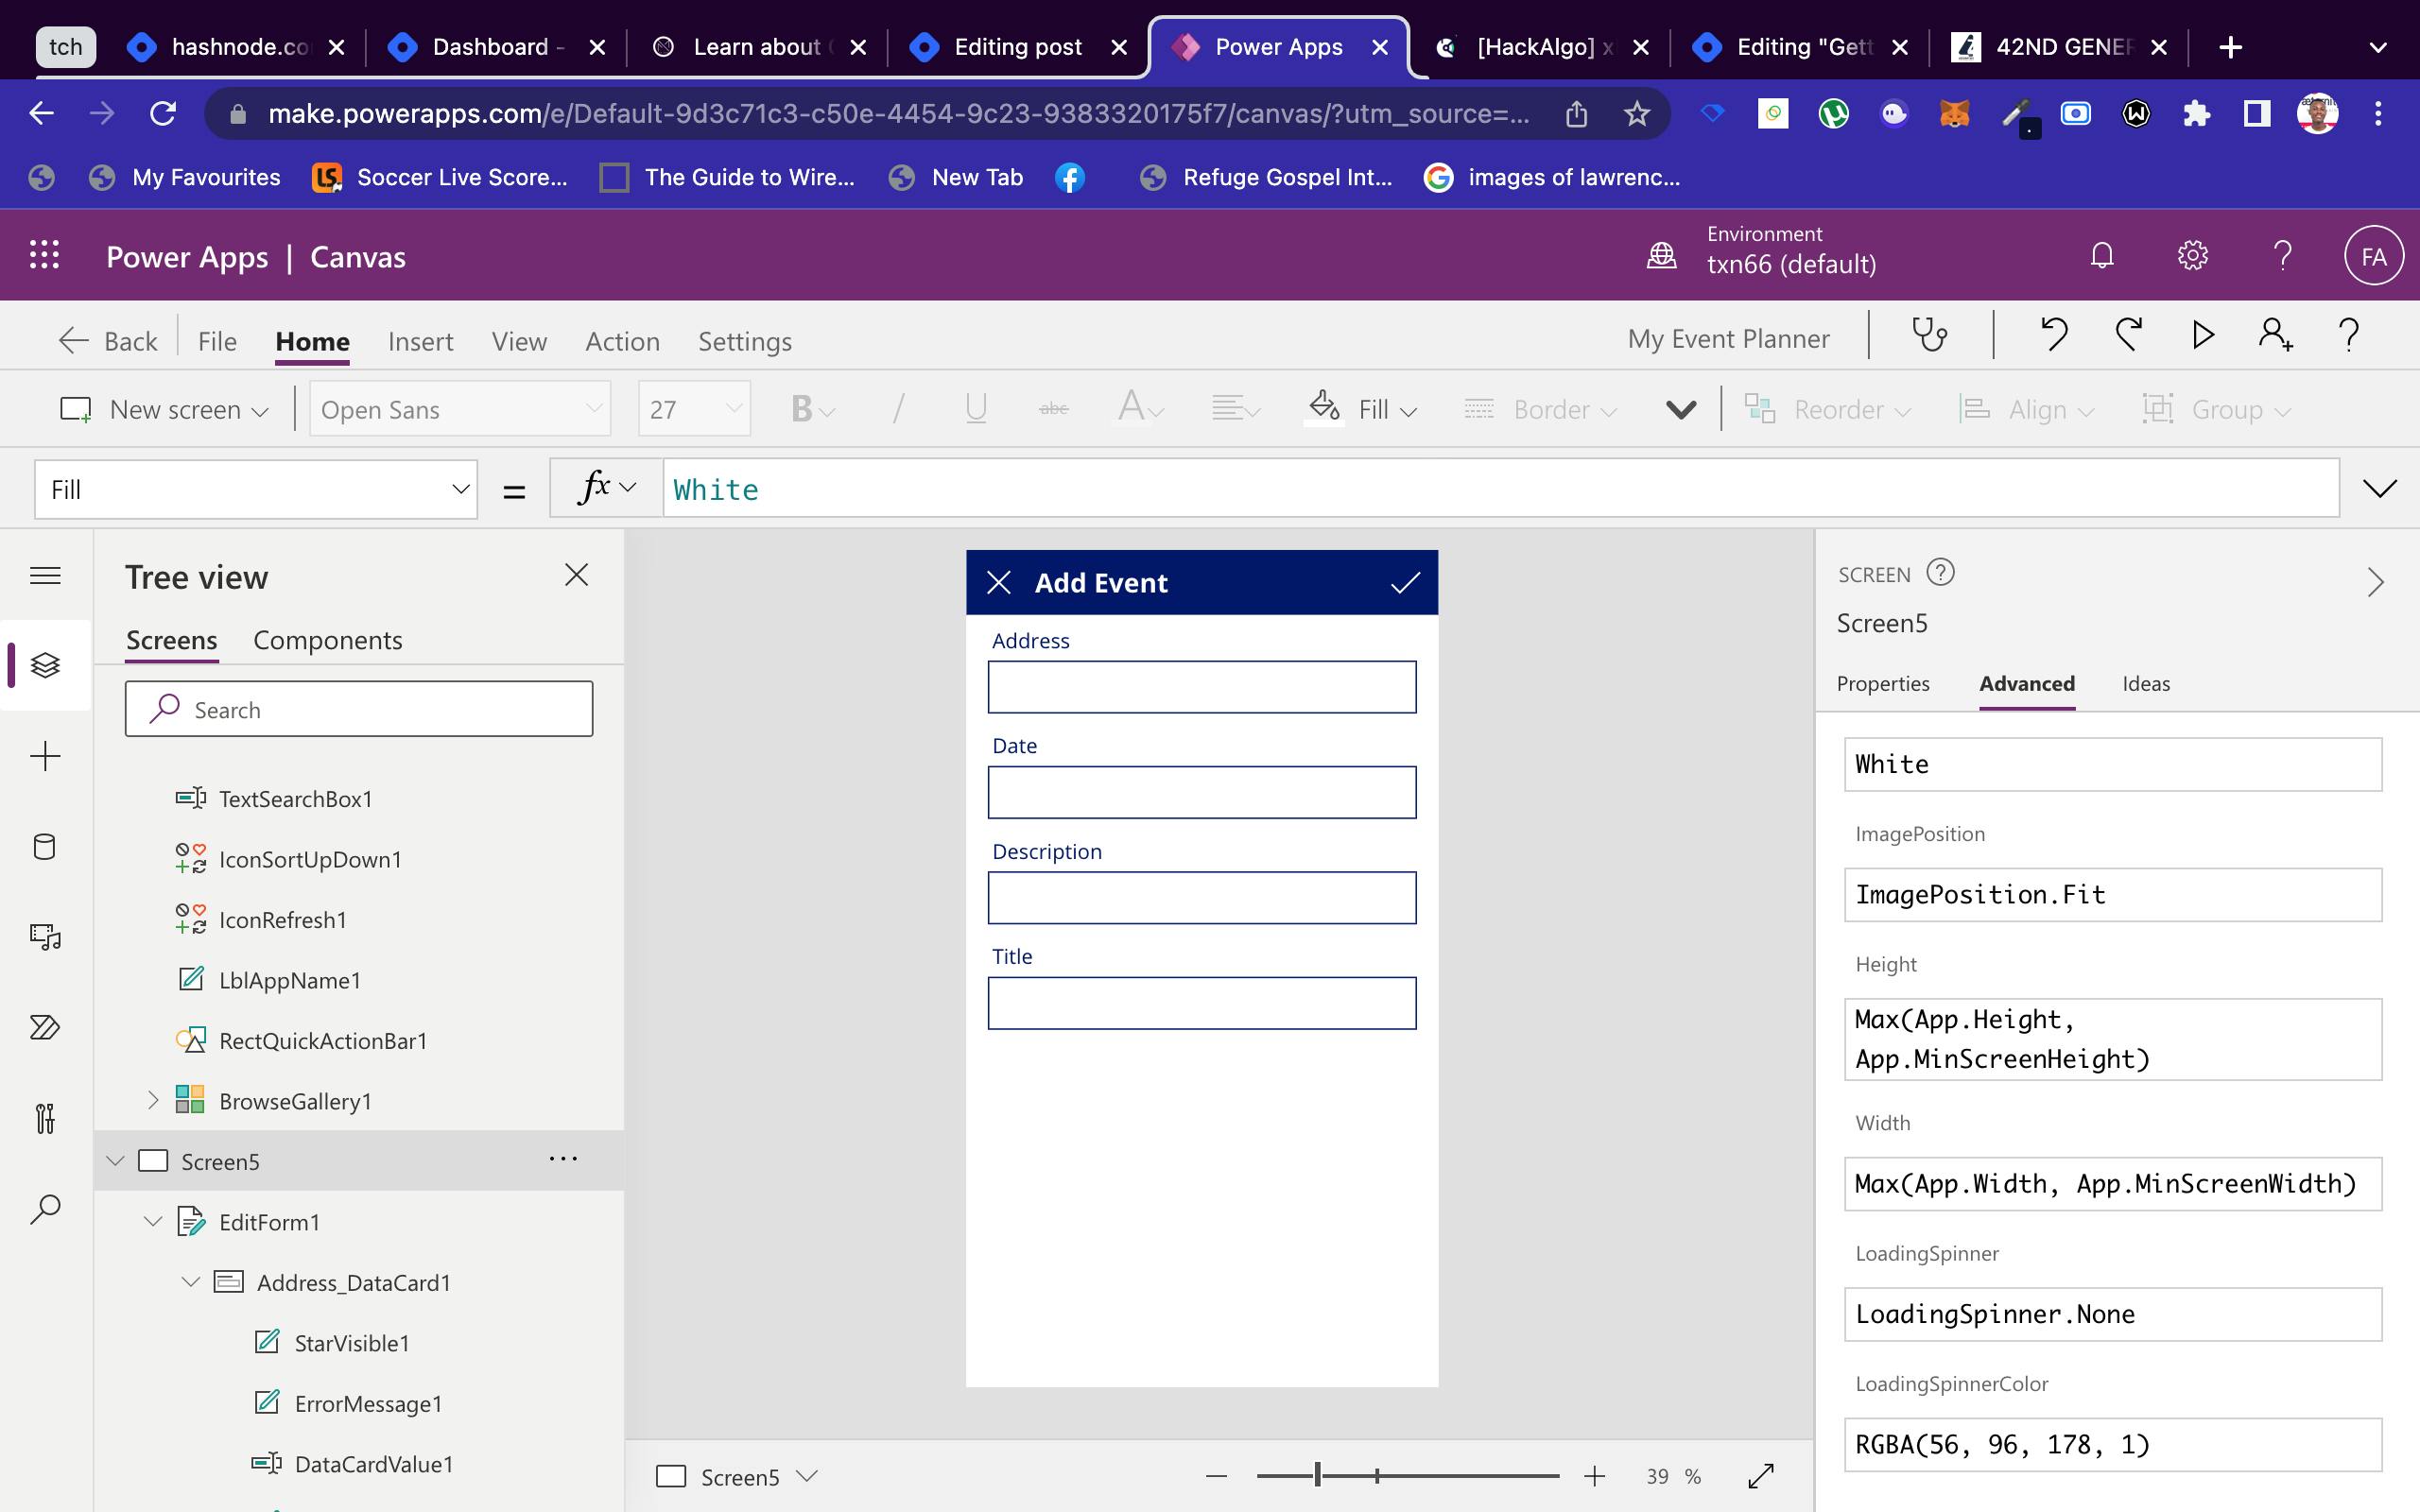
After adding the forms to the field:
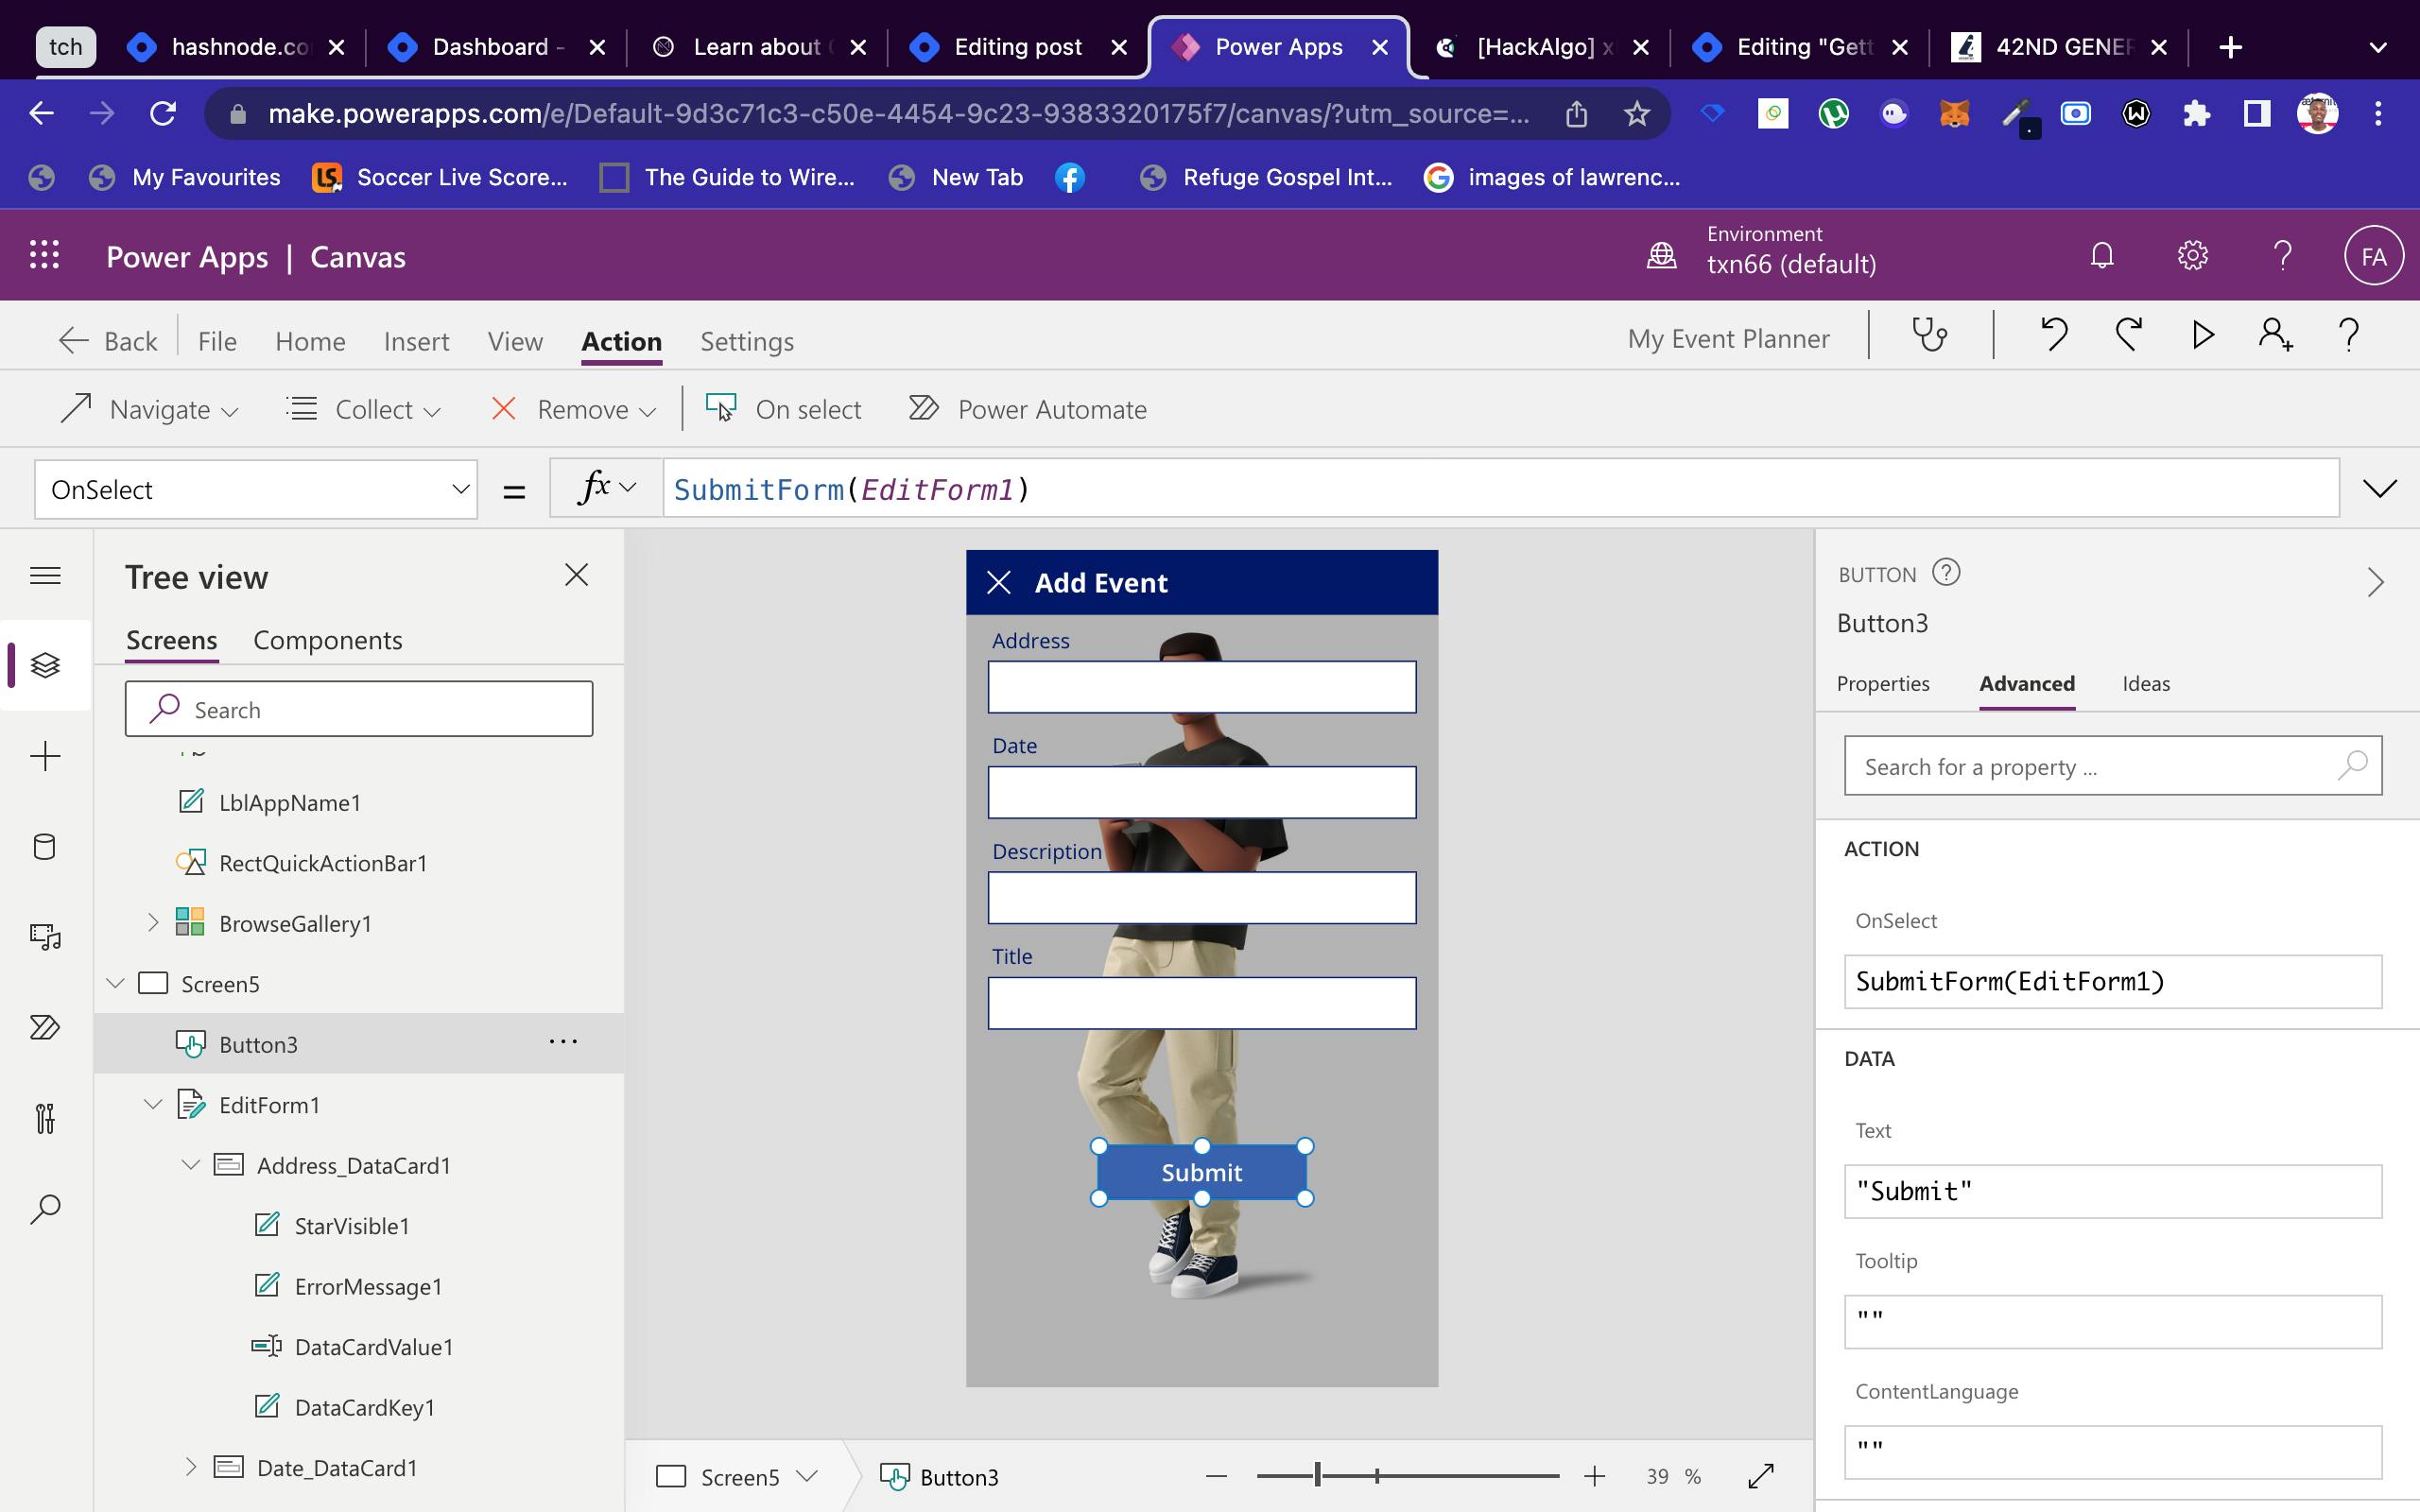
Add a Button and replace the action function, by pasting the code below;
SubmitForm(EditForm1)
We are done with Screen5, moving forward to Screen6. Our last screen for this tutorial app.
Add a new screen, following the previous description. This screen is a Scrollable screen.
To make the screen functional, kindly do the following:
- Add a form that is connected to our Google Sheet Data Form
- Add Custom Cards as done earlier
- Adjust the added Cards with the following advanced options, as seen in the image below:
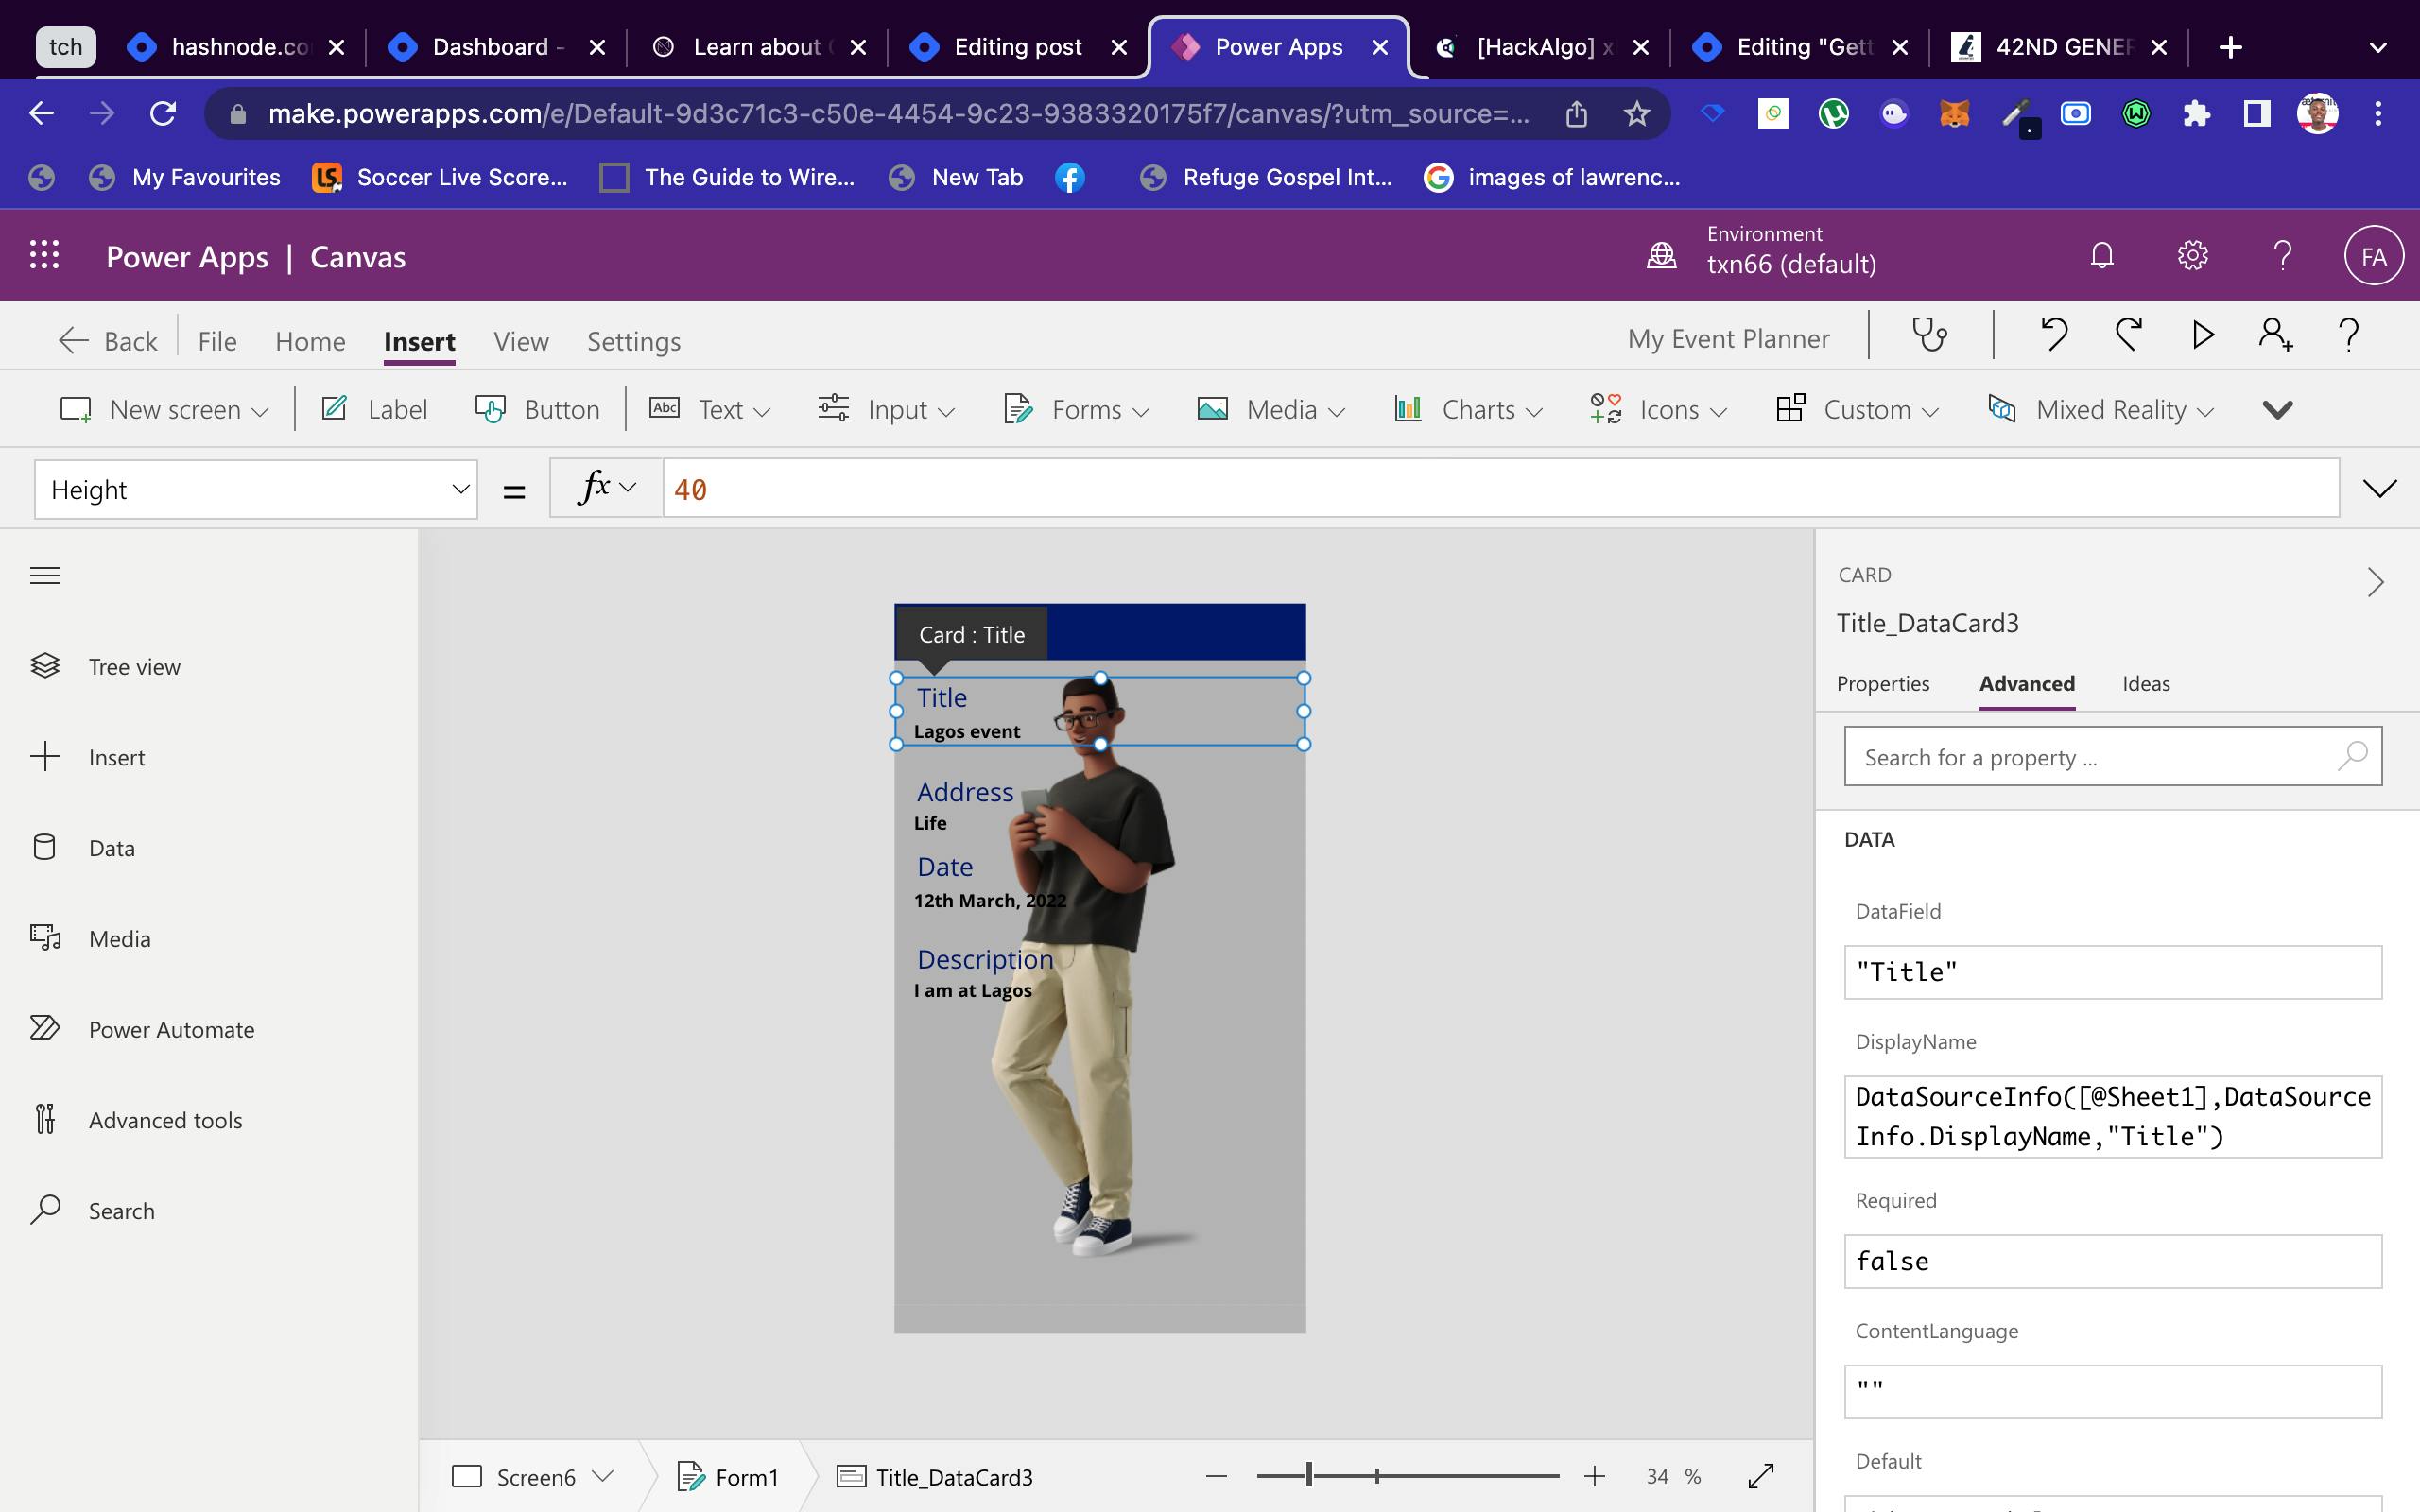
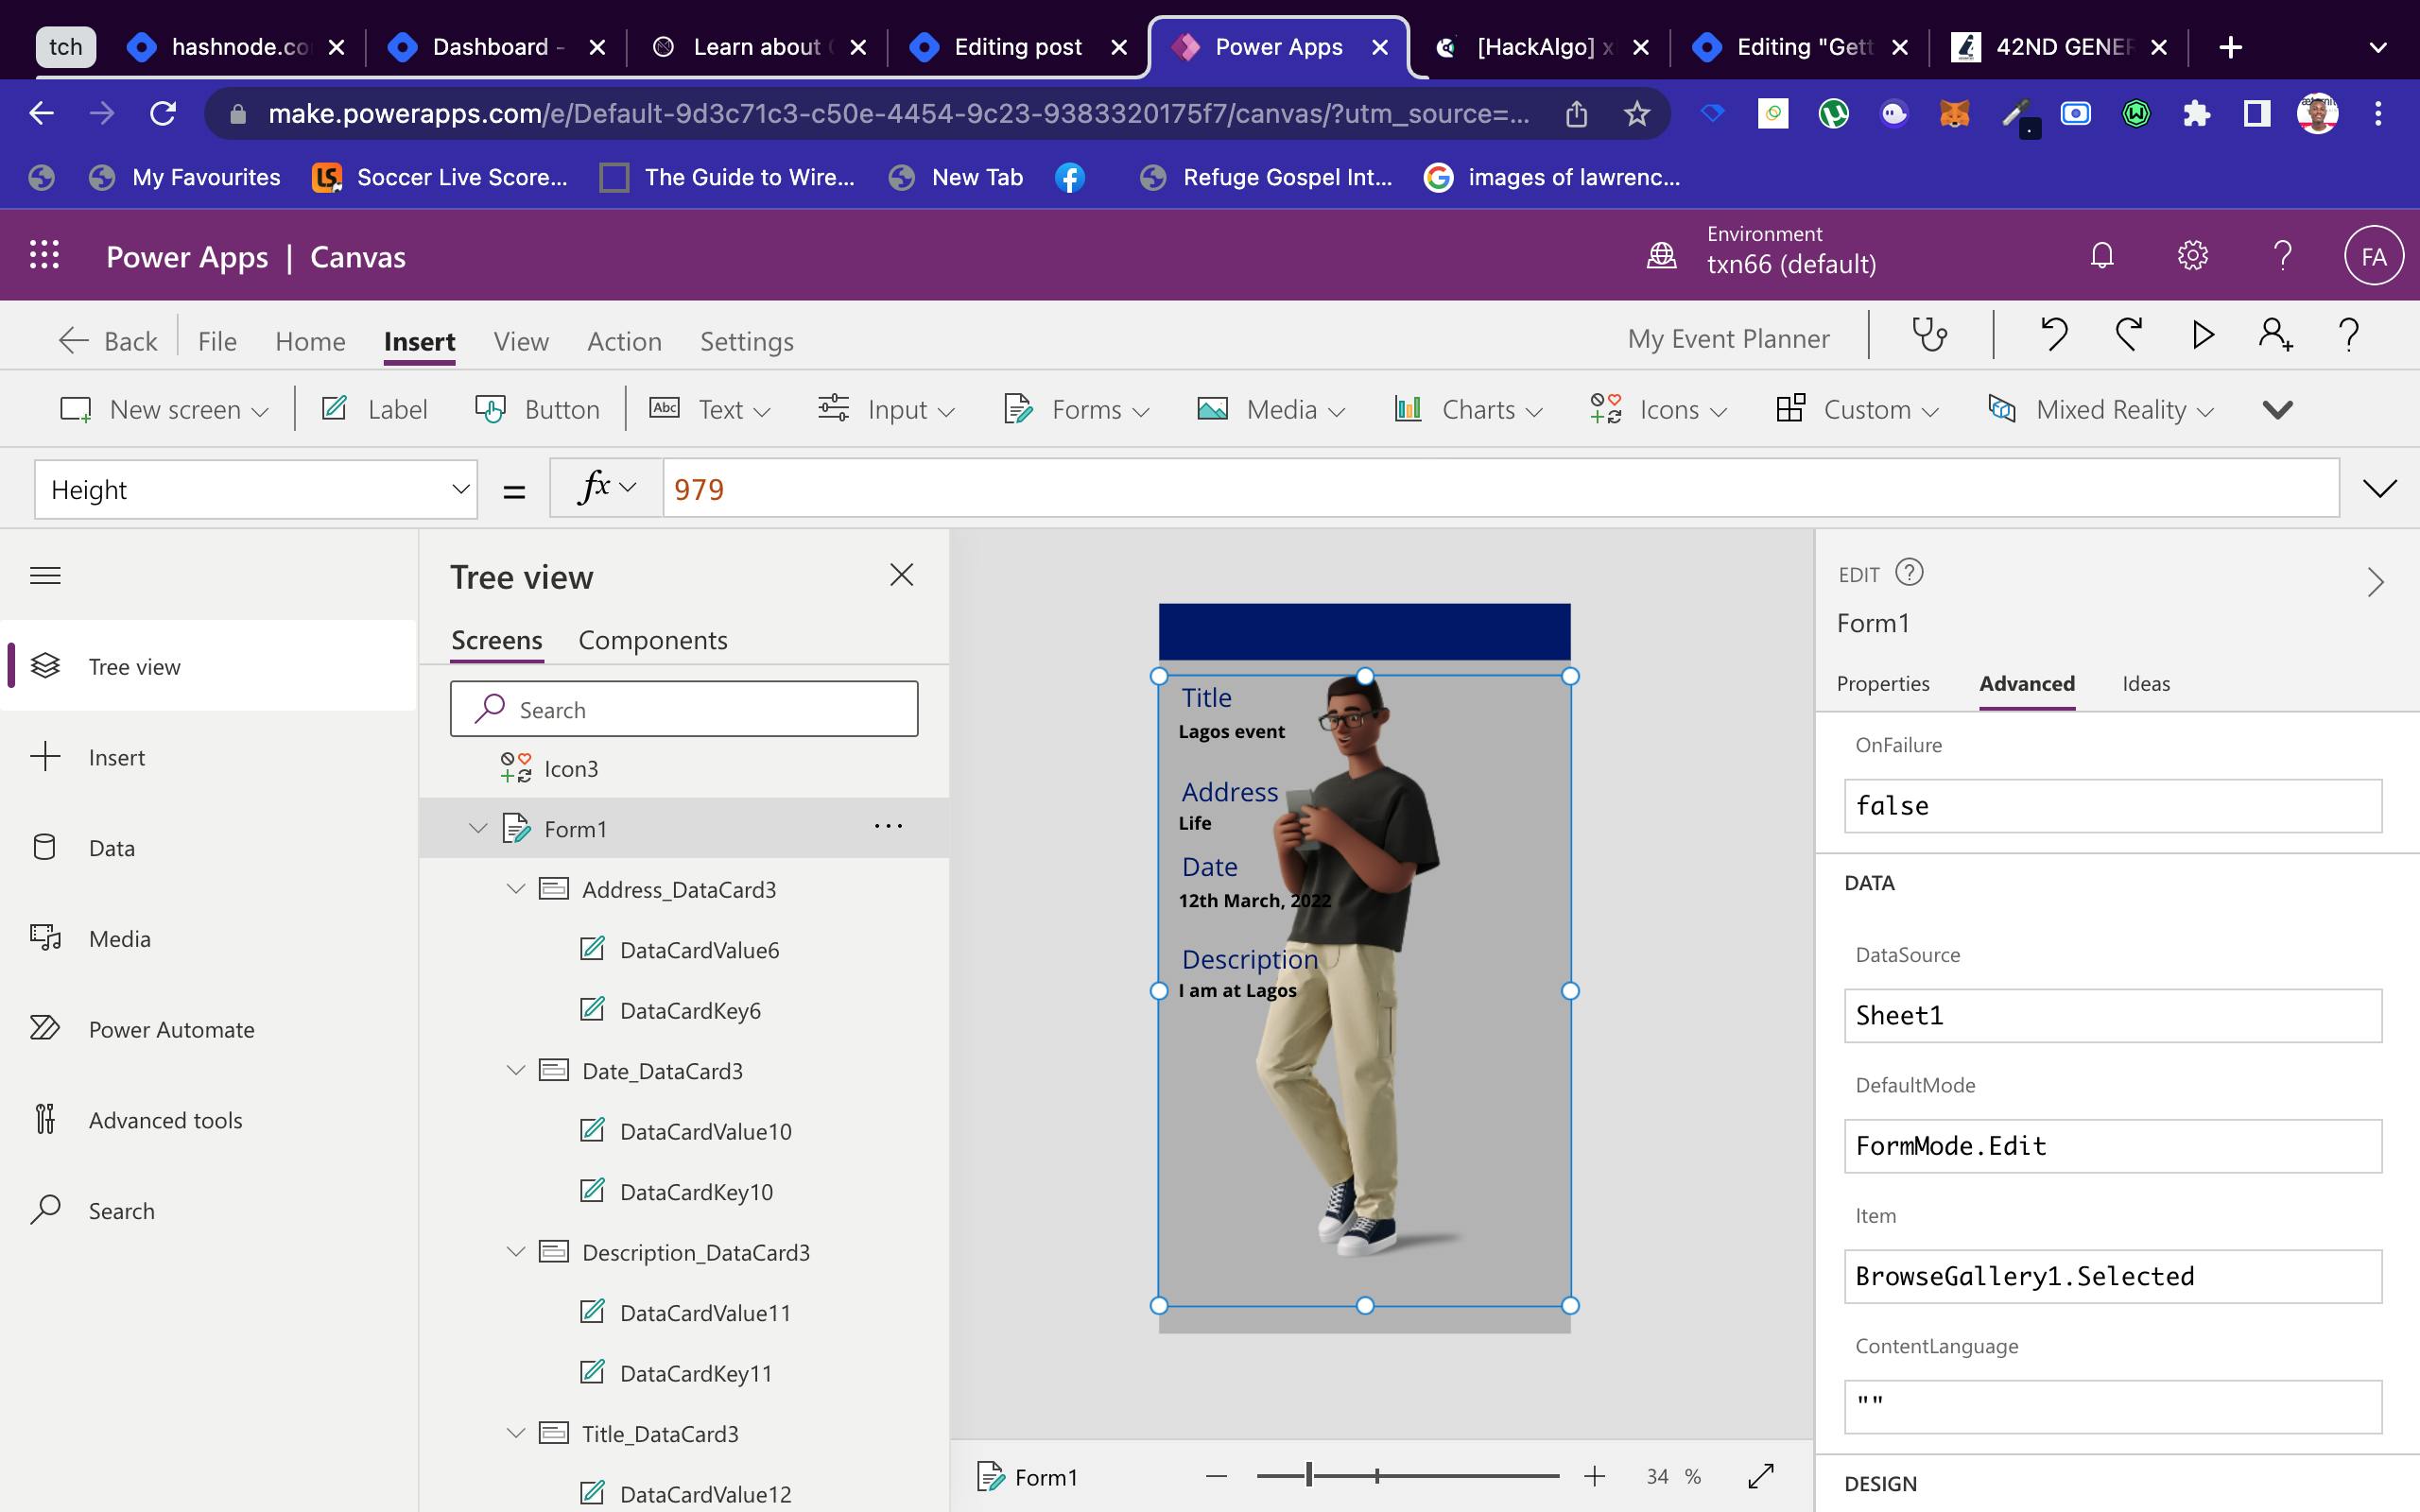
Adjust the form advanced options, as seen in the image above
- Add the icons seen below along with the title and the button
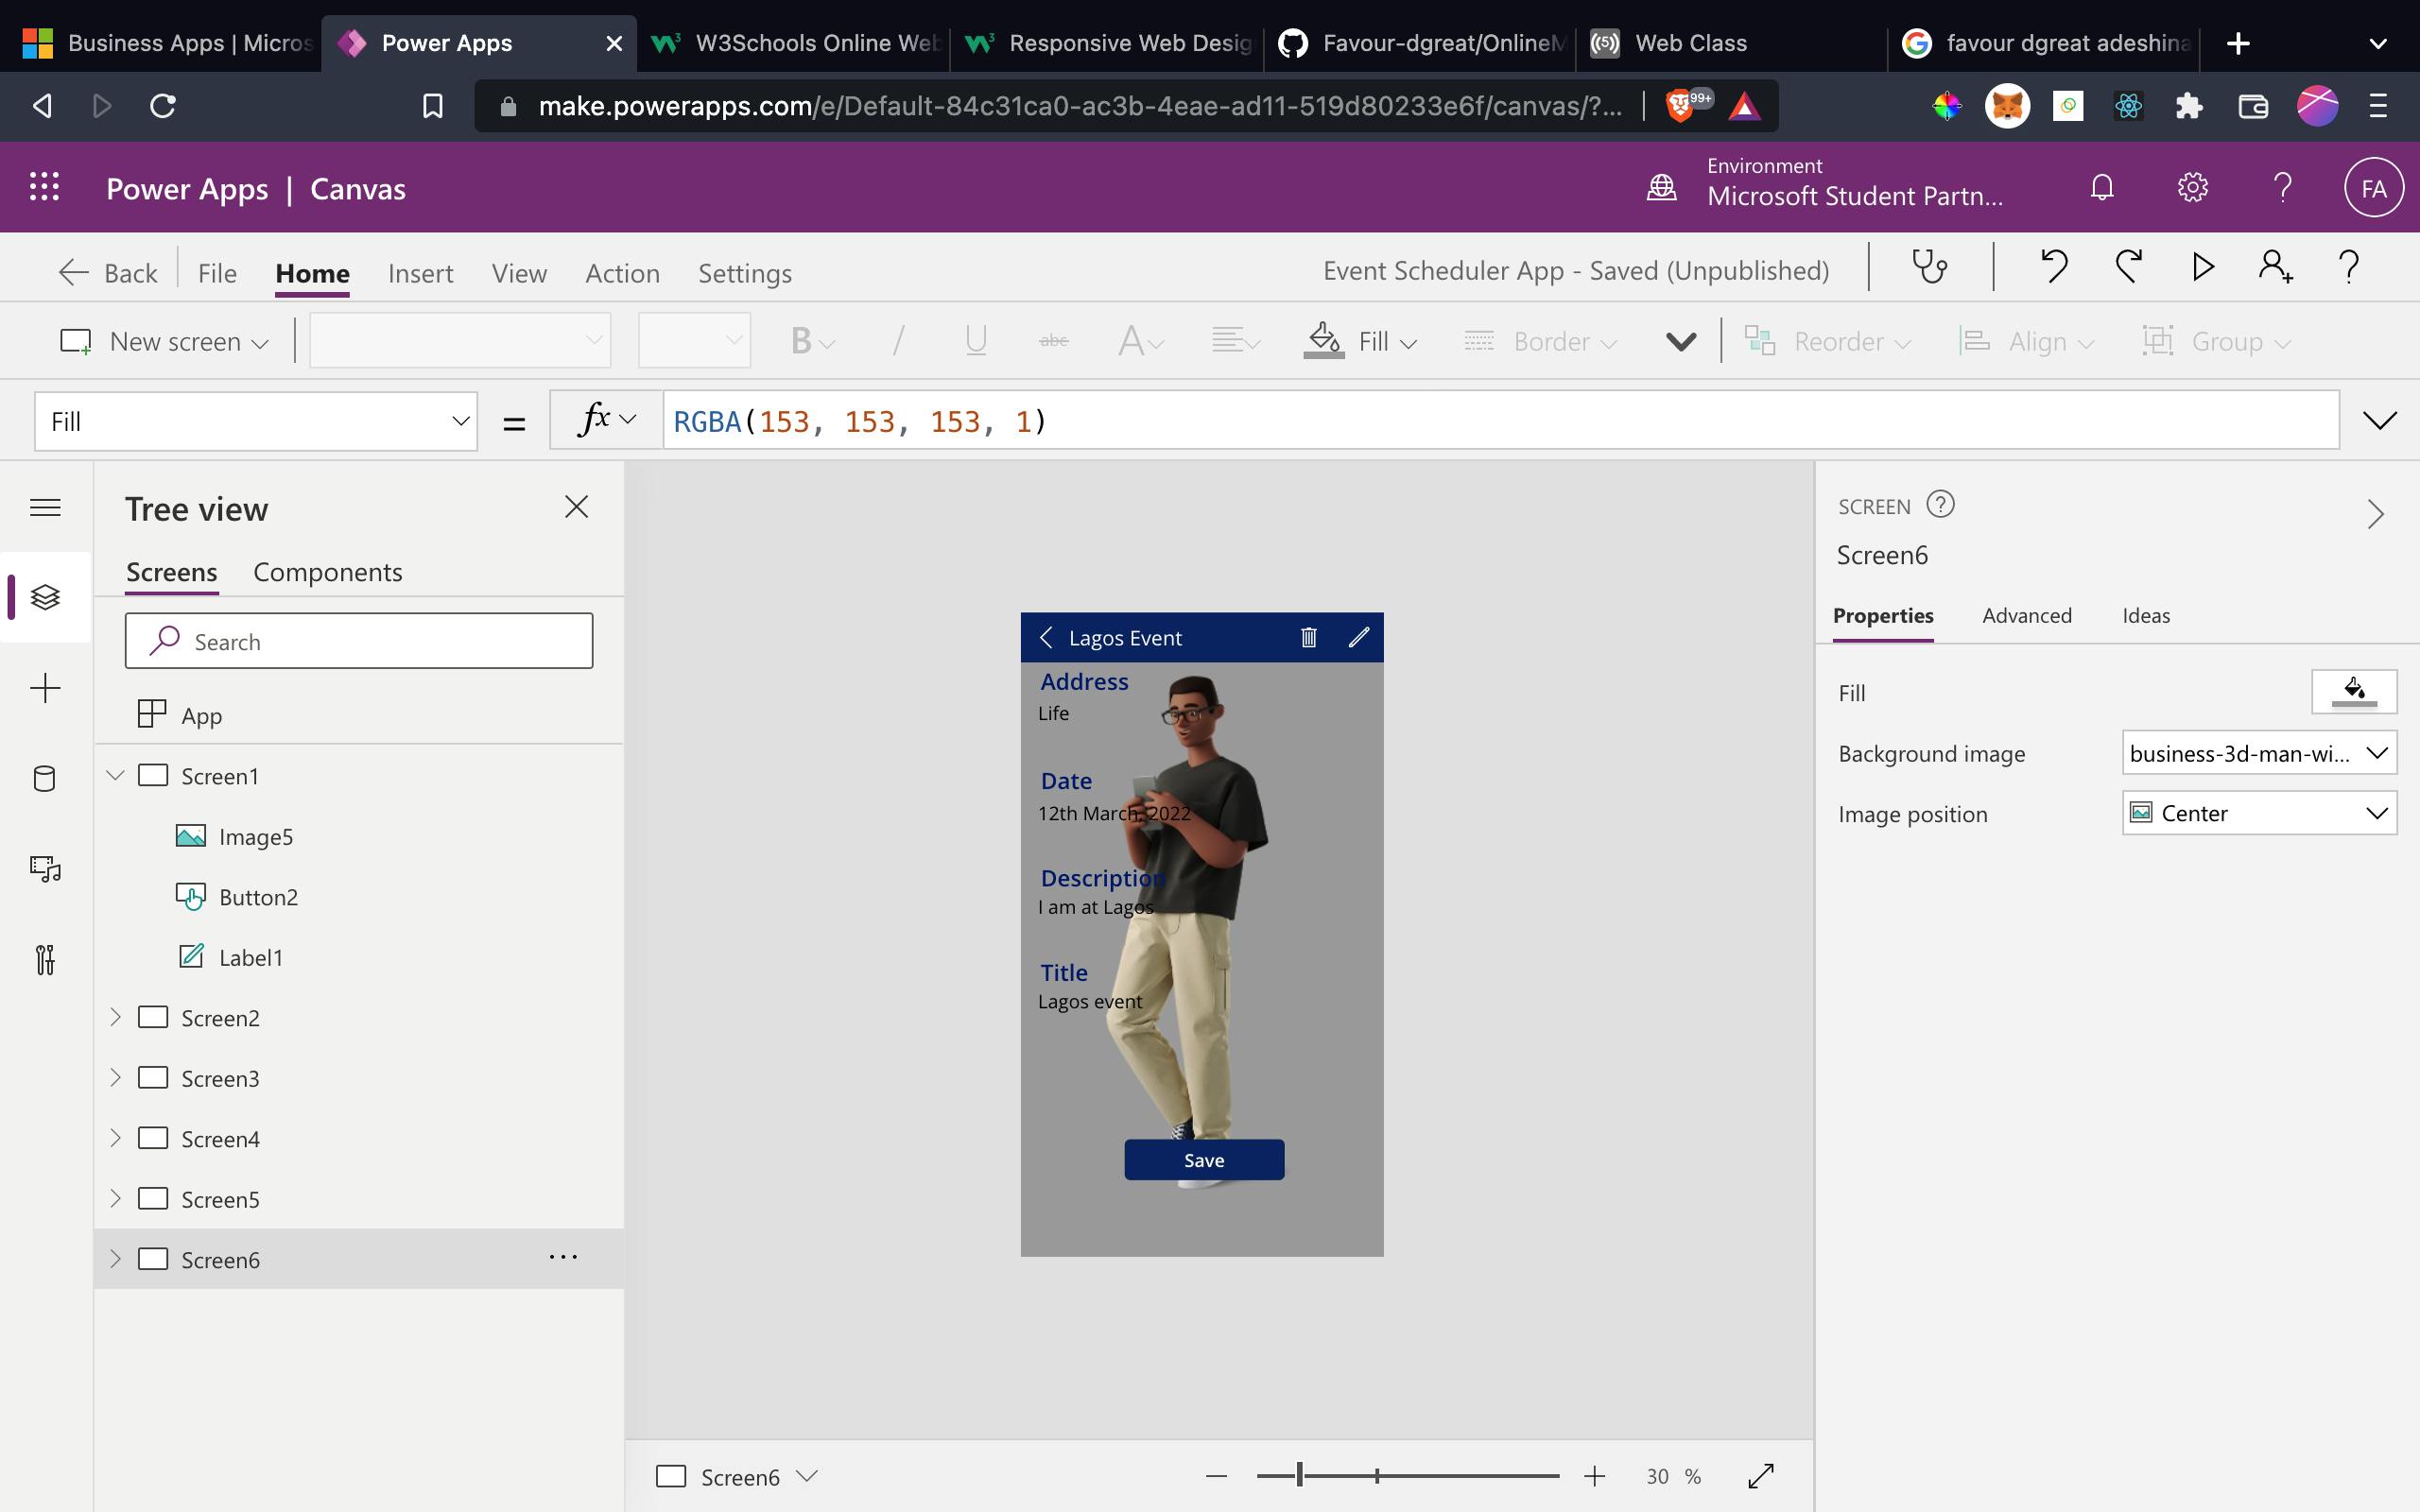
Adjust the properties, for the icons and the button, following these images:
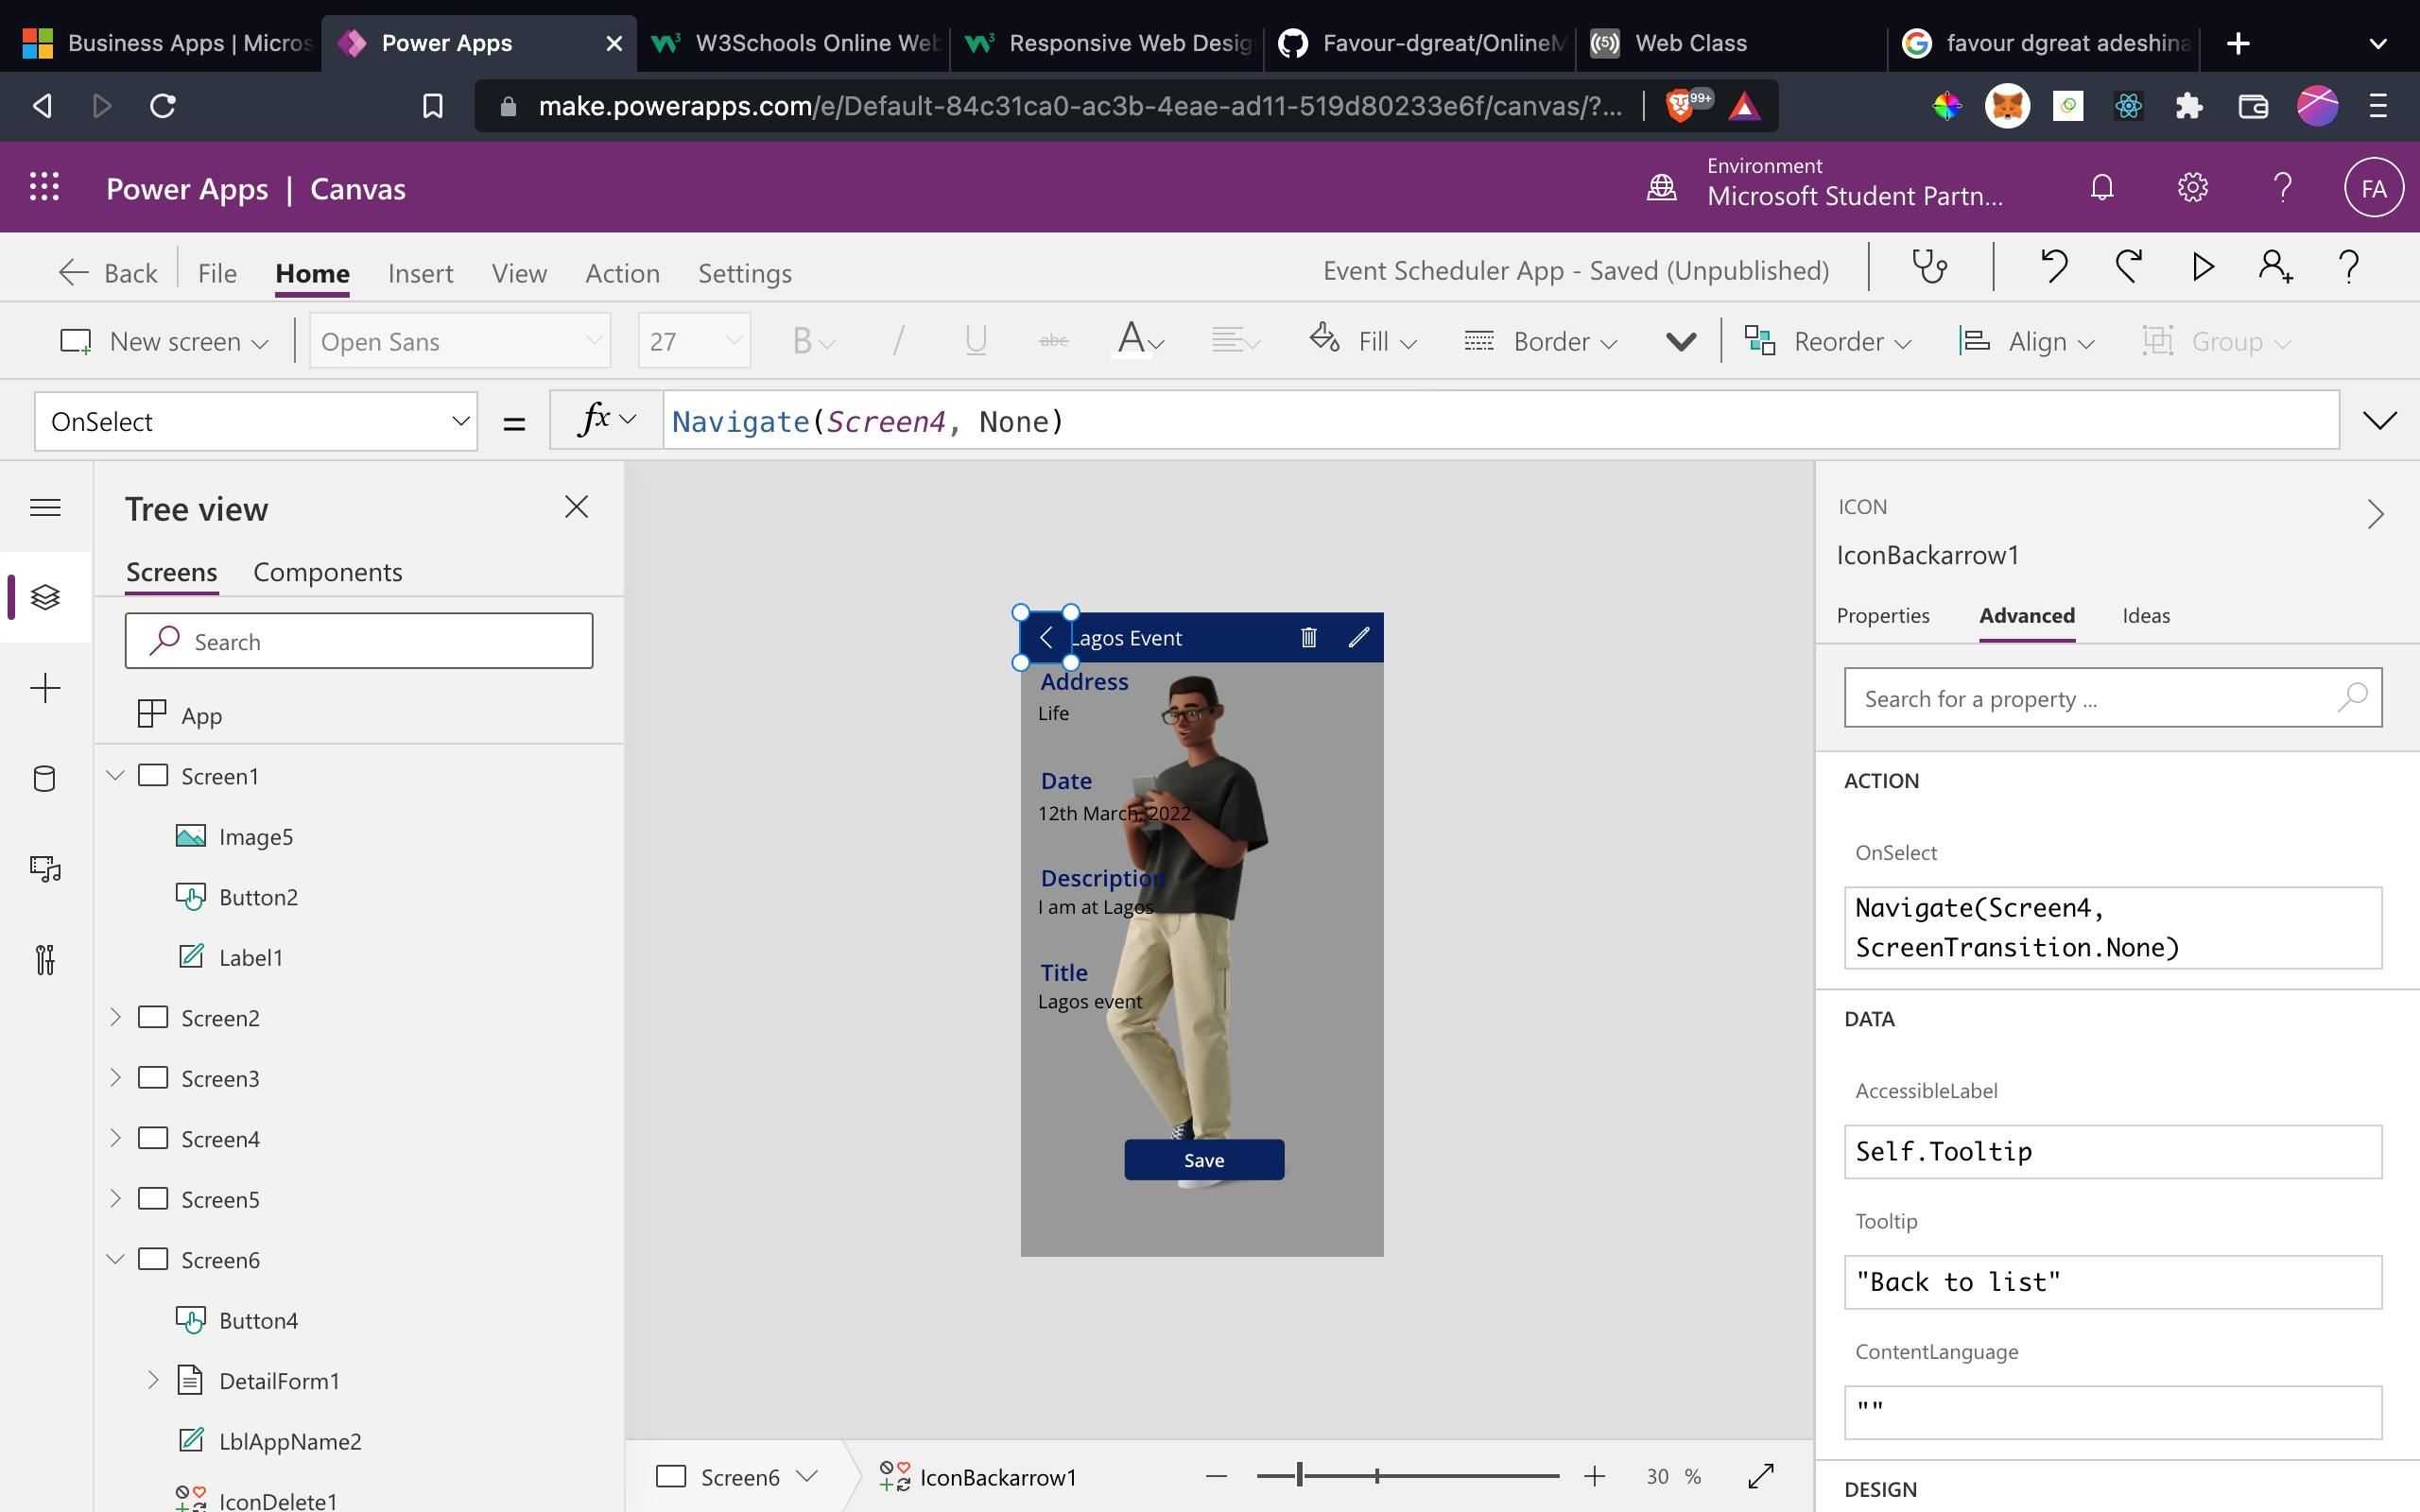
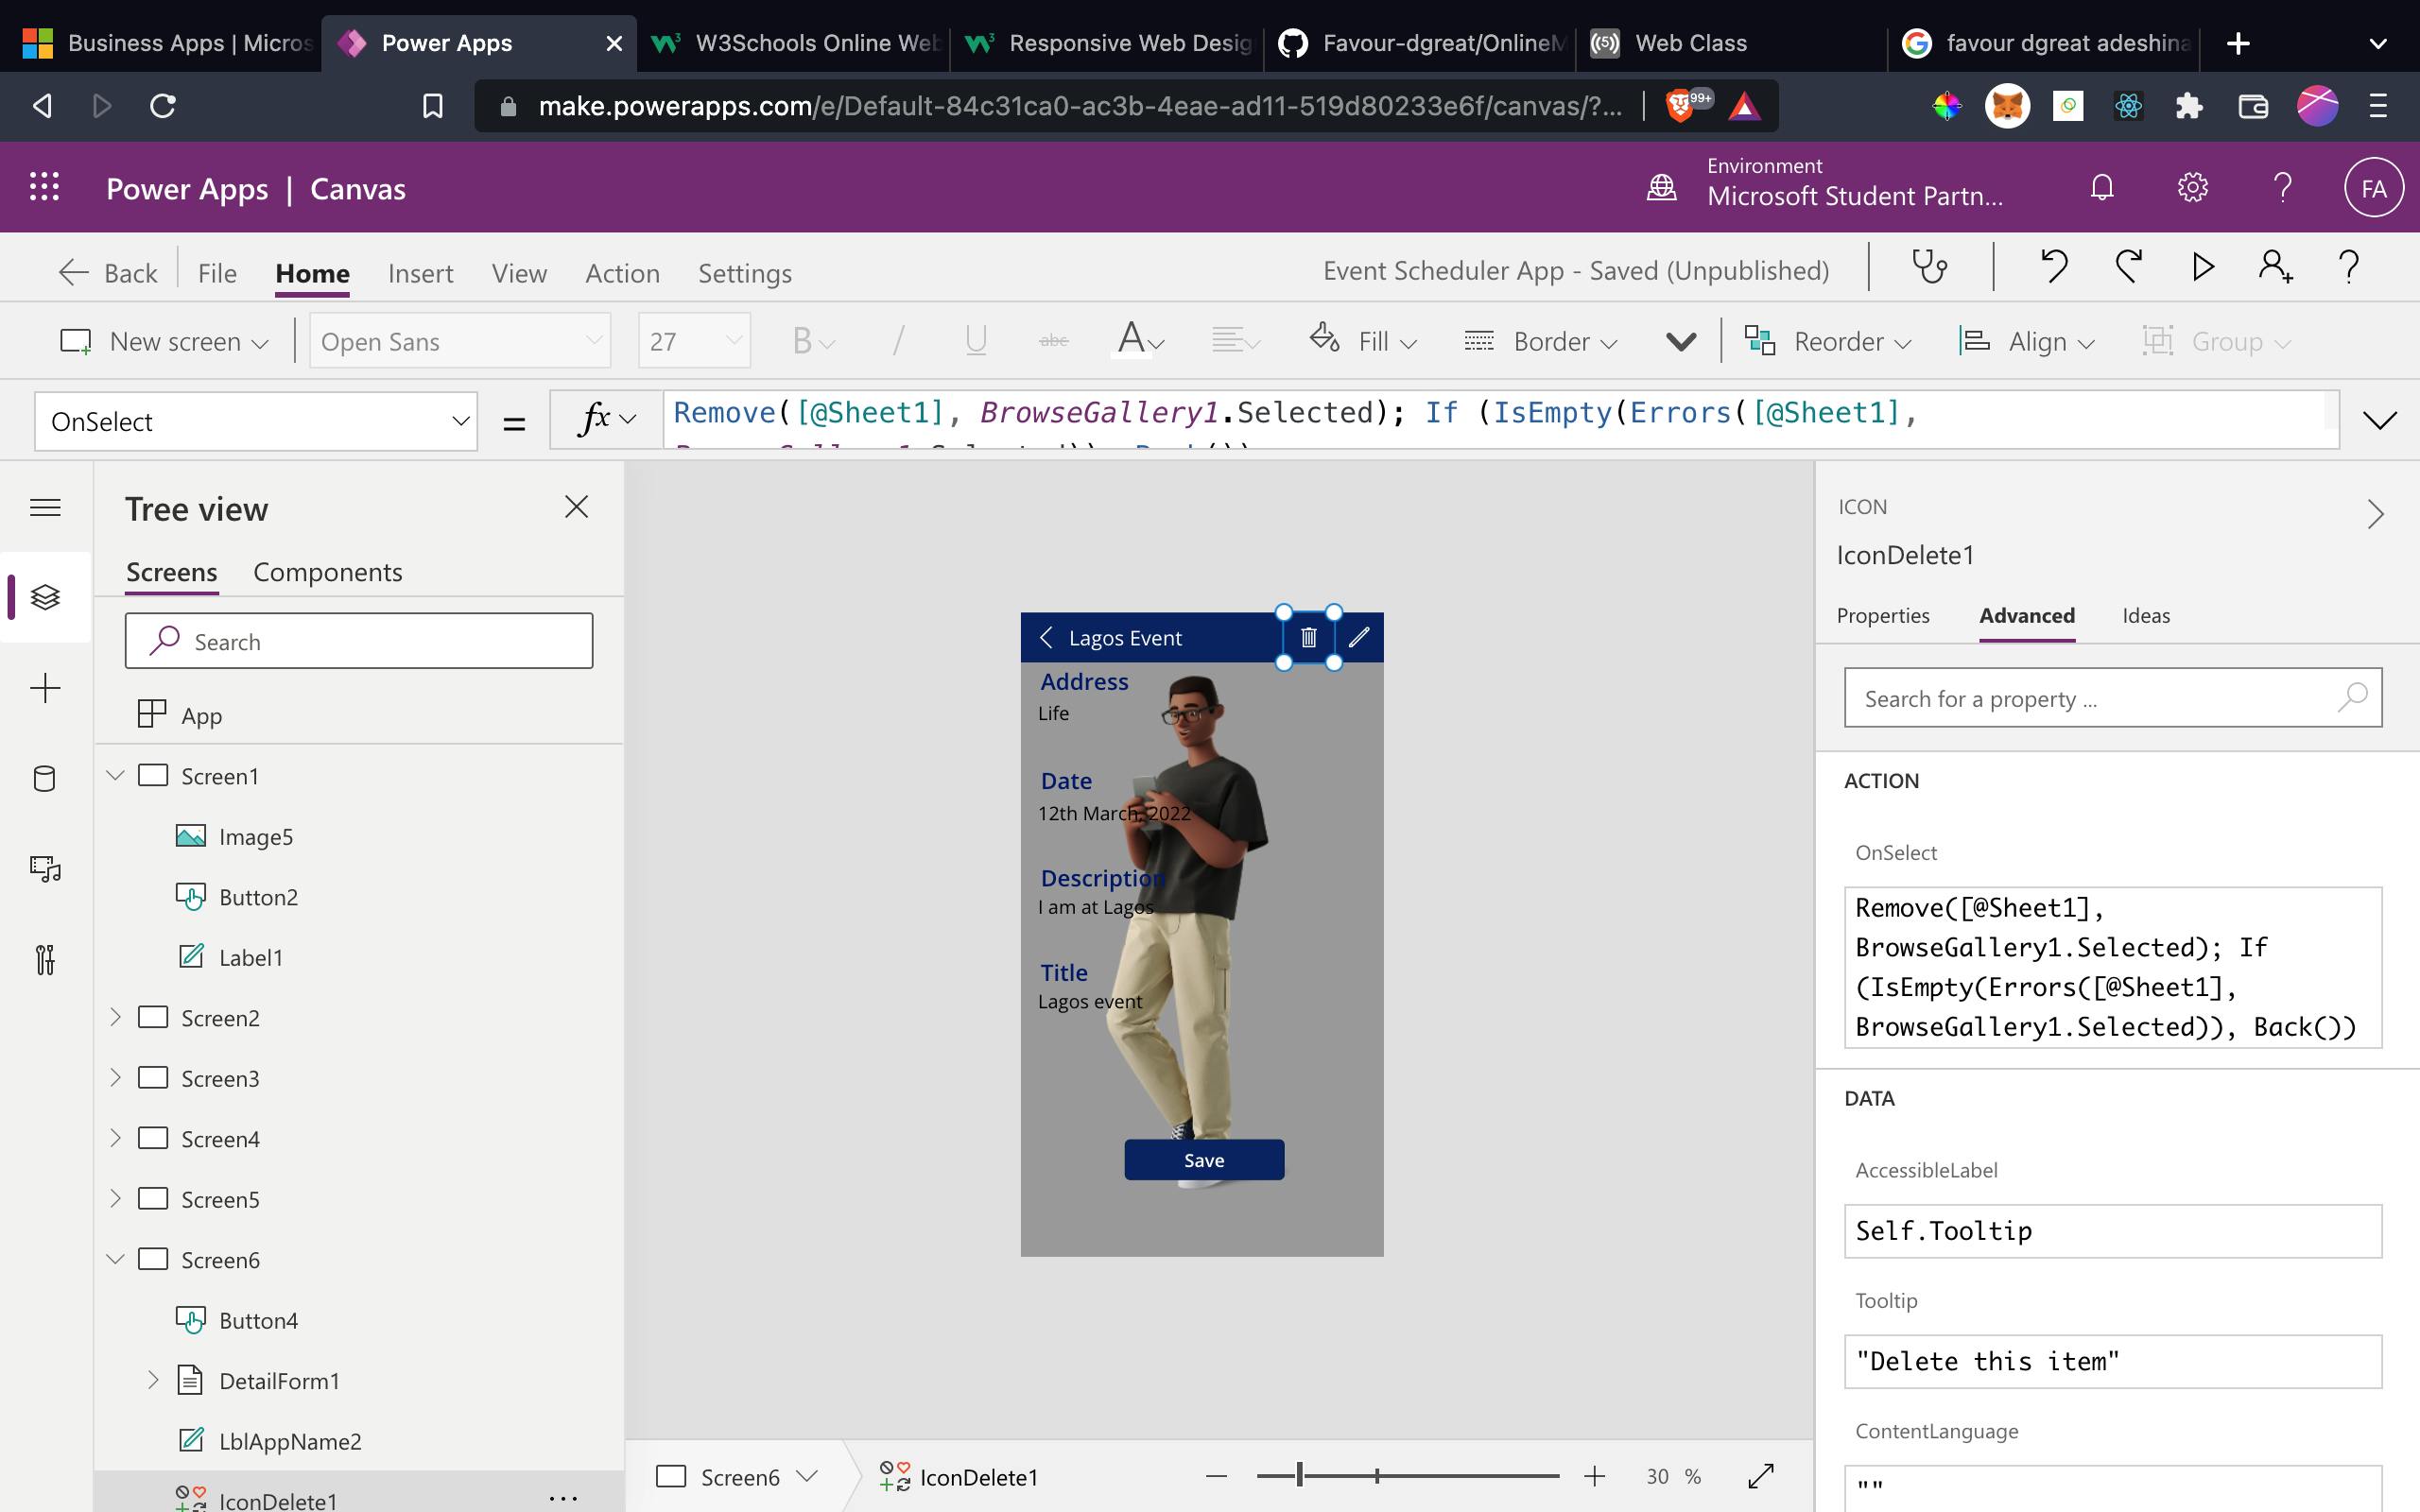
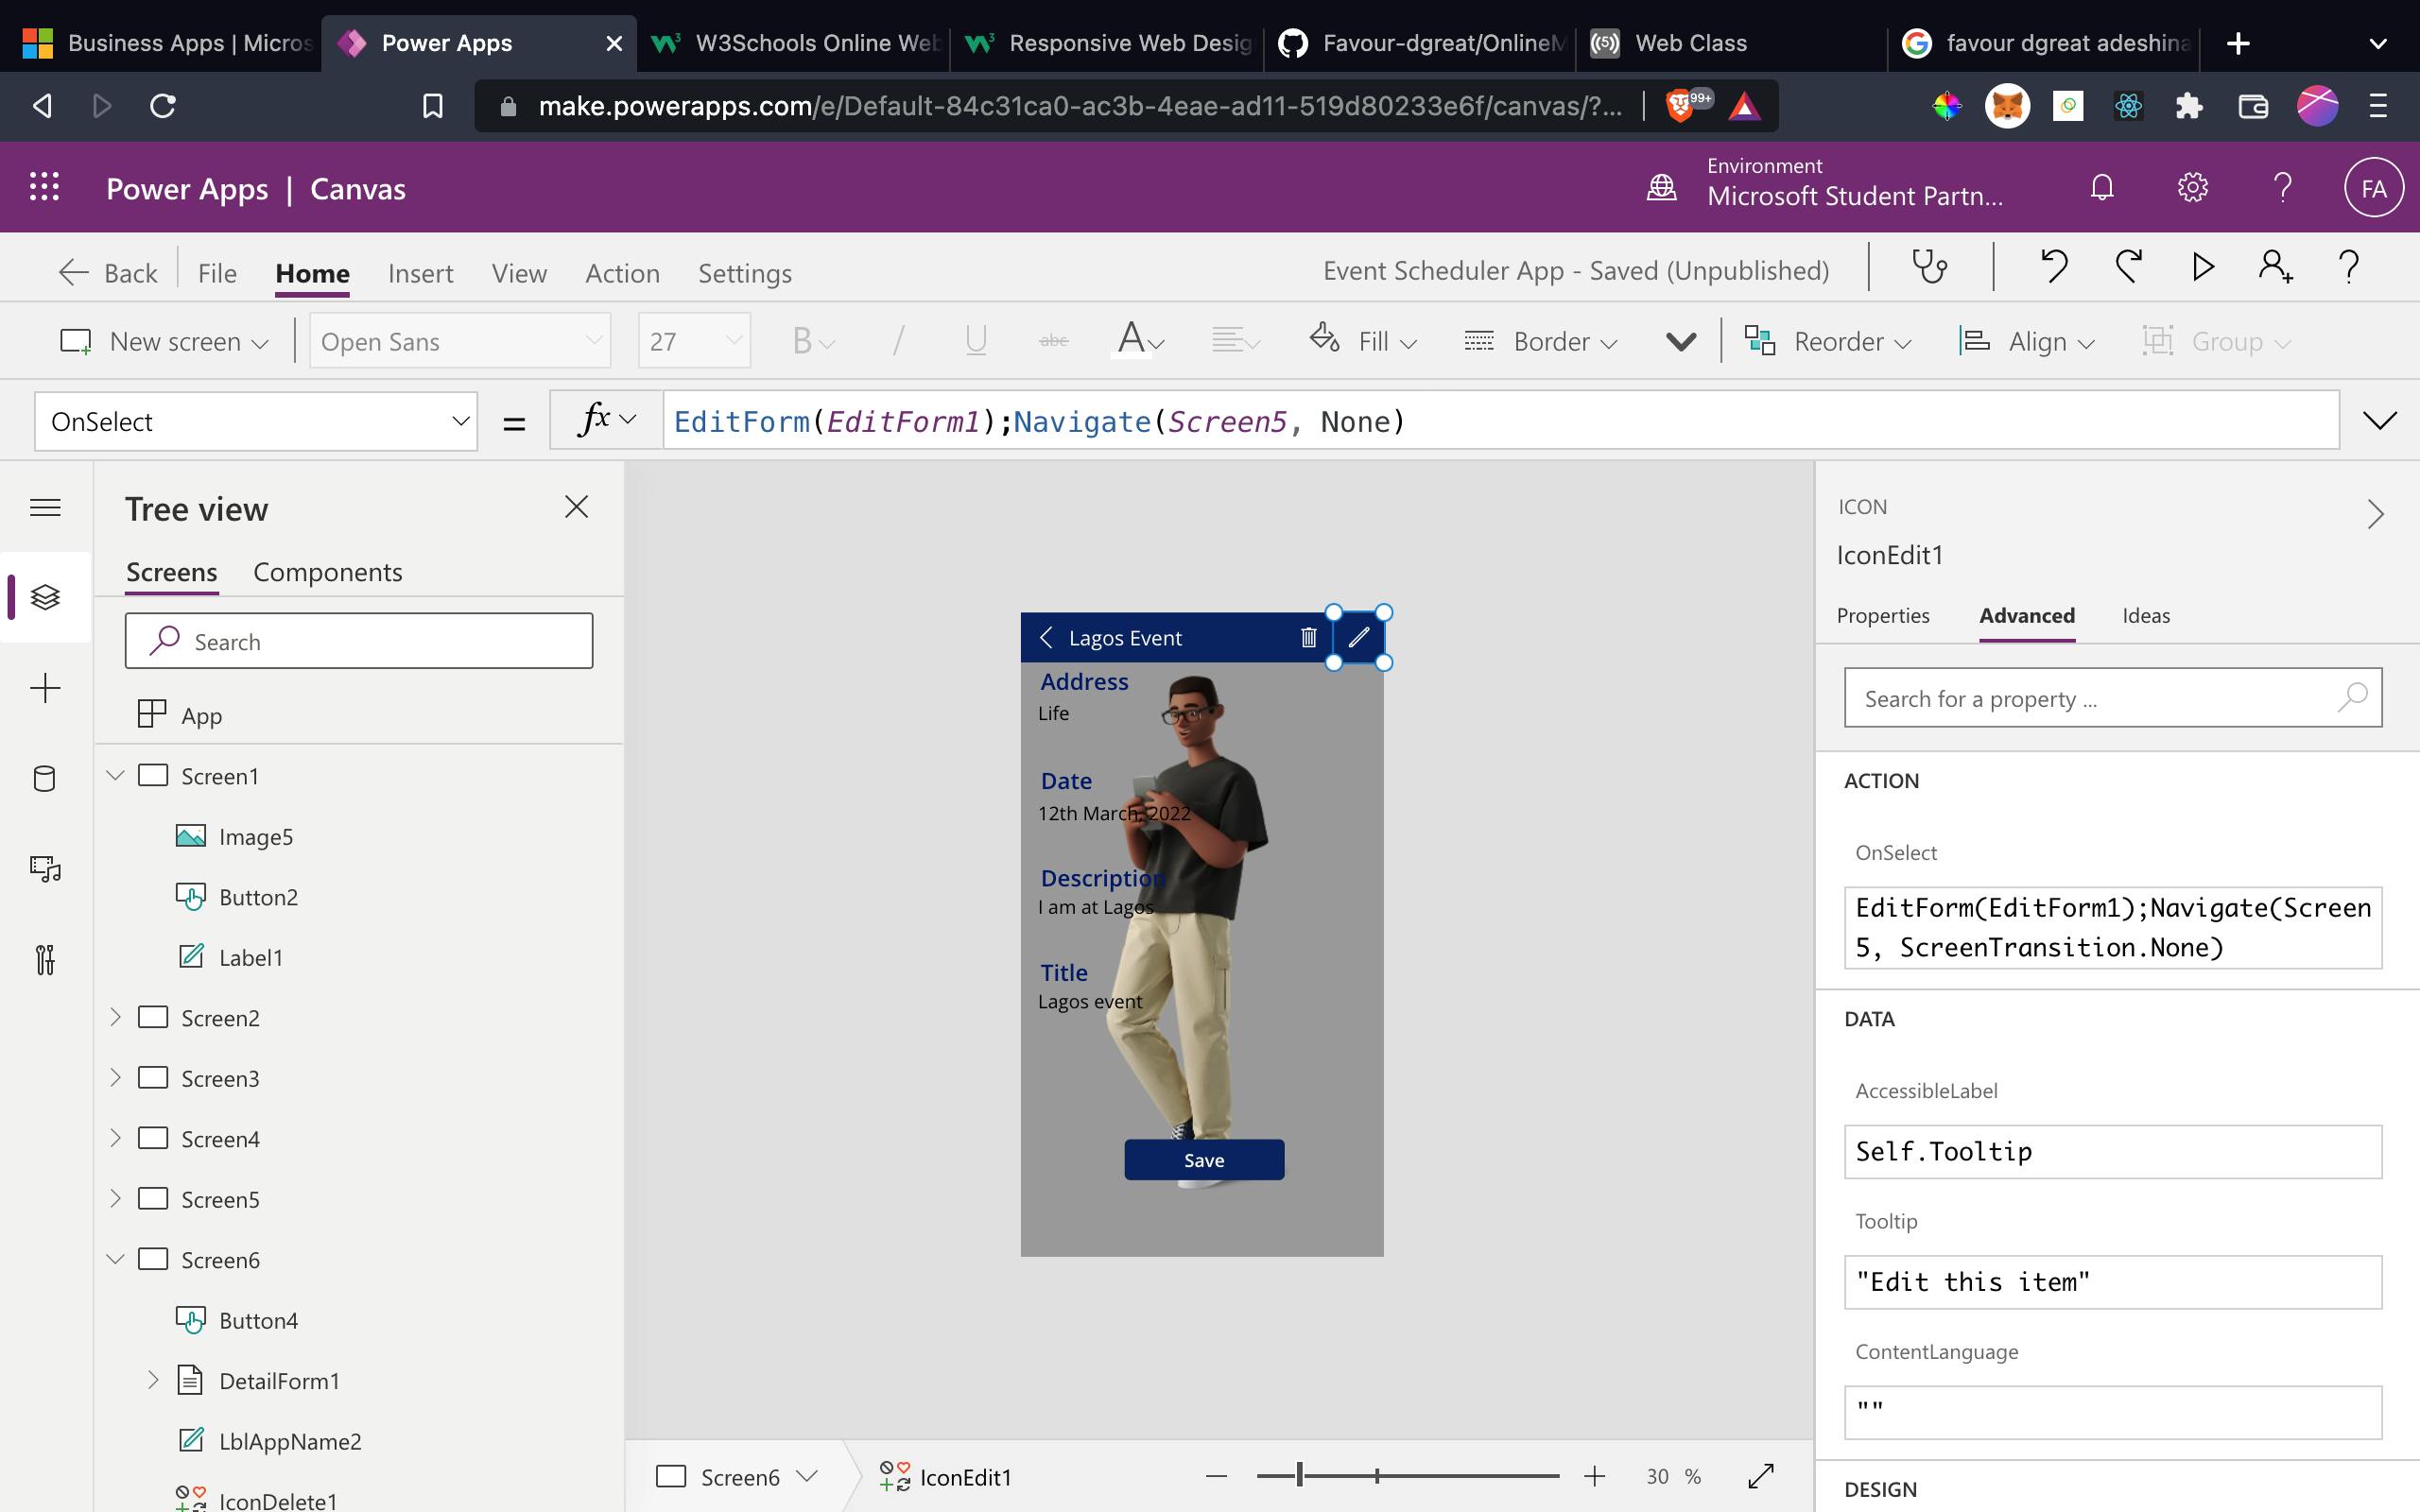
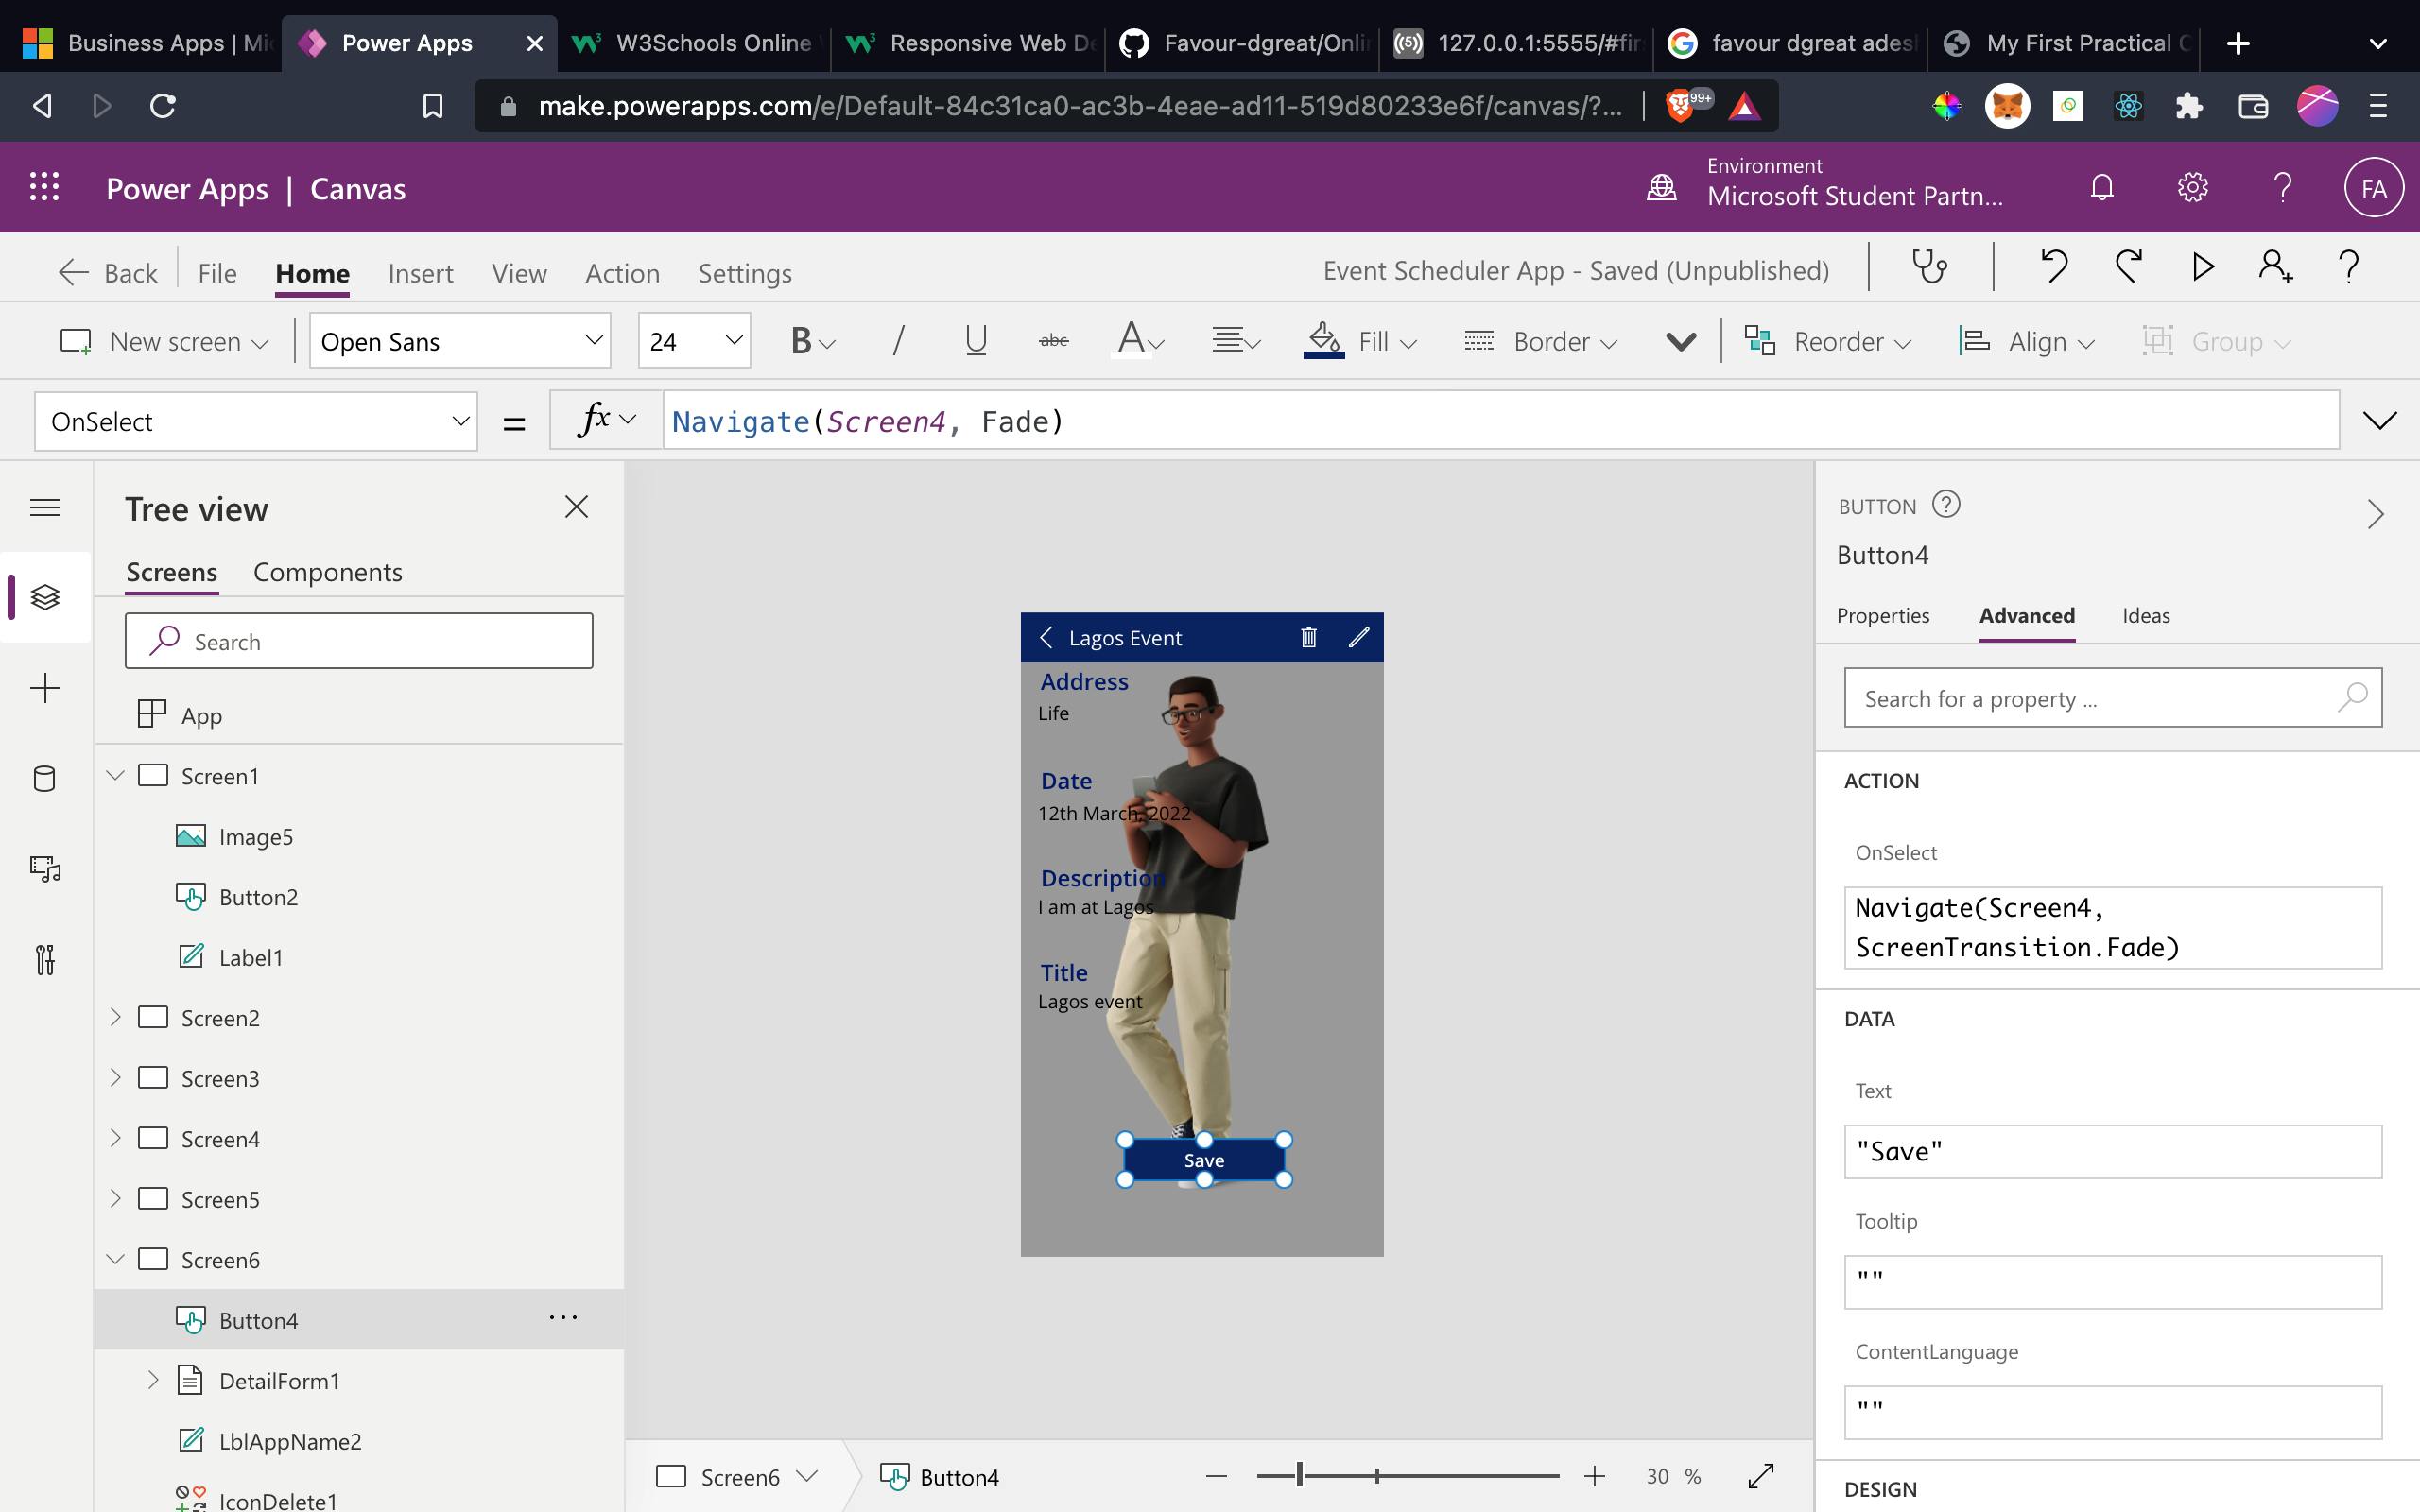
If you followed duly you should have a functioning event recording app.
Resources
- Overview of connectors for Canvas Apps
- Use of custom connectors in a Power Apps Canvas Apps
- Use Custom connectors with the timeline control
- Create a canvas app from a template
- Create a canvas app with data from an Excel file
So concluding now, a Youtube video will be released, still on this article, to better explain everything here. So, subscribe to our Youtube Channel The Complete Hub
Also, remember to Subscribe to our newsletter, like and comment on this article, and finally please share.
Thank You.
